
Booking management
Bookings are the core of Floatist. Each booking represents a single charter and tracks the entire lifecycle from creation through check-out and deposit release.
Creating a booking
Section titled “Creating a booking”To create a booking, navigate to Bookings > List and click Create booking. The following information is used when creating a booking:
- Boat — the yacht being chartered
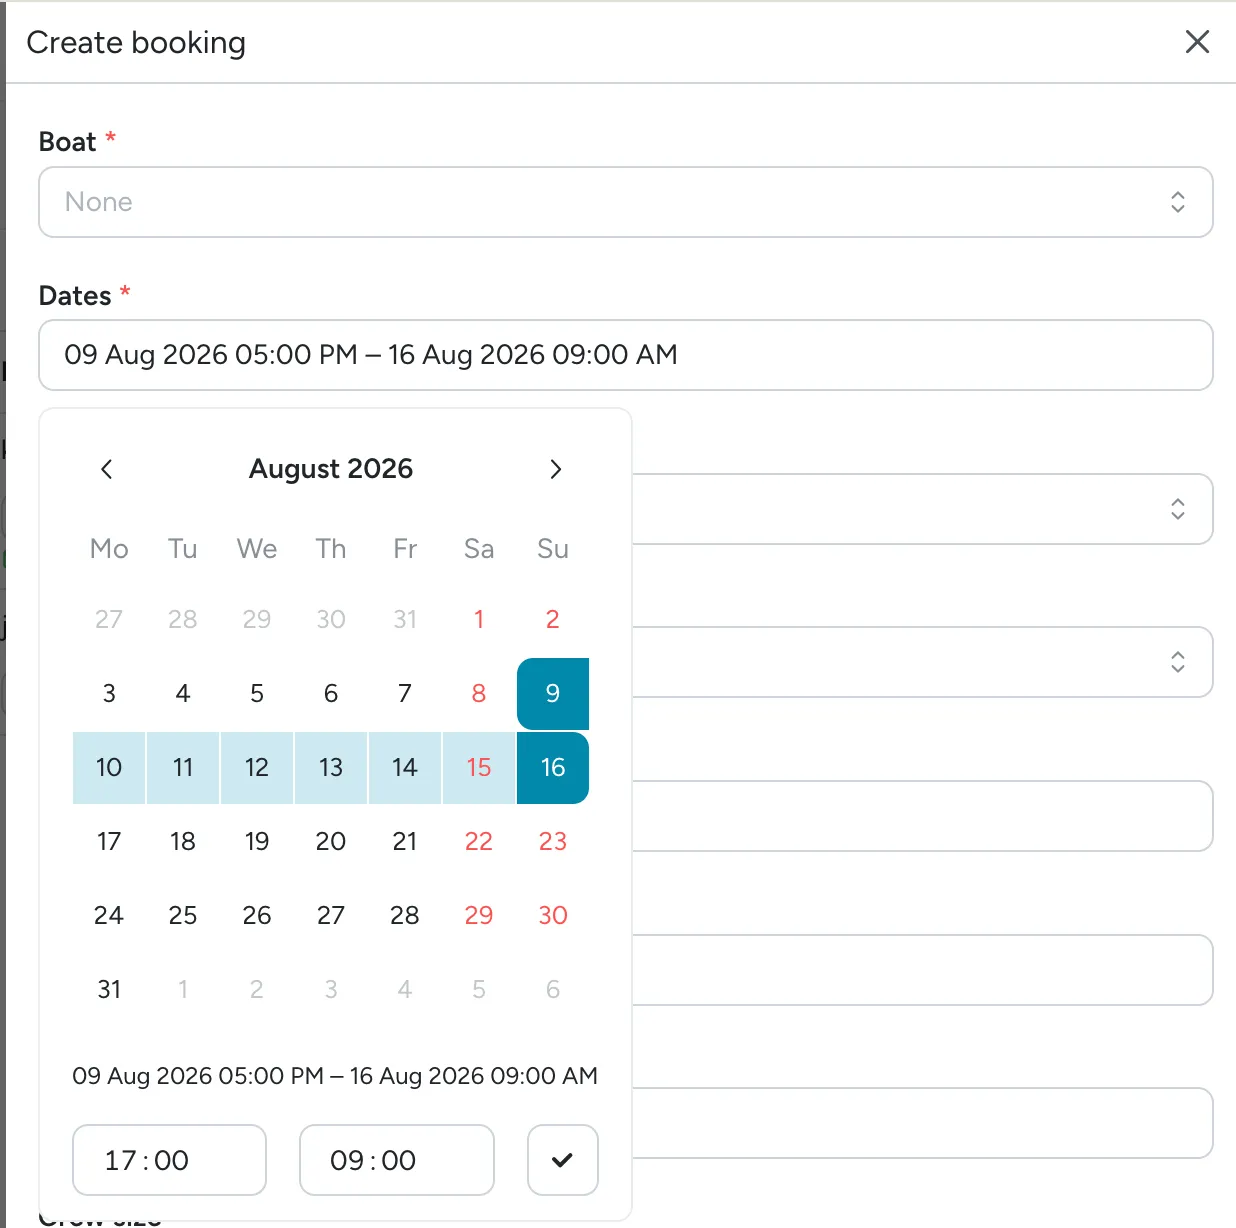
- Dates — a single date-range picker: pick the check-in date, then the check-out date, in one calendar. Same-day charters are supported — pick the same date for both ends and set different times.
- Start base / End base — the marina where the charter begins and ends
- Client name — the guest’s full name
- Email address — used to send the boarding pass and guest app access
- Contact number — phone number for the guest
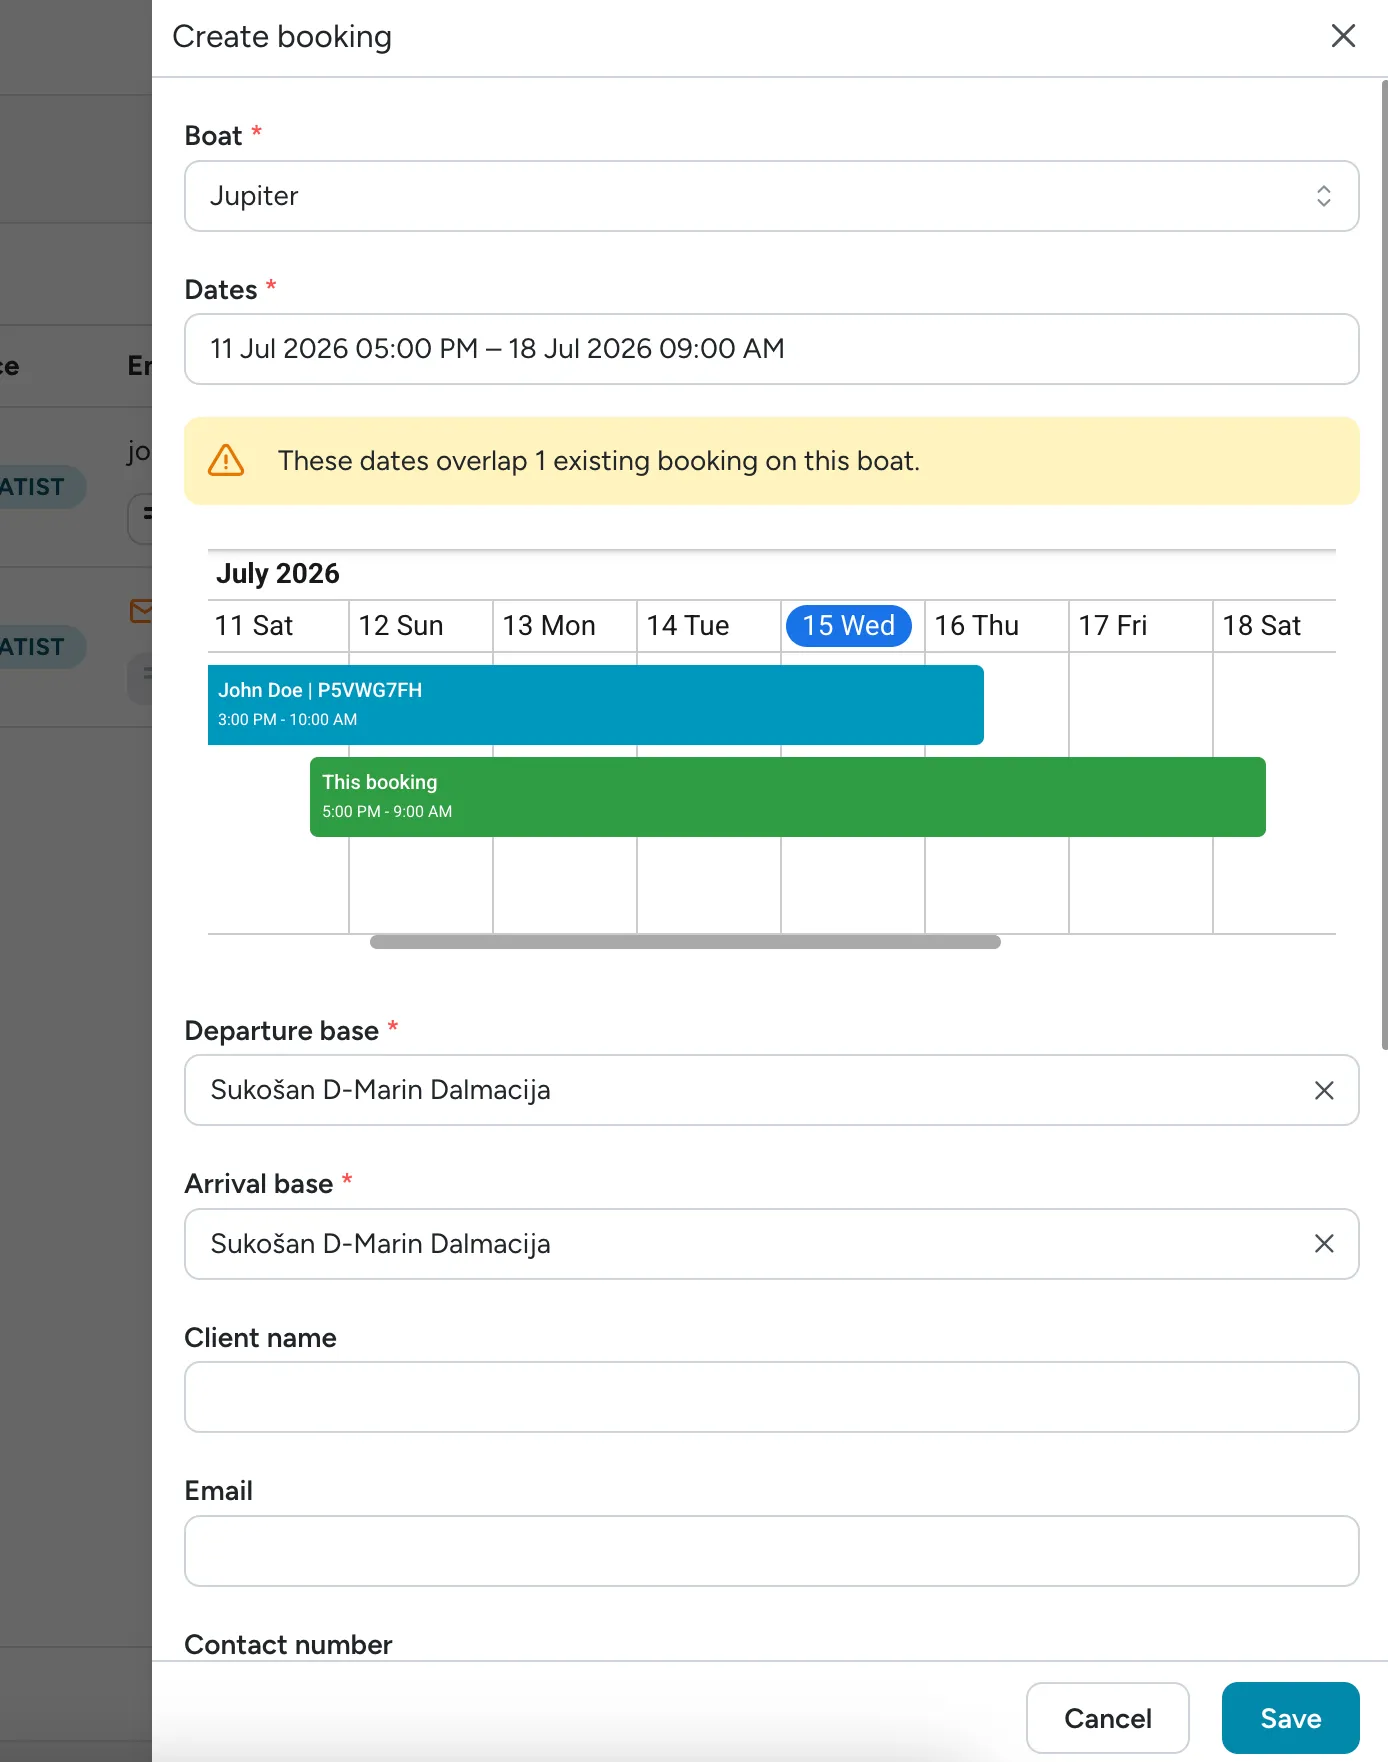
Once you have picked a boat and valid dates, whether creating a new booking or editing an existing one, Floatist checks that window against every other booking and pending request on the boat. If it finds an overlap, a warning banner appears above an inline calendar showing exactly what clashes, so staff can decide before saving instead of finding out after.
The booking calendar
Section titled “The booking calendar”Bookings > Calendar is the visual surface for managing your fleet’s schedule. It has two complementary views:
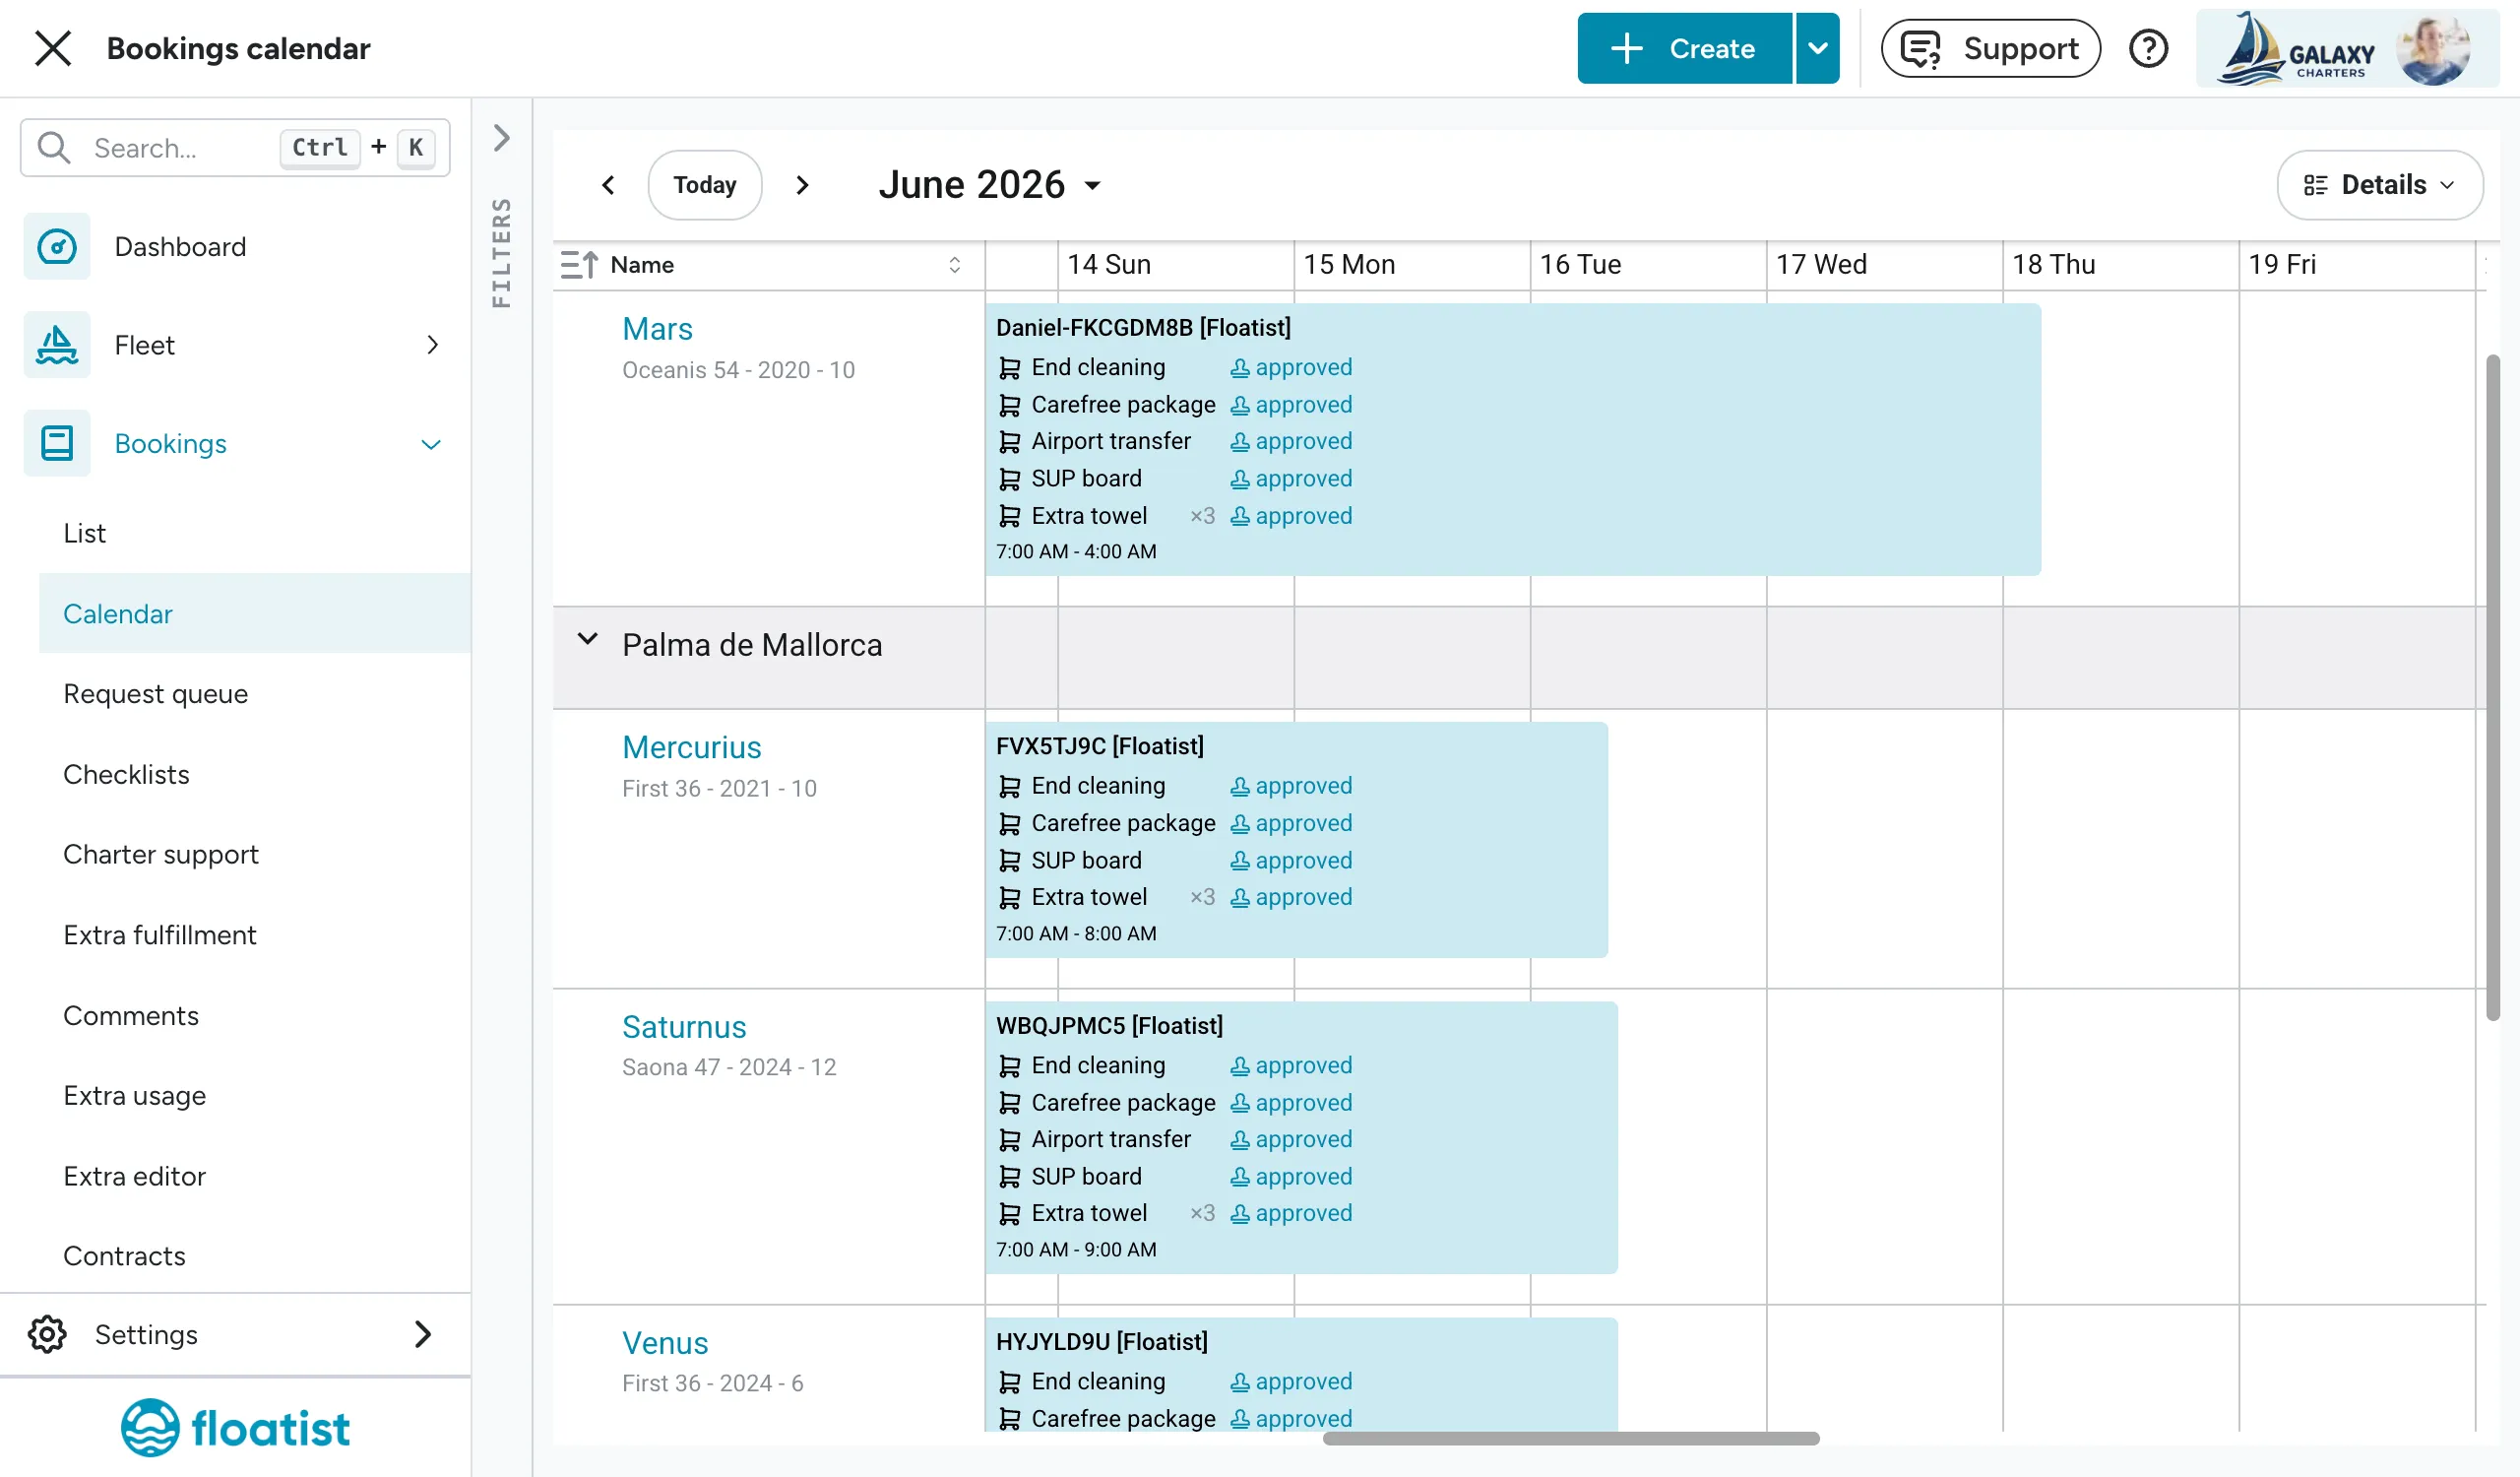
- Timeline view — a zoomable horizontal timeline. Each page covers one full year, so you can scan bookings across months without losing context. Use the zoom to focus down to a week-level view that’s optimised for day-charter operations.
- Detail view — a one-month layout that shows every extra booked for each charter at a glance. Useful when you need to see what’s been ordered alongside the bookings themselves.
The calendar remembers your scroll position, so when you navigate away and come back you land exactly where you left off.
Calendar filters
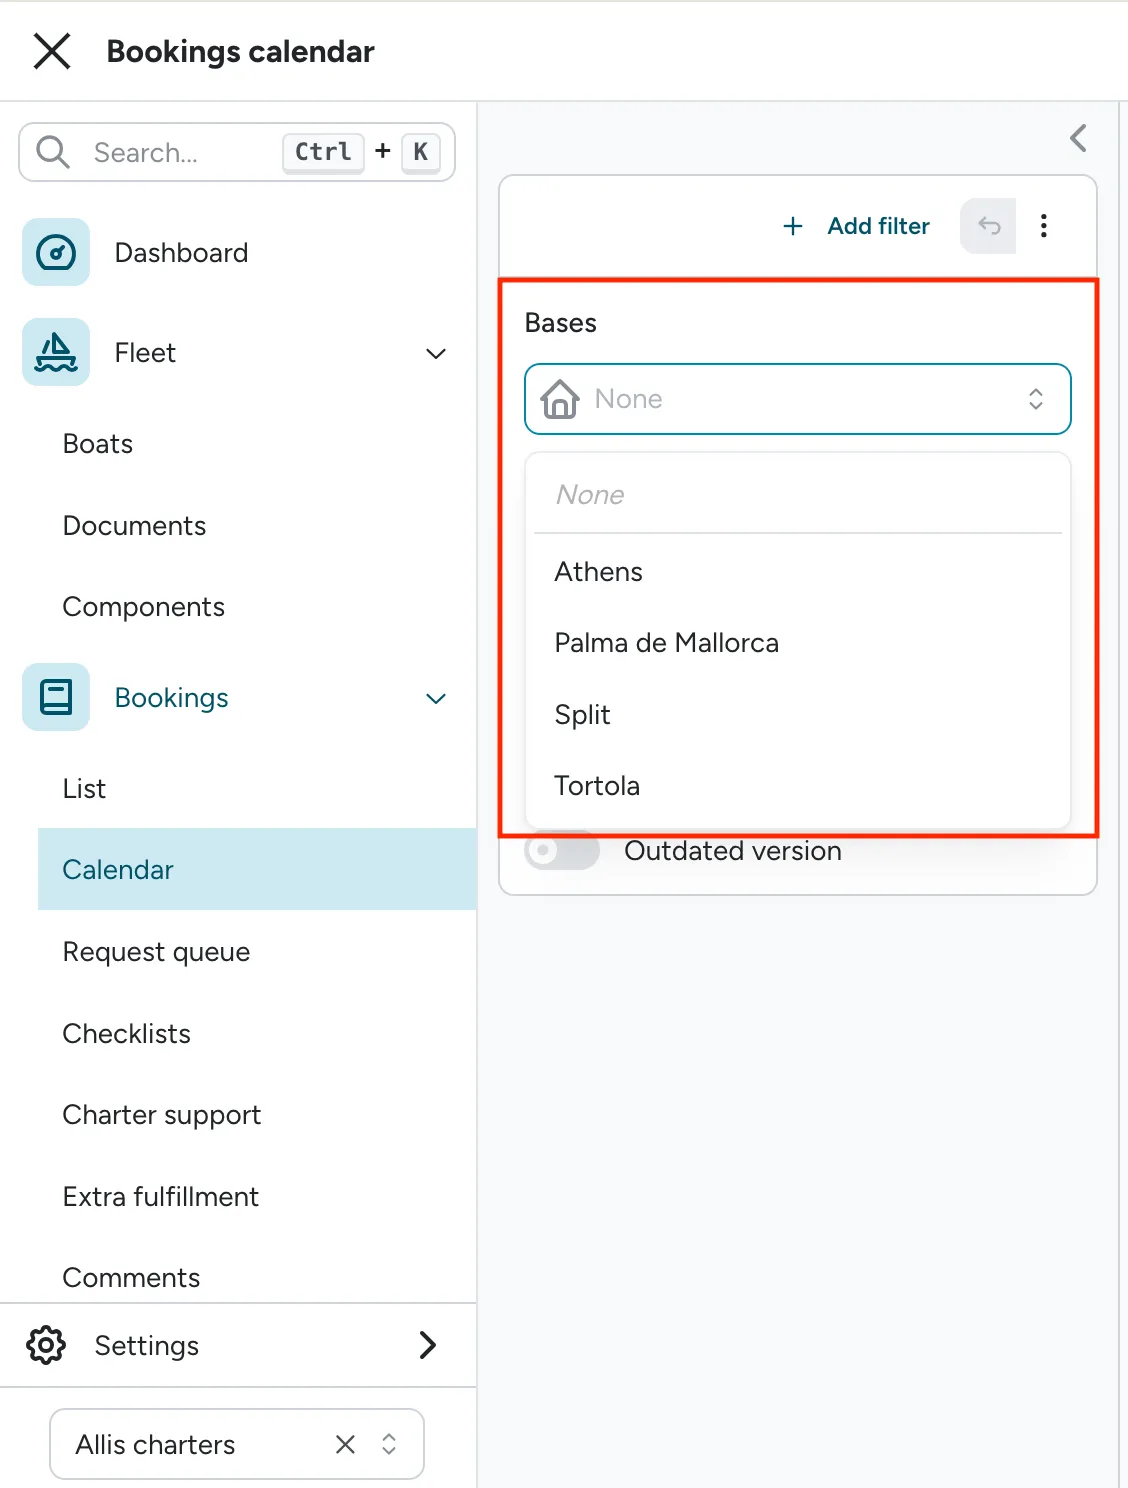
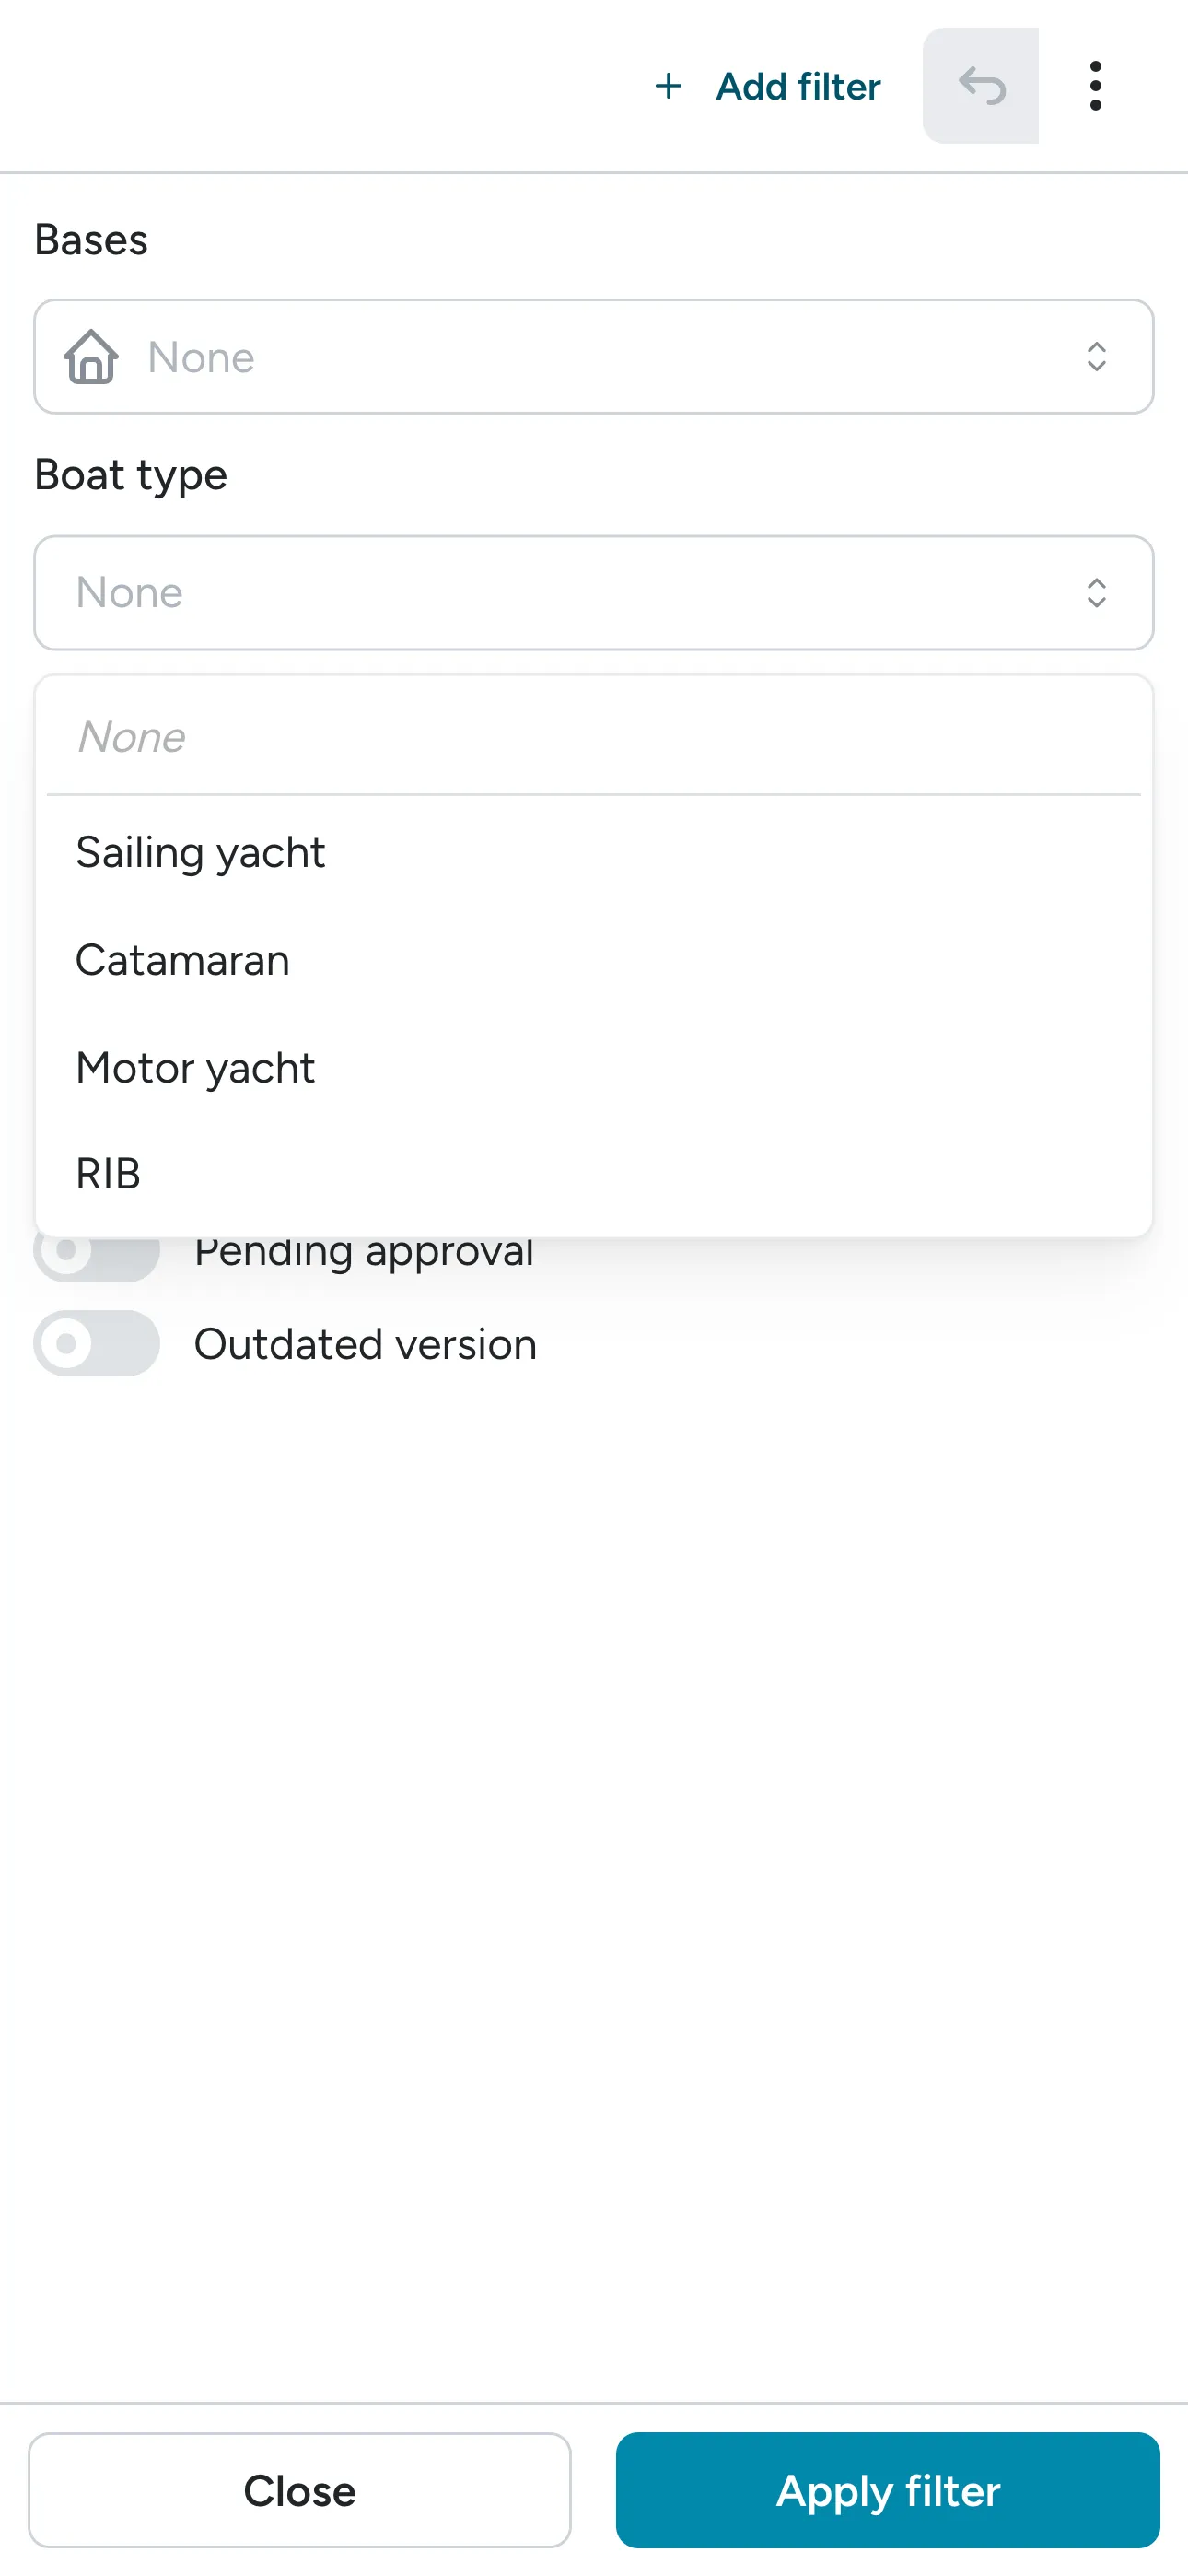
Section titled “Calendar filters”A Bases and a Boat type picker sit above the calendar at all times, scoping which bases and boat types you’re looking at — pick one or more of each, and only matching boats (and their rows) stay on the calendar. Your selection is remembered per browser, so it’s still set the next time you open the calendar. Next to them, the filter panel covers two fields:
- Is archived — show or hide archived bookings
- Extras — filter by specific extras, with switches for extras Pending approval and with an Outdated version
Filtering bookings
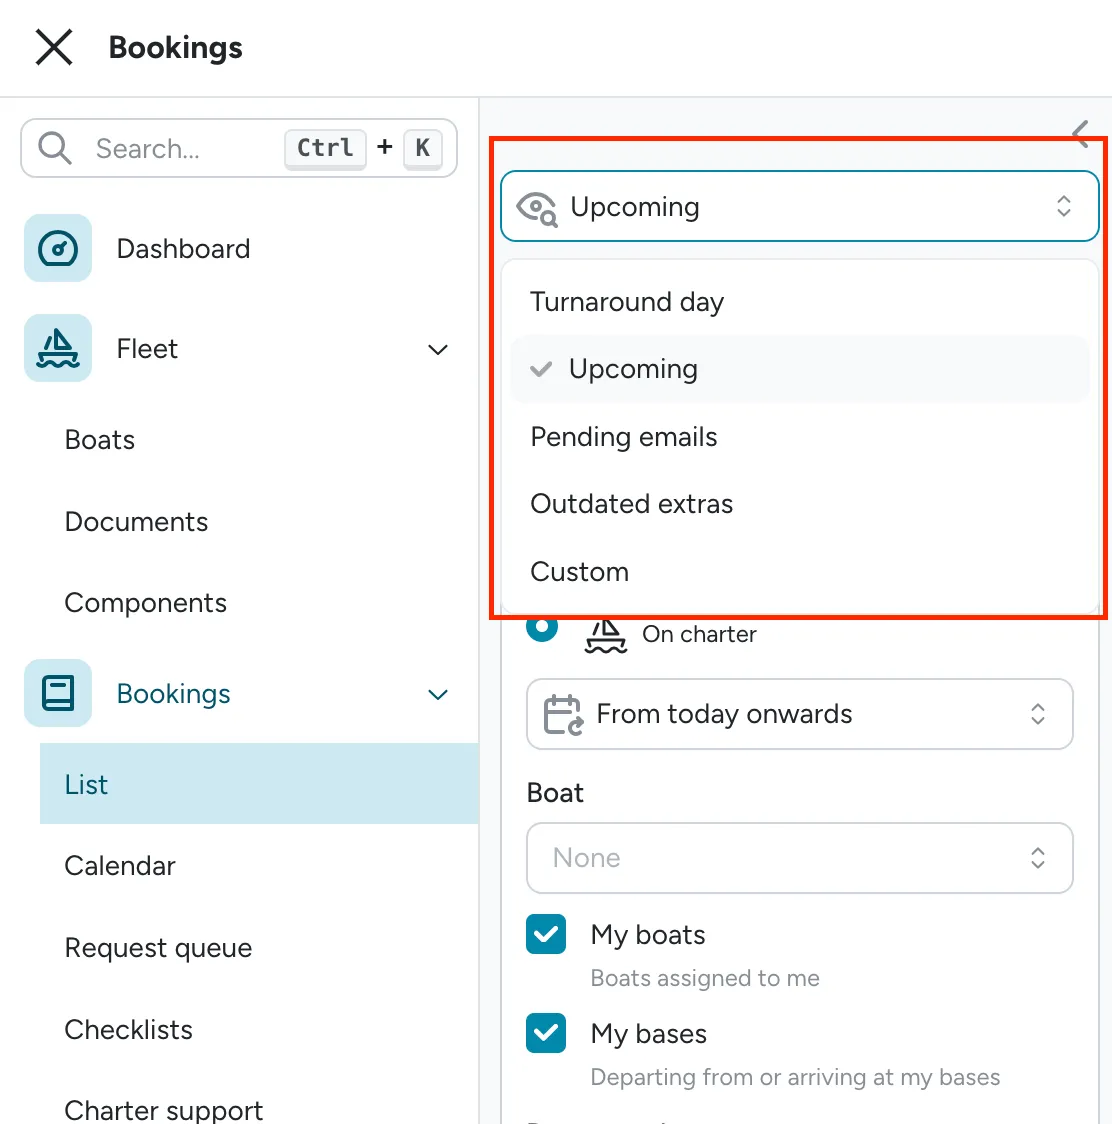
Section titled “Filtering bookings”The booking list opens on a saved view instead of a blank filter set. Pick a view from the dropdown at the top of the list:
- Turnaround day (the default) — bookings departing or arriving today
- Upcoming — charters starting soon
- Pending emails — bookings waiting on a confirmation or reminder email
- Outdated extras — bookings with extras that need a refresh
- Custom — build your own filter set from scratch
Click Add filter to add any available field, including Boat, Boat type (sailing yacht, catamaran, motor yacht, or RIB), Departure base, Arrival base, My boats, My bases, dates, and more. Each filter you add gets its own row with a menu to:
- Negate — flip it to “is not” (shown inline as a not prefix on the filter)
- Disable — keep the filter defined but skip it, without deleting it
- Duplicate or Remove it
If you change a view’s filters, the view switches to Temporary view and nothing is saved automatically. Use Revert to snap the filters back to the view’s original set, or the Go back to <view name> link to leave the temporary set entirely and return to the view you started from.
Filtering by date
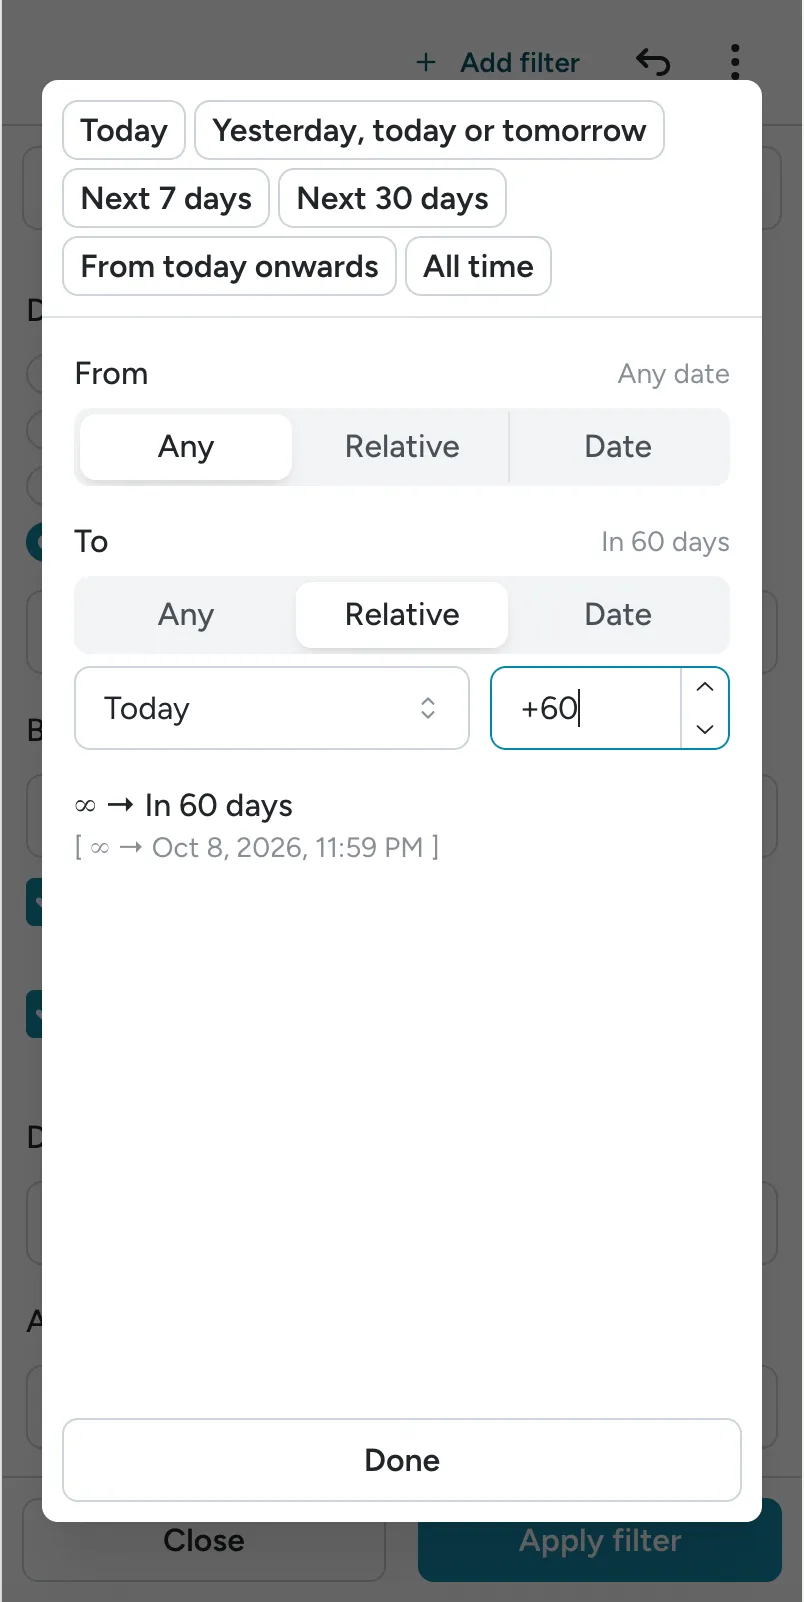
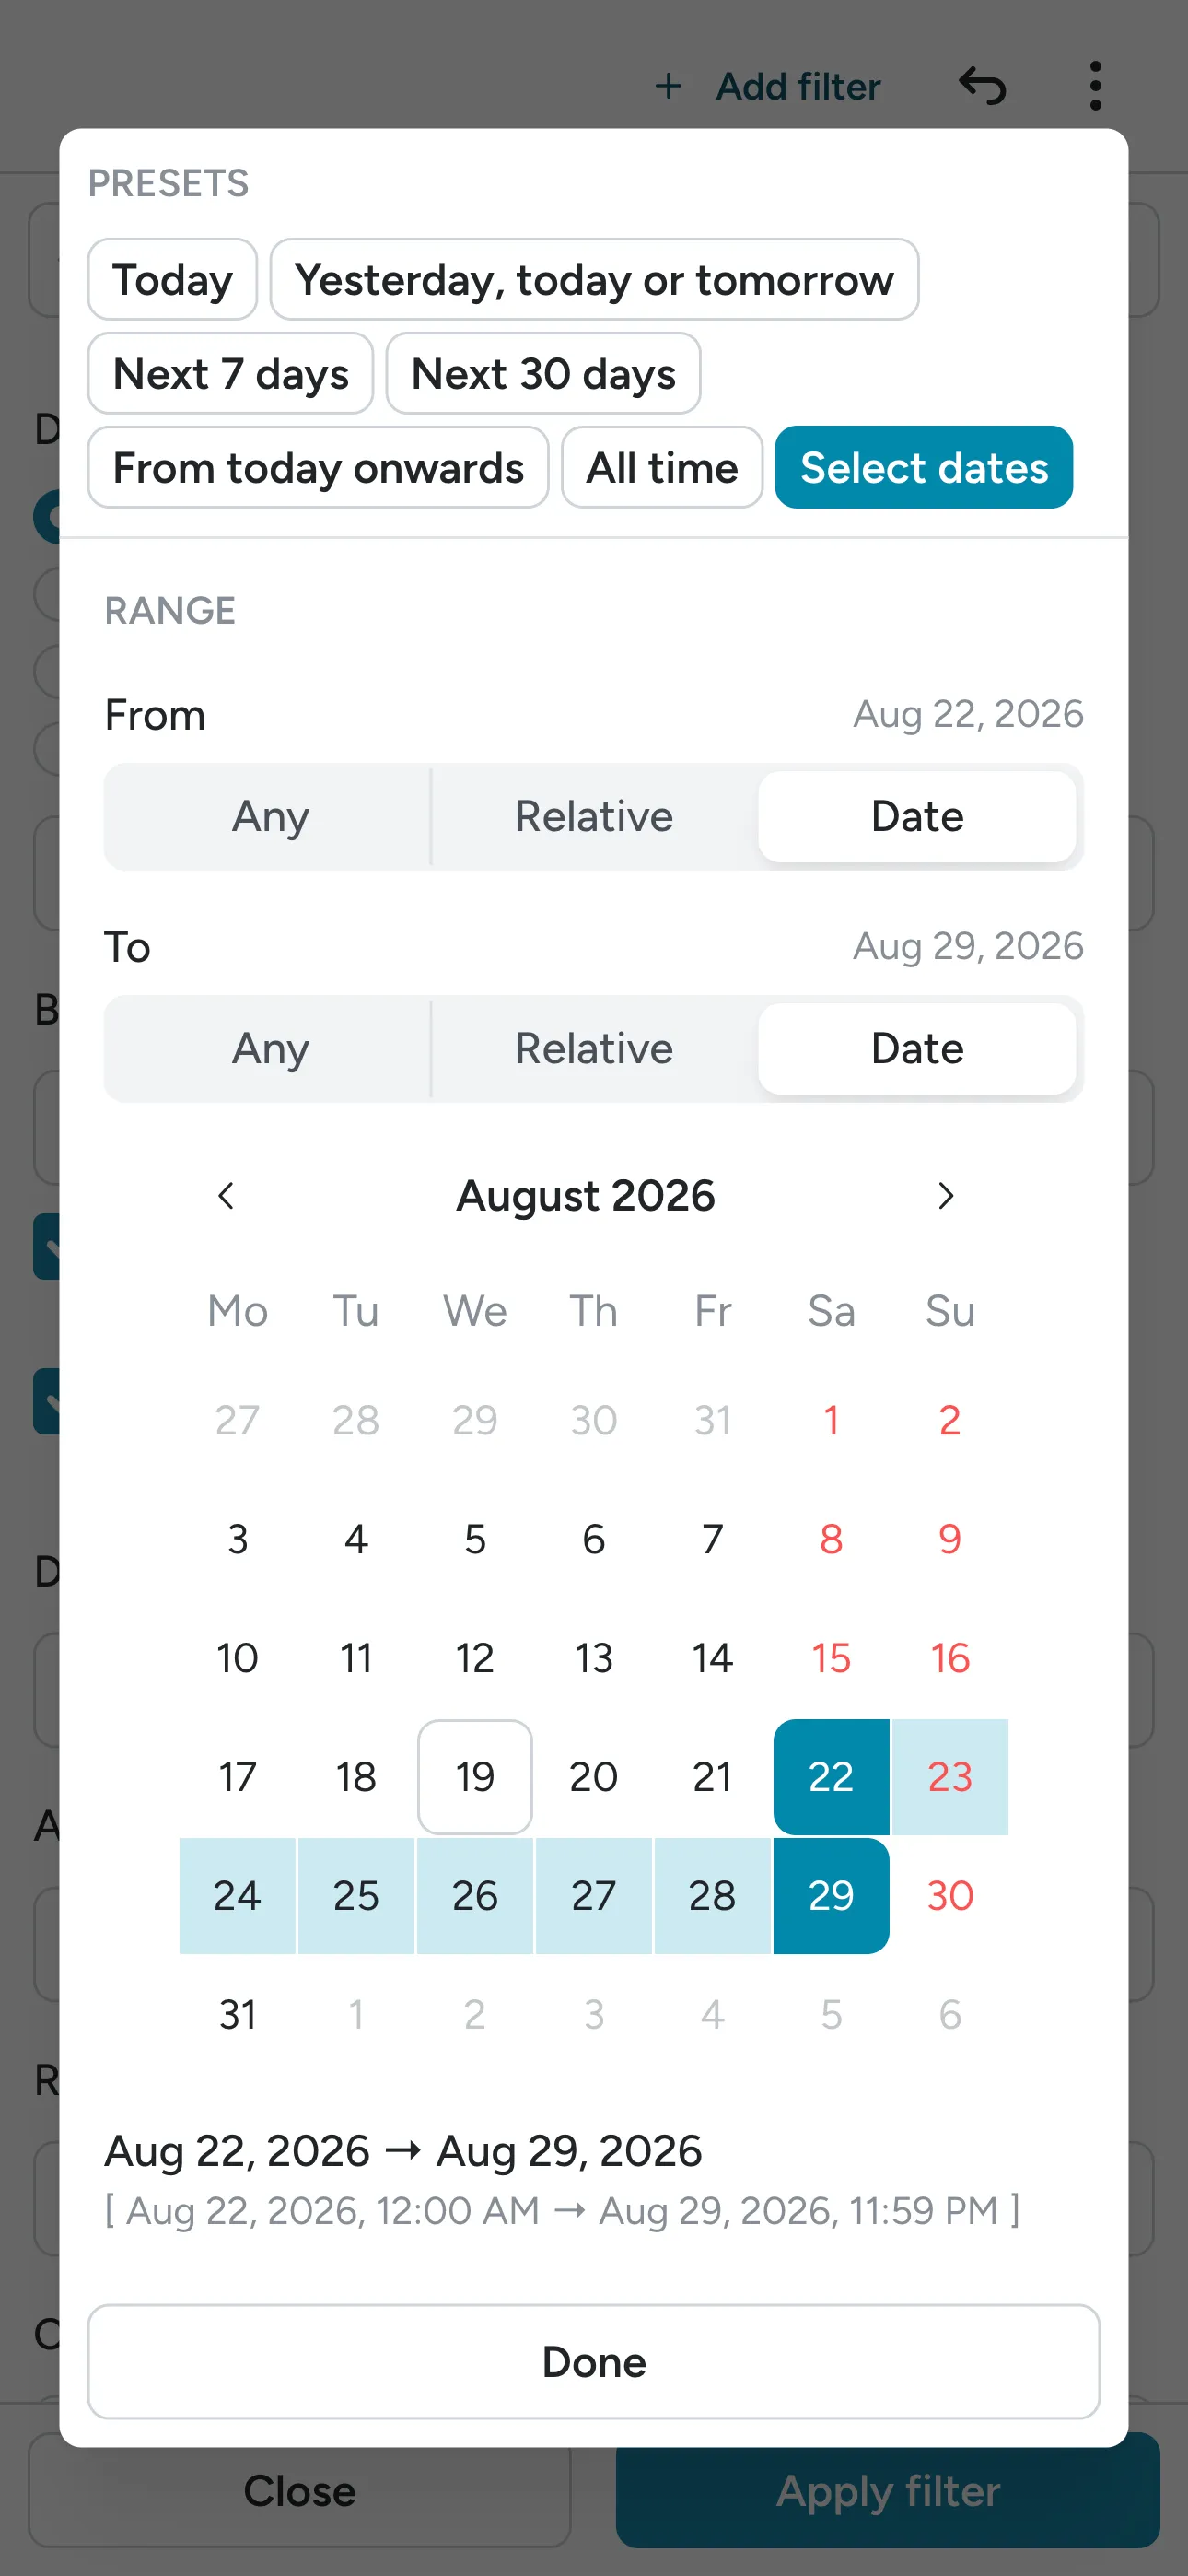
Section titled “Filtering by date”The Dates filter first asks which date it should match on: Departure, Arrival, Departure or Arrival, or On charter. From there, pick the range using either a quick preset (Today, Yesterday, today or tomorrow, Next 7 days, Next 30 days, From today onwards, All time, Select dates) or set From and To individually, each as Any, Relative (for example “Today +60 days”), or a specific Date.
Select dates opens the calendar straight into range mode with today picked on both ends, ready to drag into whatever exact pair of days you need — including a single day, picked once. It stays highlighted for any specific date pair you land on, not just the day it seeded.
Booking sources
Section titled “Booking sources”Bookings can enter Floatist from different sources:
- Floatist — created directly in the app
- MMK — imported from the MMK booking platform
- NauSYS — imported from the NauSYS system
Bookings imported from an external source have their core fields locked (dates, boat, bases, client info) to stay in sync with the original system. If you need to edit these fields, you can detach the booking from its source — see Detaching from an external source.
Booking requests from the marketing website
Section titled “Booking requests from the marketing website”Bookings can also originate from a guest submitting a request on your marketing website. Requests land in the request queue as Pending until staff review them and either archive them or confirm the booking. See Managing booking requests for the full triage process.
Booking lifecycle
Section titled “Booking lifecycle”Every booking progresses through six stages. The stage is automatically determined based on which process steps have been completed on the booking timeline.
Stage 0: Pending
Section titled “Stage 0: Pending”The status when a booking comes directly from the marketing website and is not yet confirmed. See Booking requests from the marketing website. Once staff review and confirm the request in the request queue, the booking request moves from Pending to Accepted and shows as a confirmed booking in the Booking List and Calendar.
Stage 1: Preparation
Section titled “Stage 1: Preparation”The initial state once a booking is created or confirmed. The boat needs to be prepared before the guest arrives.
Process steps to complete:
- Crew list submitted — guest crew information is collected
- Repairs done — any required maintenance is finished
- Cleaning outside — exterior of the boat is cleaned
- Cleaning inside — interior of the boat is cleaned
Stage 2: Ready for check-in
Section titled “Stage 2: Ready for check-in”Once all preparation steps are complete, the booking moves to Ready for check-in. The boat is prepared and waiting for the guest to arrive.
Process steps to complete:
- Office check-in — the office check-in is done
- Deposit paid — the security deposit has been received
- Client pre-check - the guest completes the pre check-in on the guest app (this is optional, can be skipped or marked as done manually)
- Check-in — staff has completed the check-in checklist
Stage 3: On charter
Section titled “Stage 3: On charter”The guest is actively sailing. The booking remains in this stage until the guest returns.
Process steps to complete:
- Ready for checkout — the guest signals they are ready to return the boat
Stage 4: Ready for check-out
Section titled “Stage 4: Ready for check-out”The guest has returned and is ready for the check-out process.
Process steps to complete:
- Ready for check-out - guest requests check-out when they are ready for someone to come on board
- Check-out — staff has completed the check-out checklist
- Deposit released — the security deposit is returned (with any deductions if applicable)
Stage 5: Checked out
Section titled “Stage 5: Checked out”The booking is complete. All process steps have been finished, the deposit has been settled, and the booking is closed.
Additional process steps
Section titled “Additional process steps”Beyond the core stage progression, the booking timeline also tracks:
- Extras prepared — any booked extras (equipment, provisions) are ready
- Client arrived — the guest has physically arrived at the base
- Client check-in submitted — the guest completed their part of the check-in
- Extras cleaned — rented extras have been returned and cleaned
- Diver inspection — an underwater hull inspection has been done
Booking issues
Section titled “Booking issues”Issues allow crew and staff to report problems during a charter. You can find them in the Issues tab on a booking.
- Open an issue with a title, description, and optional photos
- Discuss via messages — both crew and staff can send messages with images
- Close the issue once resolved, or reopen it if needed
Issues are a great way to keep a record of any damage, complaints, or incidents that happen during a charter.
Detaching from an external source
Section titled “Detaching from an external source”When a booking is imported from MMK or NauSYS, its core fields are locked to keep it in sync with the source system. The locked fields include: dates, boat, start/end base, and client information.
If you need to edit these fields (for example, when the external system is incorrect or you want to manage the booking entirely in Floatist), you can detach the booking from its source:
-
Open the booking
-
Click the 3-dot menu next to the Share button
-
Disable MMK sync
Archiving bookings
Section titled “Archiving bookings”You can archive a booking to hide it from the default booking list without permanently deleting it. Archived bookings can be found by filtering for archived bookings in the booking list.
Remarks history
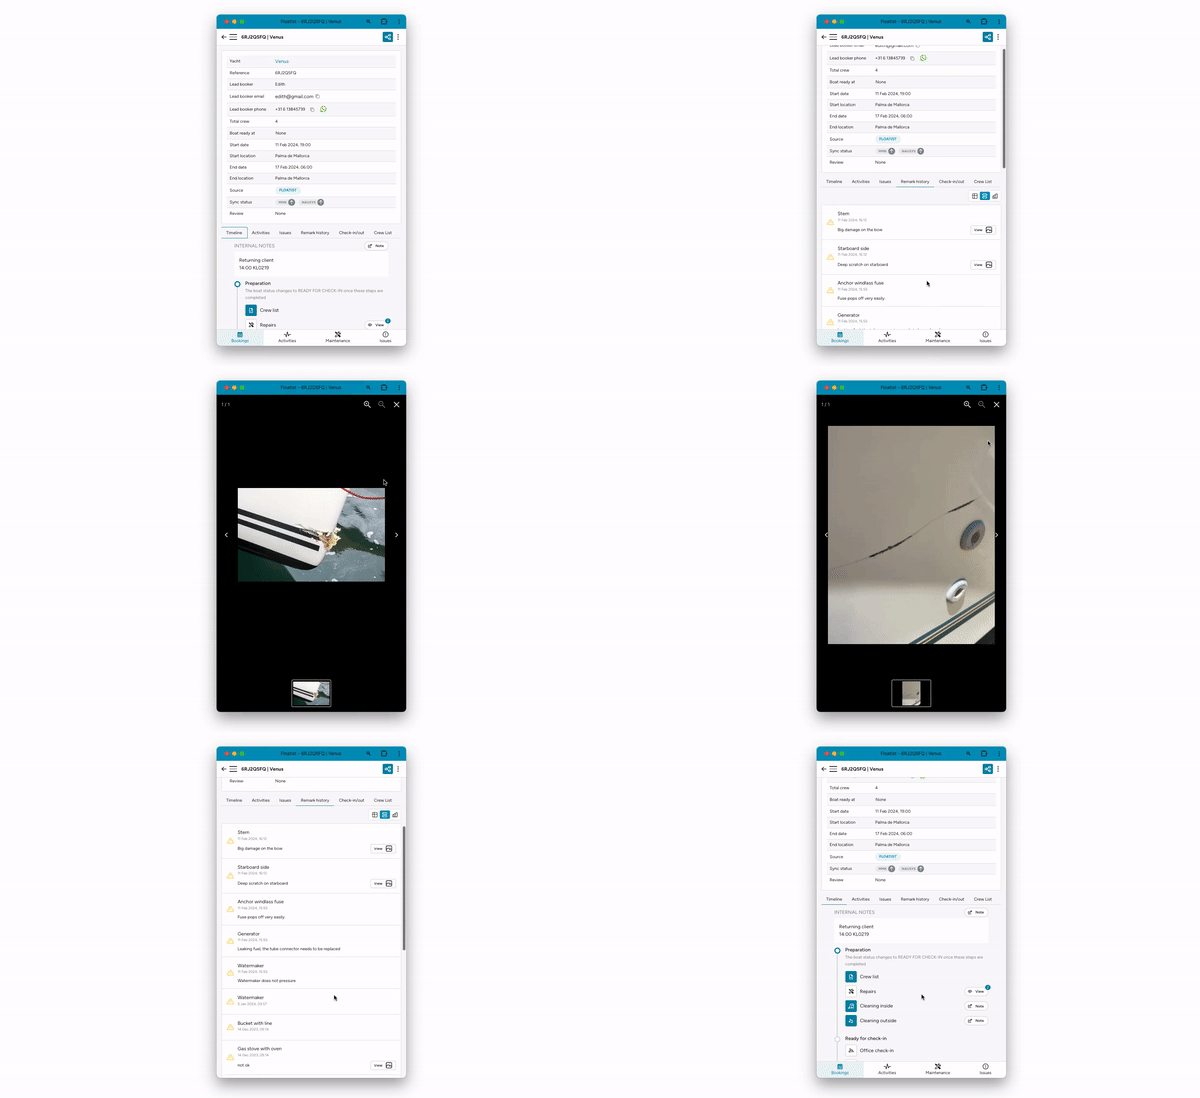
Section titled “Remarks history”On the booking detail view we display all previous remarks, images and notes right from the same view. This way you can easily verify what has been recorded for a specific yacht in the weeks before judging how to proceed.
Go to the Booking > Remark history
Overriding the boat configuration
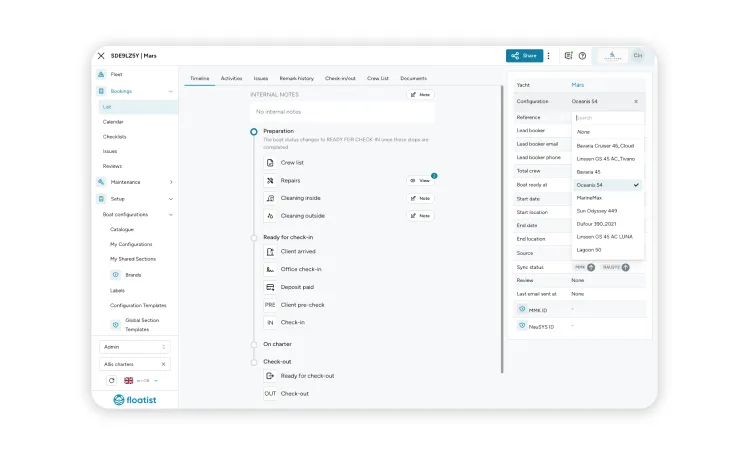
Section titled “Overriding the boat configuration”By default, each boat is assigned to one boat configuration. Boat configurations are defined in the Setup menu > Boat configurations > My configuration. The boat configuration determines what is shown to the client in Pre-check-in, Check-in, and Check-out.
Sometimes you may have two different types of configurations for the same boat — for example, a regatta version that includes extra sails but no dinghy. In this case, you can override the boat configuration for a specific booking.
You can manage the configuration in the booking overview by selecting it and choosing a different one.
Expected arrival time
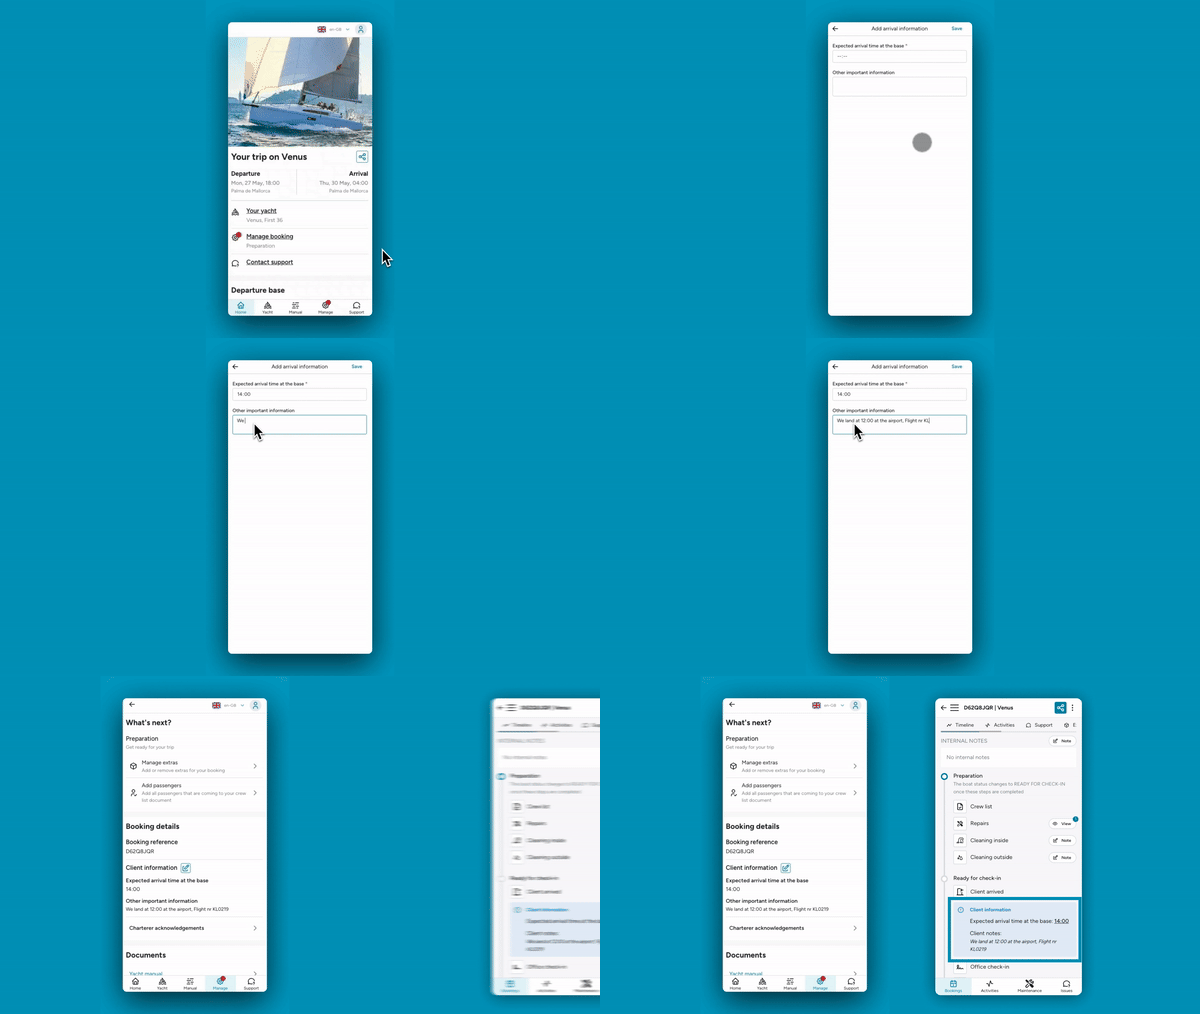
Section titled “Expected arrival time”In the guest app, clients are asked to fill in their arrival information. This allows you to plan and prioritise your tasks for check-in day more carefully.
Once the client has filled in their information, it will show up in the booking timeline. The client can still edit it from the Manage menu in their app.
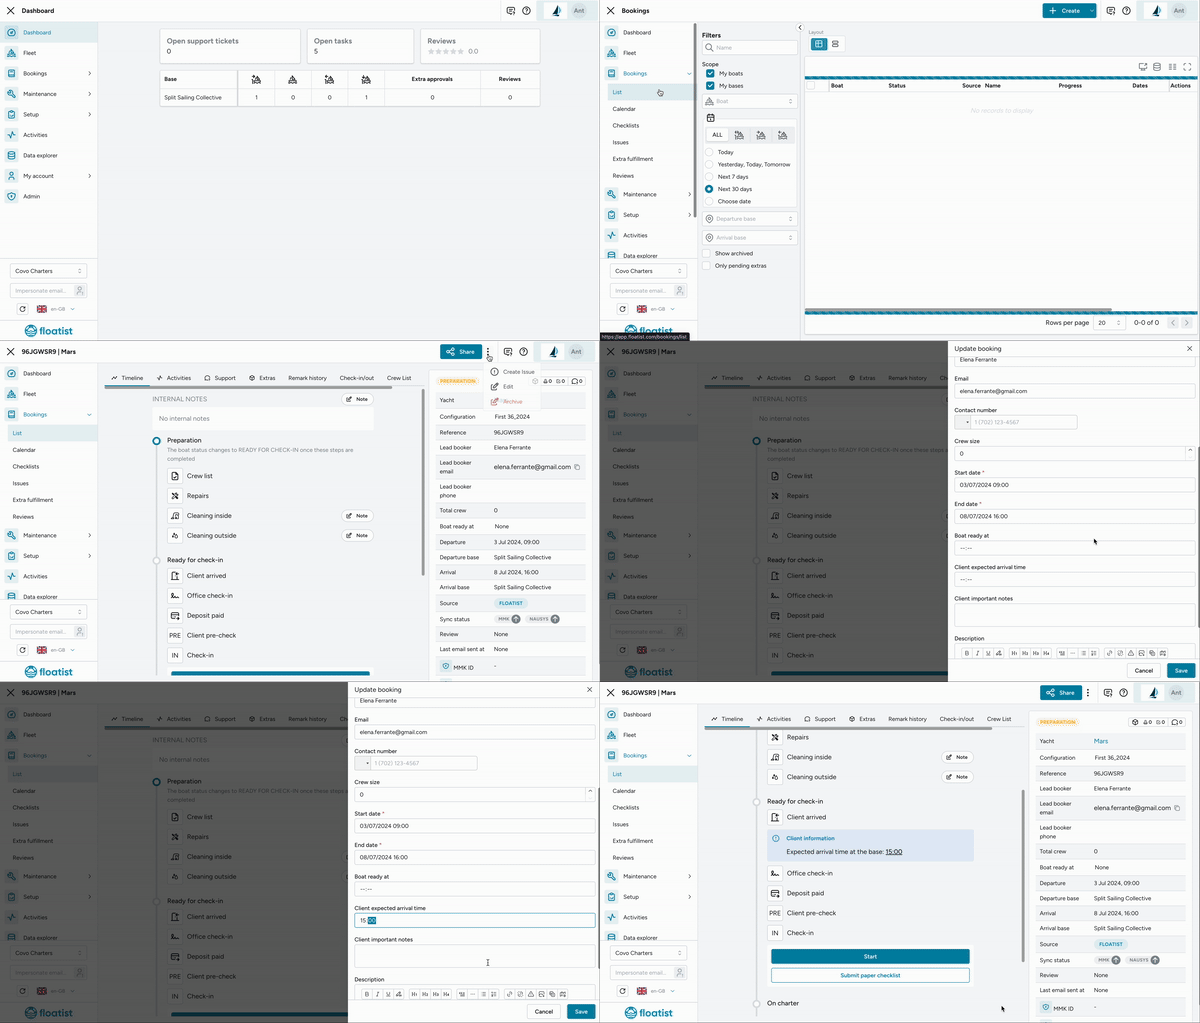
You can also edit this information on behalf of the client from the Edit Booking menu.
Crew list management
Section titled “Crew list management”For details on managing the crew list — including how to reopen it after a client has submitted it — see the Crew list article.