
Overview
Tasks are at the core of what Floatist does. They can be used for any work that needs to be completed — repairs, routine maintenance, cleaning, provisioning, and more. Tasks are connected throughout the application: to boats, bookings, extras, checklists, and inventory.
Task fields
Section titled “Task fields”A task contains the following fields:
- ID: Unique and monotonically increasing number. This is the simplest way to refer to a task.
- Title: A summary of what has to be done, or a description of a problem that was found.
- Description: An optional text with details about the work required.
- Priority: To set the importance or urgency of a task. This can be one of the following:
Highest,High,Medium,Low,Lowest. - Attachments: Images and other files. Mainly used to document what’s broken and its location.
- Comments: Users can add comments on a task, with both text and images.
- Workflow state: Represents where the task is in its lifecycle (To be done, In progress, Done…). Workflow states are fully customizable — see Workflow states.
- Due date: An optional date indicating when the task should be finished. This allows base managers to prioritize tasks, and is the foundation for planned maintenance and schedules.
- Estimated labor: An optional time estimate for how long the task should take to complete. Useful for workload planning.
- Boat: A task can be assigned to
0 or 1boat. This is the fundamental link that makes Floatist work for maintenance. Tasks without boats can be used for other activities, likeclean the office once a week. - Component: Boats contain components (like an Engine), and those components typically have a location on the boat plan. Assigning components to tasks allows you to be more specific about what needs work, and enables analytics about which components break most often. This link is also the foundation for planned maintenance.
- Location: Allows you to place markers on the boat’s deck plan, so technicians can quickly find where the work needs to happen.
- Assignees: A task can be assigned to
0, 1 or multipleusers. Assignees can filter tasks assigned to them and receive push notifications when tasks are assigned. - Category: Floatist supports category hierarchies. Base managers can create custom
categories and assign them to tasks. Categories are useful for analytics — for example, answering
questions like:
How much did we spend on electrical repairs? - Labels: A flexible mechanism to model any other categorization beyond categories or assignees. Labels have a name and a configurable color.
- Project: A task can be part of a project. Projects are typically used for complex maintenance periods, like winter maintenance. See Projects.
- Checklists: Checklists that can be attached to a task. Submitting a checklist is independent of the task’s workflow state — a task can be marked Done whether or not its checklists have been submitted, though typically you’d want them completed before closing out.
- Billables: Cost tracking for the task — see Billables.
- Created by: The user who created the task. It’s set automatically, shown as a column in the table view, and included in CSV and PDF exports — handy for seeing at a glance who raised each task.
- Activity: Every action on a task is tracked through Floatist’s activity stream. Managers can always know who did what and when.
Task relationships
Section titled “Task relationships”Tasks can be connected to other objects in Floatist:
- Other tasks: Create
parent-childrelationships. For example, a parent task tocheck the oil filterscan spawn a child taskreplace oil filterif maintenance is needed. This models causality between tasks. - Charter issues: When a guest reports a problem during their charter, the base manager can create a task to handle the repair once the boat returns. The charter issue stays linked to the task, visible from both sides.
- Booking comments: A booking’s lifecycle involves many steps, and each step can have comments. When a comment turns into actionable work, you can create a linked task. This makes it easy to track and bill all tasks that originated from a specific booking.
- Extras: Tasks can be created on the booking timeline for extra preparation and clean-up. These tasks can also be generated automatically using extra automations — see Extras Operations for details.
Workflow states
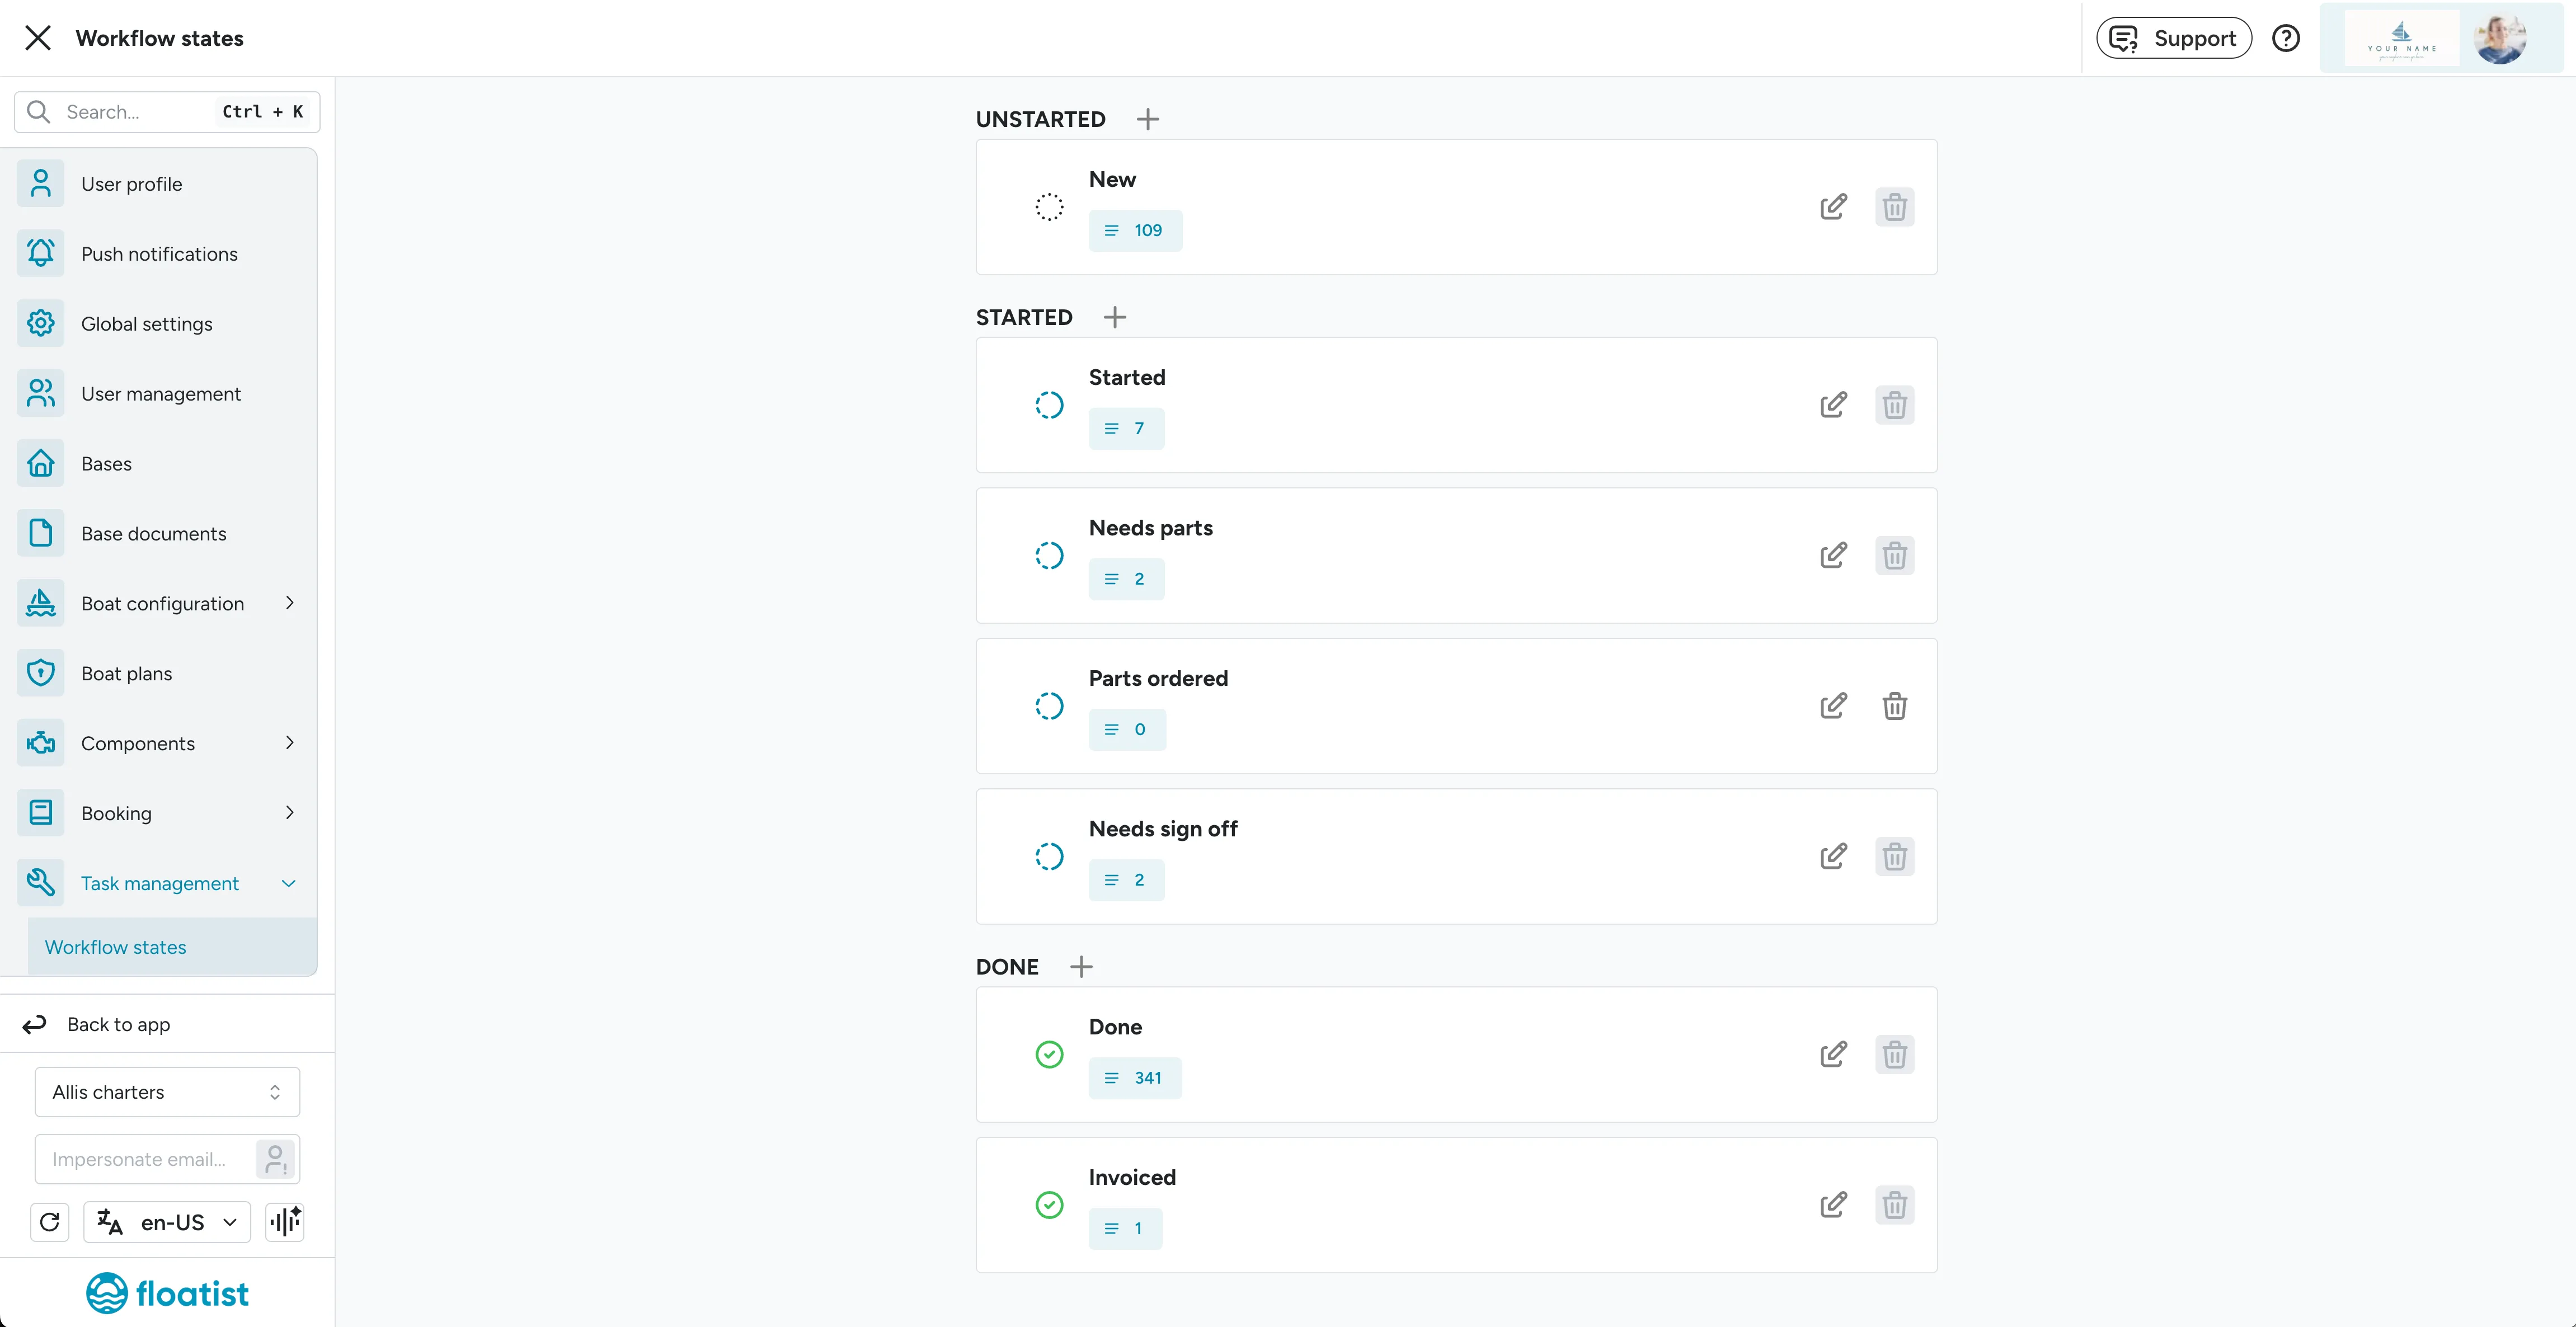
Section titled “Workflow states”Workflow states model the lifecycle of a task. They are divided into 3 fixed categories:
- Unstarted: The task has been created, but no one is working on it.
- Started: Someone is actively working on the task.
- Done: The task is completed.
Each category must have at least one workflow state. You can create custom states within each category at Settings > Task management > Workflow states.
Billables
Section titled “Billables”Executing a task costs time and money. To keep your business running, you want to track those costs and bill the right person — typically either the boat owner or a booking guest. In Floatist, you can add the following billables to a task:
- Labor: Record how long a staff member worked on the task, along with notes. You can add multiple labor entries per task if different people worked on it.
- Inventory item: Track which parts were consumed from your warehouse. This is the link between Inventory management and tasks.
- Expense: Any other type of cost, with an amount and notes.
All billables are visible on the task detail page and contribute to the Cost and Labor views, helping you track spending across your fleet.
Task comments
Section titled “Task comments”Users can add comments on tasks with both text and images. A dedicated comments page gives you a centralized view of all comments across your tasks. A preview of recent task comments is also displayed on the dashboard.
Task views
Section titled “Task views”Floatist provides multiple views to help you work with tasks in different ways:
- Table: Information in a tabular layout. Default on desktop. Supports data export to PDF and CSV.
- List: Compact view showing the most important task data. Default on mobile.
- Calendar: Monthly calendar where tasks are displayed by their due date.
- Workload: A weekly grid that shows task due dates on the horizontal axis and assignees on the vertical axis. Useful for distributing work evenly across your team.
- Plan: Displays tasks on the boat’s deck plan, based on the task’s location or component.
- Count: A chart showing the number of tasks, grouped by an entity of your choosing (boat, assignee, workflow state, etc.).
- Cost: Similar to Count, but adding up all costs recorded on tasks.
- Labor: Similar to Count and Cost, but adding up total labor recorded on tasks.
Table columns
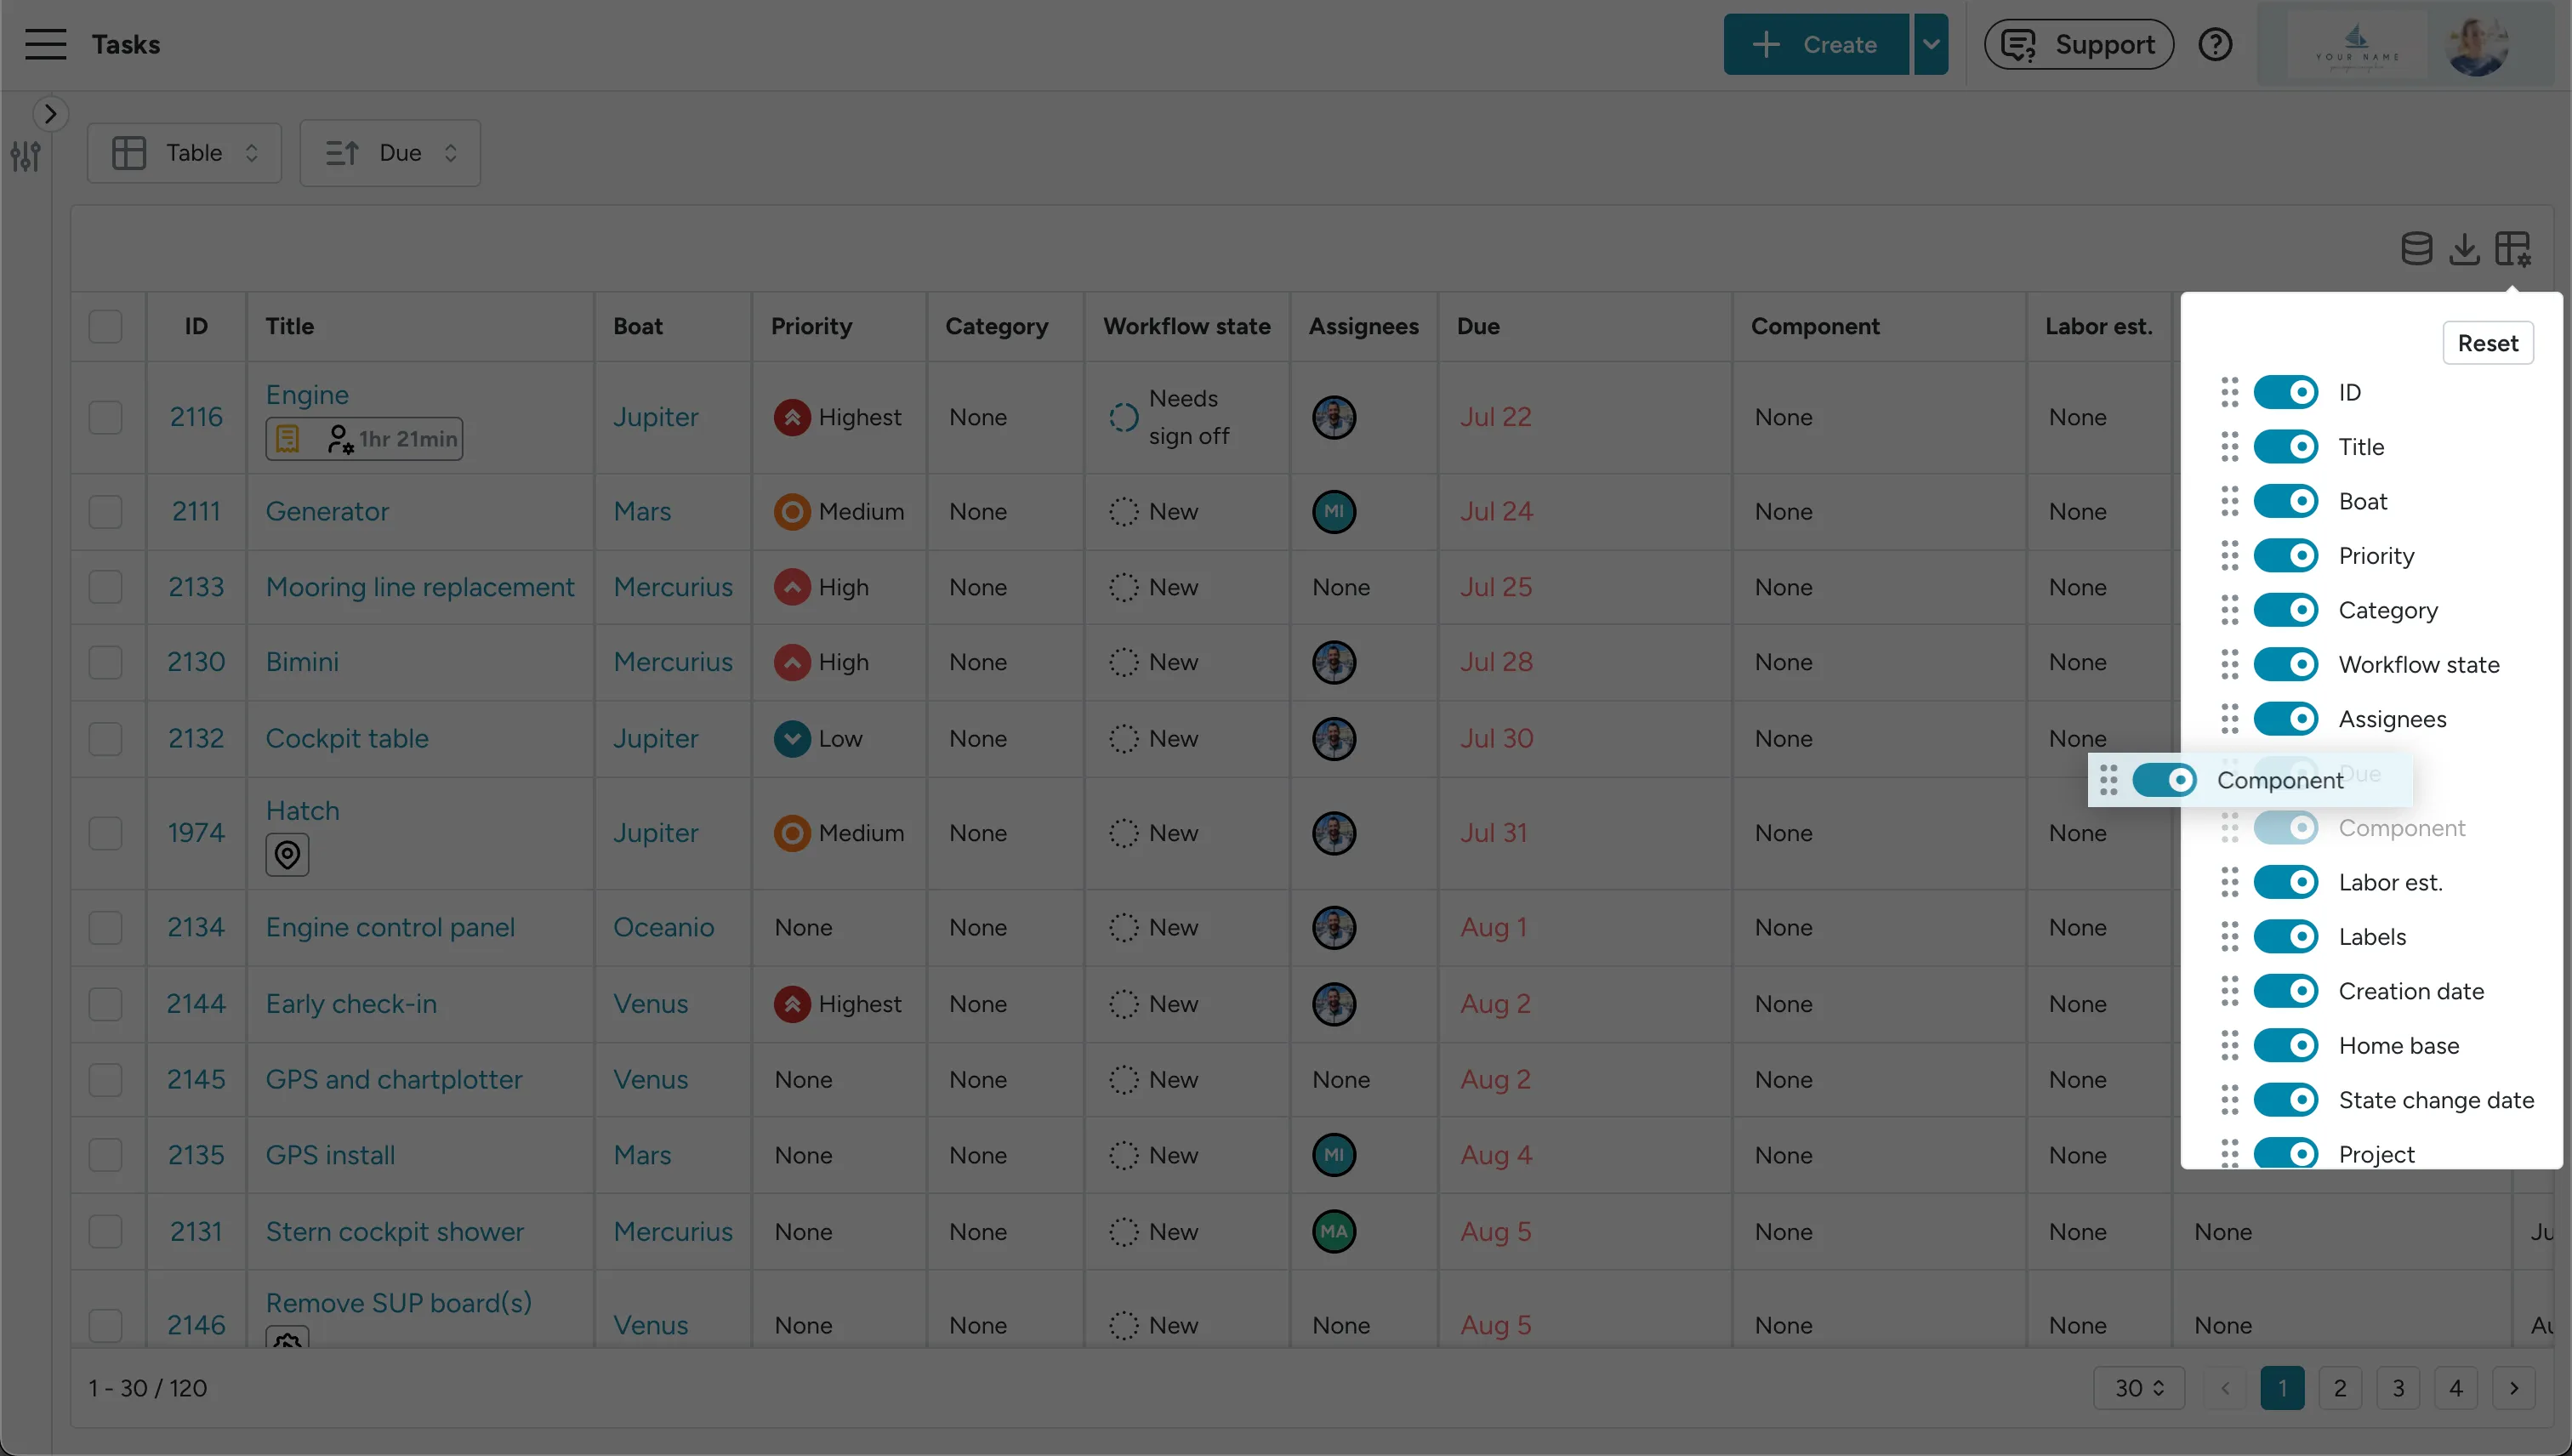
Section titled “Table columns”The task table columns can be reordered using the gear icon on the top right of the table. Drag and drop columns to arrange them, and toggle columns on or off to customize your view.
Archiving tasks
Section titled “Archiving tasks”You can archive tasks to hide them from the default task list without permanently deleting them. Archived tasks are useful for keeping completed or outdated tasks out of sight while preserving their history and cost data.
To view archived tasks, apply the Archived filter on the task list.
Bulk creation
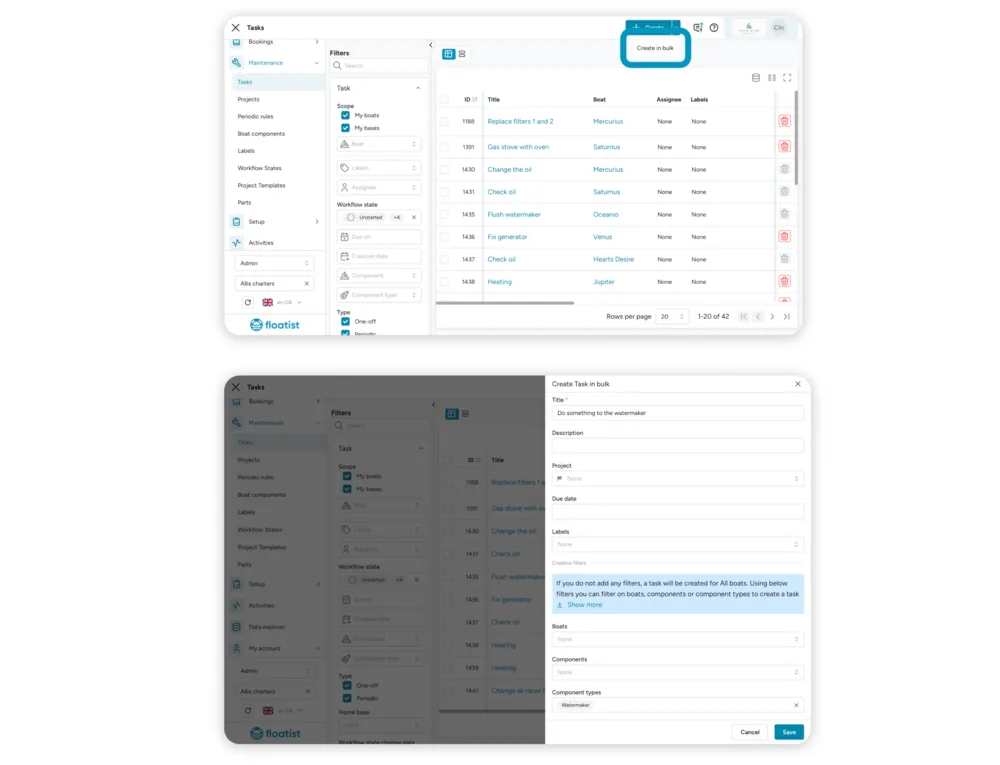
Section titled “Bulk creation”Besides creating single tasks, you can create the same task for multiple boats at once.
- Go to the Task management > Tasks page.
- Click the arrow next to Create task and select Create in Bulk.
- Add the details of the task you want to create.
- Use the filters to select which boats and/or components should receive the task:
- No filters selected: one task is created for each boat in your fleet.
- Boats selected: tasks are created only for those boats.
- Components selected: tasks are created only for boats that have those components.
- Both selected: tasks are created only for selected boats that have the selected components.
Bulk update
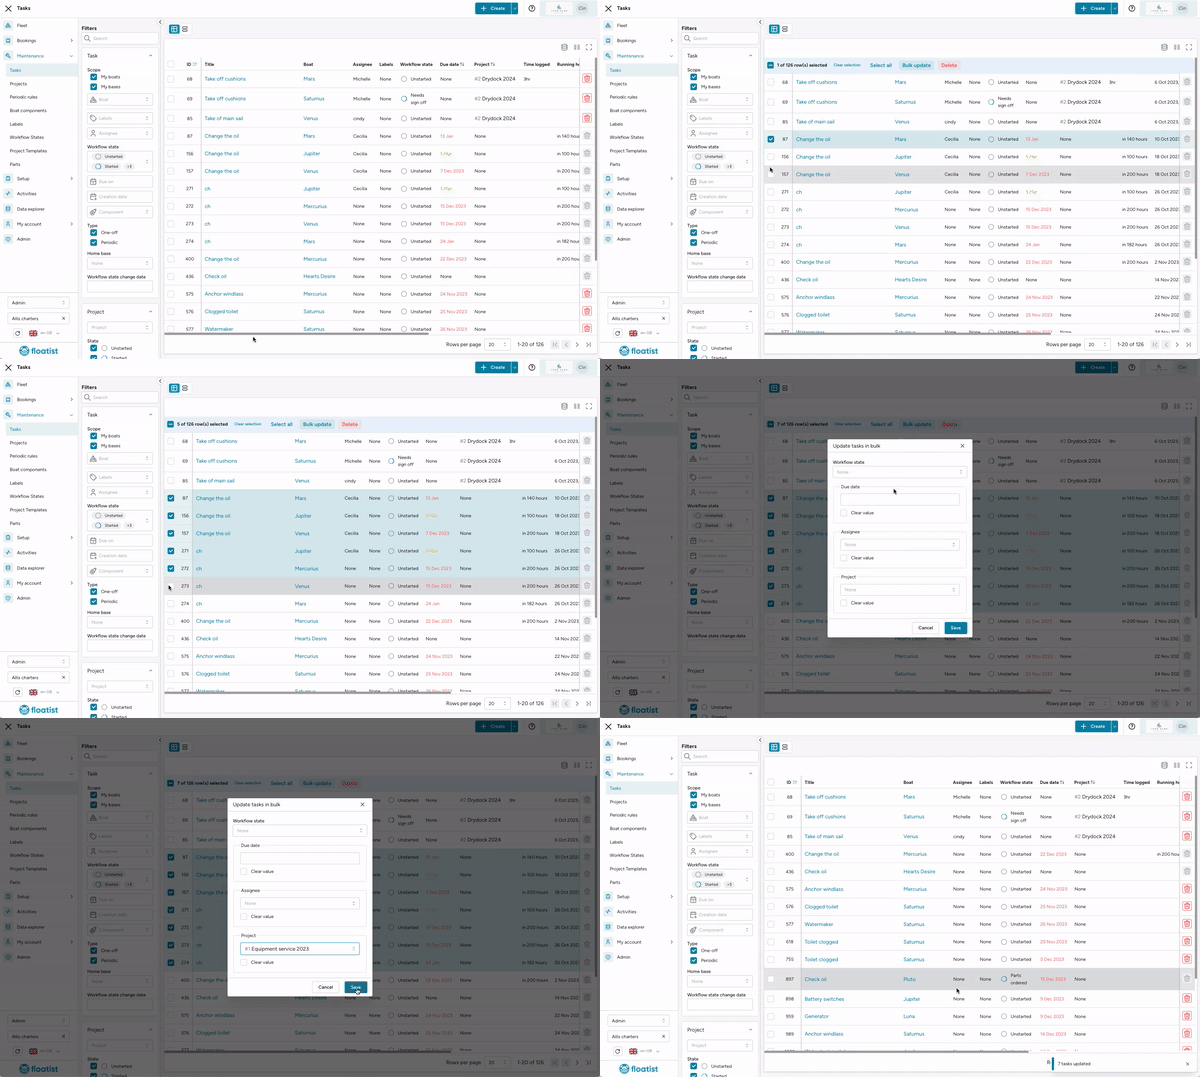
Section titled “Bulk update”You can update multiple tasks at once using the following bulk actions:
- Update the Workflow state
- Update the Due date
- Update the Assignee
- Update the Project
To do so, select one or more tasks, and click Bulk Update at the top of the table. Then choose the action you want to apply.
Export tasks as PDF
Section titled “Export tasks as PDF”Task reports can be exported as formal PDF documents:
- In bulk from the Task List: select tasks using the checkboxes (multi-select or select all — up to 200 tasks at a time), then click Download reports at the top of the table.
- From an individual task: open the task detail page, click the 3-dot menu, and select Export as PDF.