
Best practices
This page describes the recommended end-to-end workflow for a charter, from sharing the booking link with the guest through to handling support requests during the trip. Following these practices keeps both your team and your guests well prepared, and lets the Floatist app do the heavy lifting where it can.
1. Share the guest login link
Section titled “1. Share the guest login link”We recommend sharing the Floatist guest app login details with the client well in advance, so they can take advantage of everything the app offers — see Guest experience for what guests can do.
How to share the login link
Section titled “How to share the login link”There are several options to share the login link, all accessible from the Share button at the top of the booking detail page.
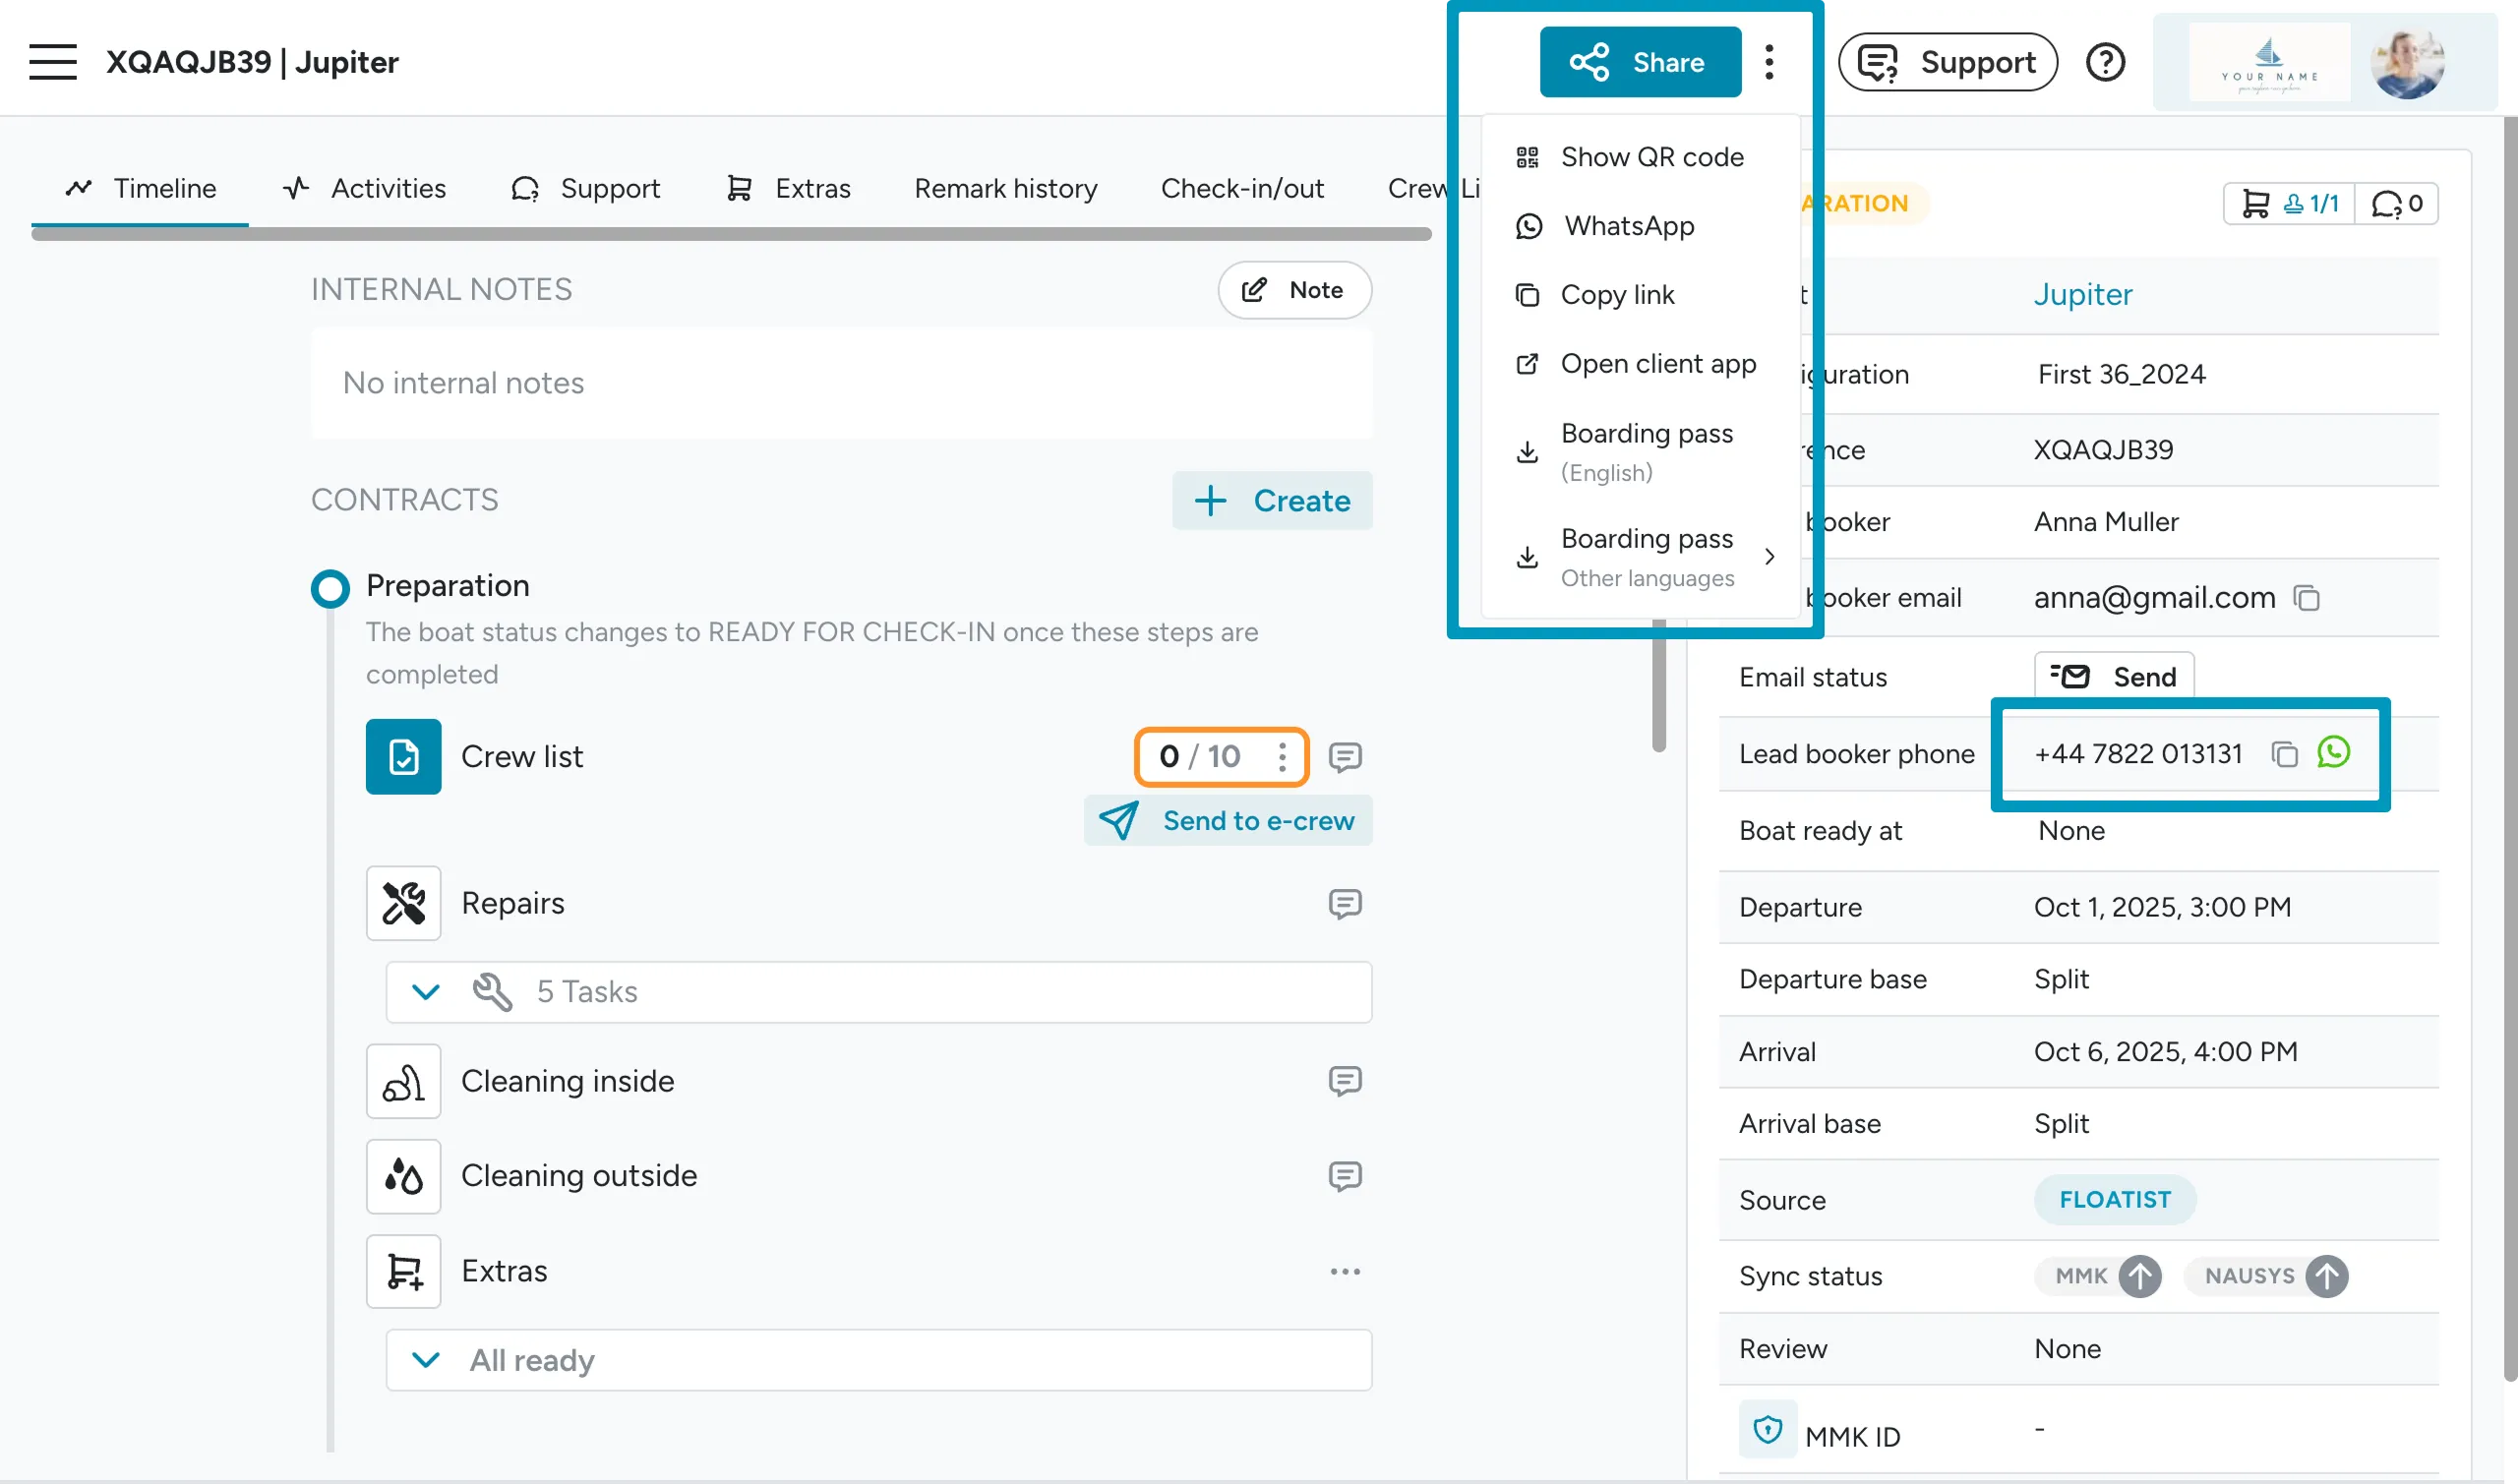
- Show QR code: Show the QR code on your screen — useful when the guest is standing next to you with their phone. They scan with their camera and get directed to their app.
- WhatsApp: If a valid phone number is filled in on the booking, a WhatsApp button appears next to it. Use it to send the magic link directly.
- Copy Link: Copy the magic link and paste it anywhere — email, text message, etc.
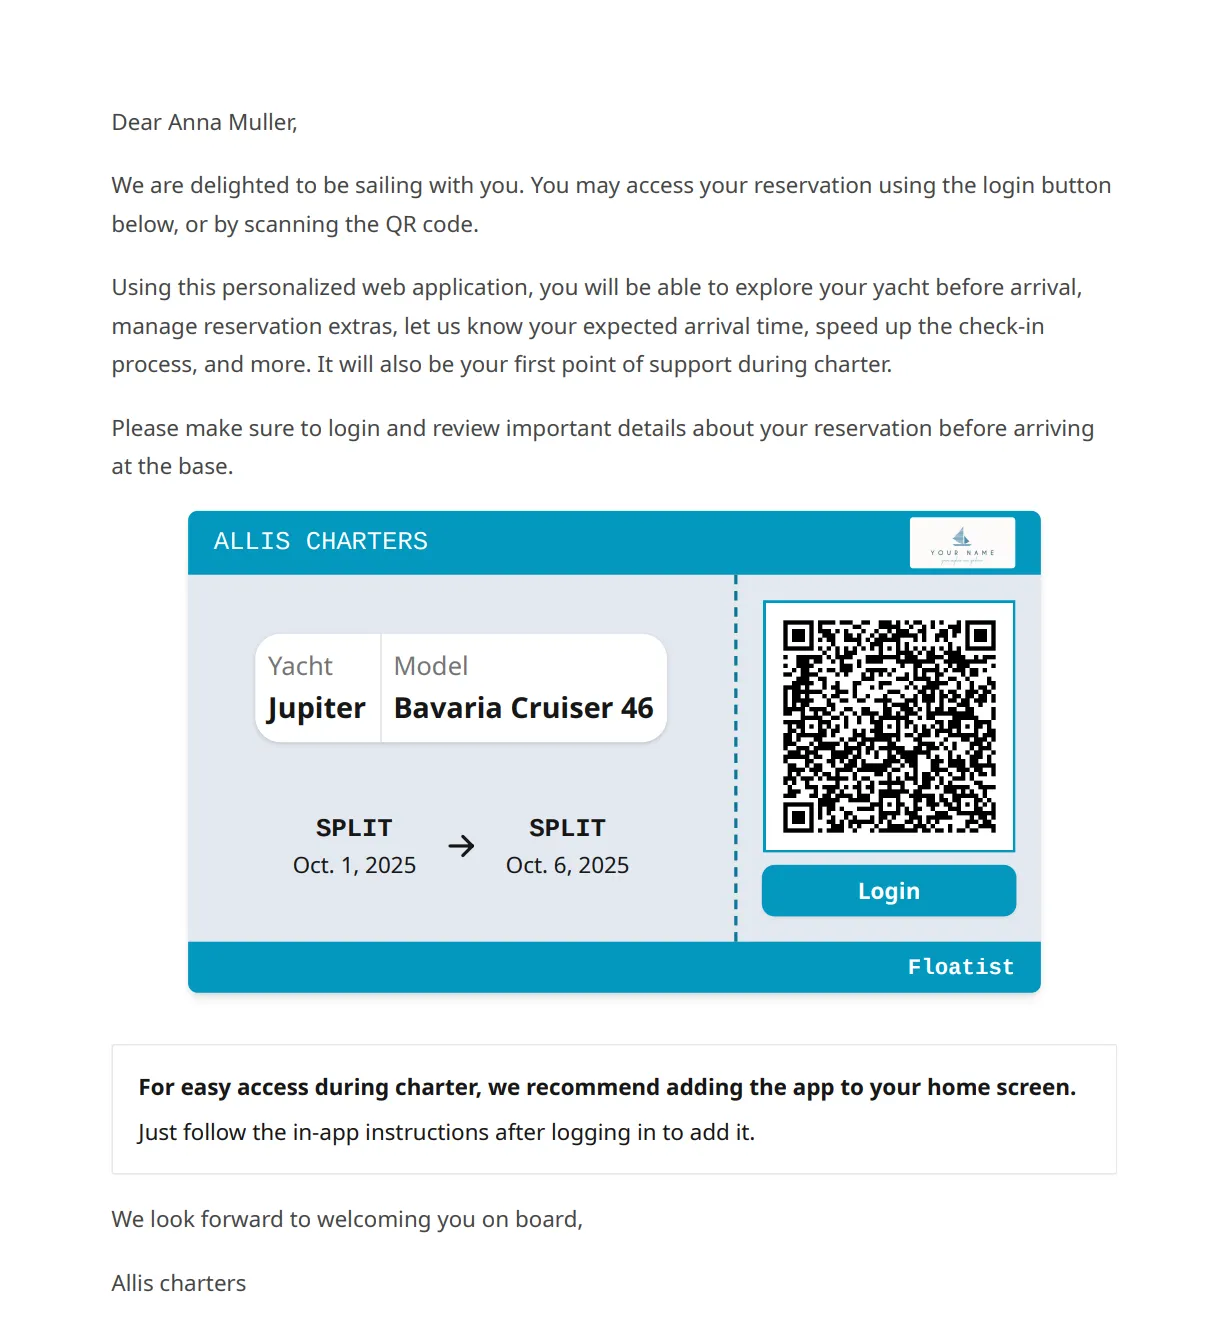
- Download boarding pass: Download the boarding pass as a PDF (available in any supported language). Beyond the QR code, it’s a full charter briefing — yacht details, departure and arrival base info with a Google Maps link, and the operator’s contact details. Share it through your preferred channel, or use Send emails to mail it straight to the guest — see Guest experience for the full contents.
2. Guest fills in arrival info, crew list, and extras
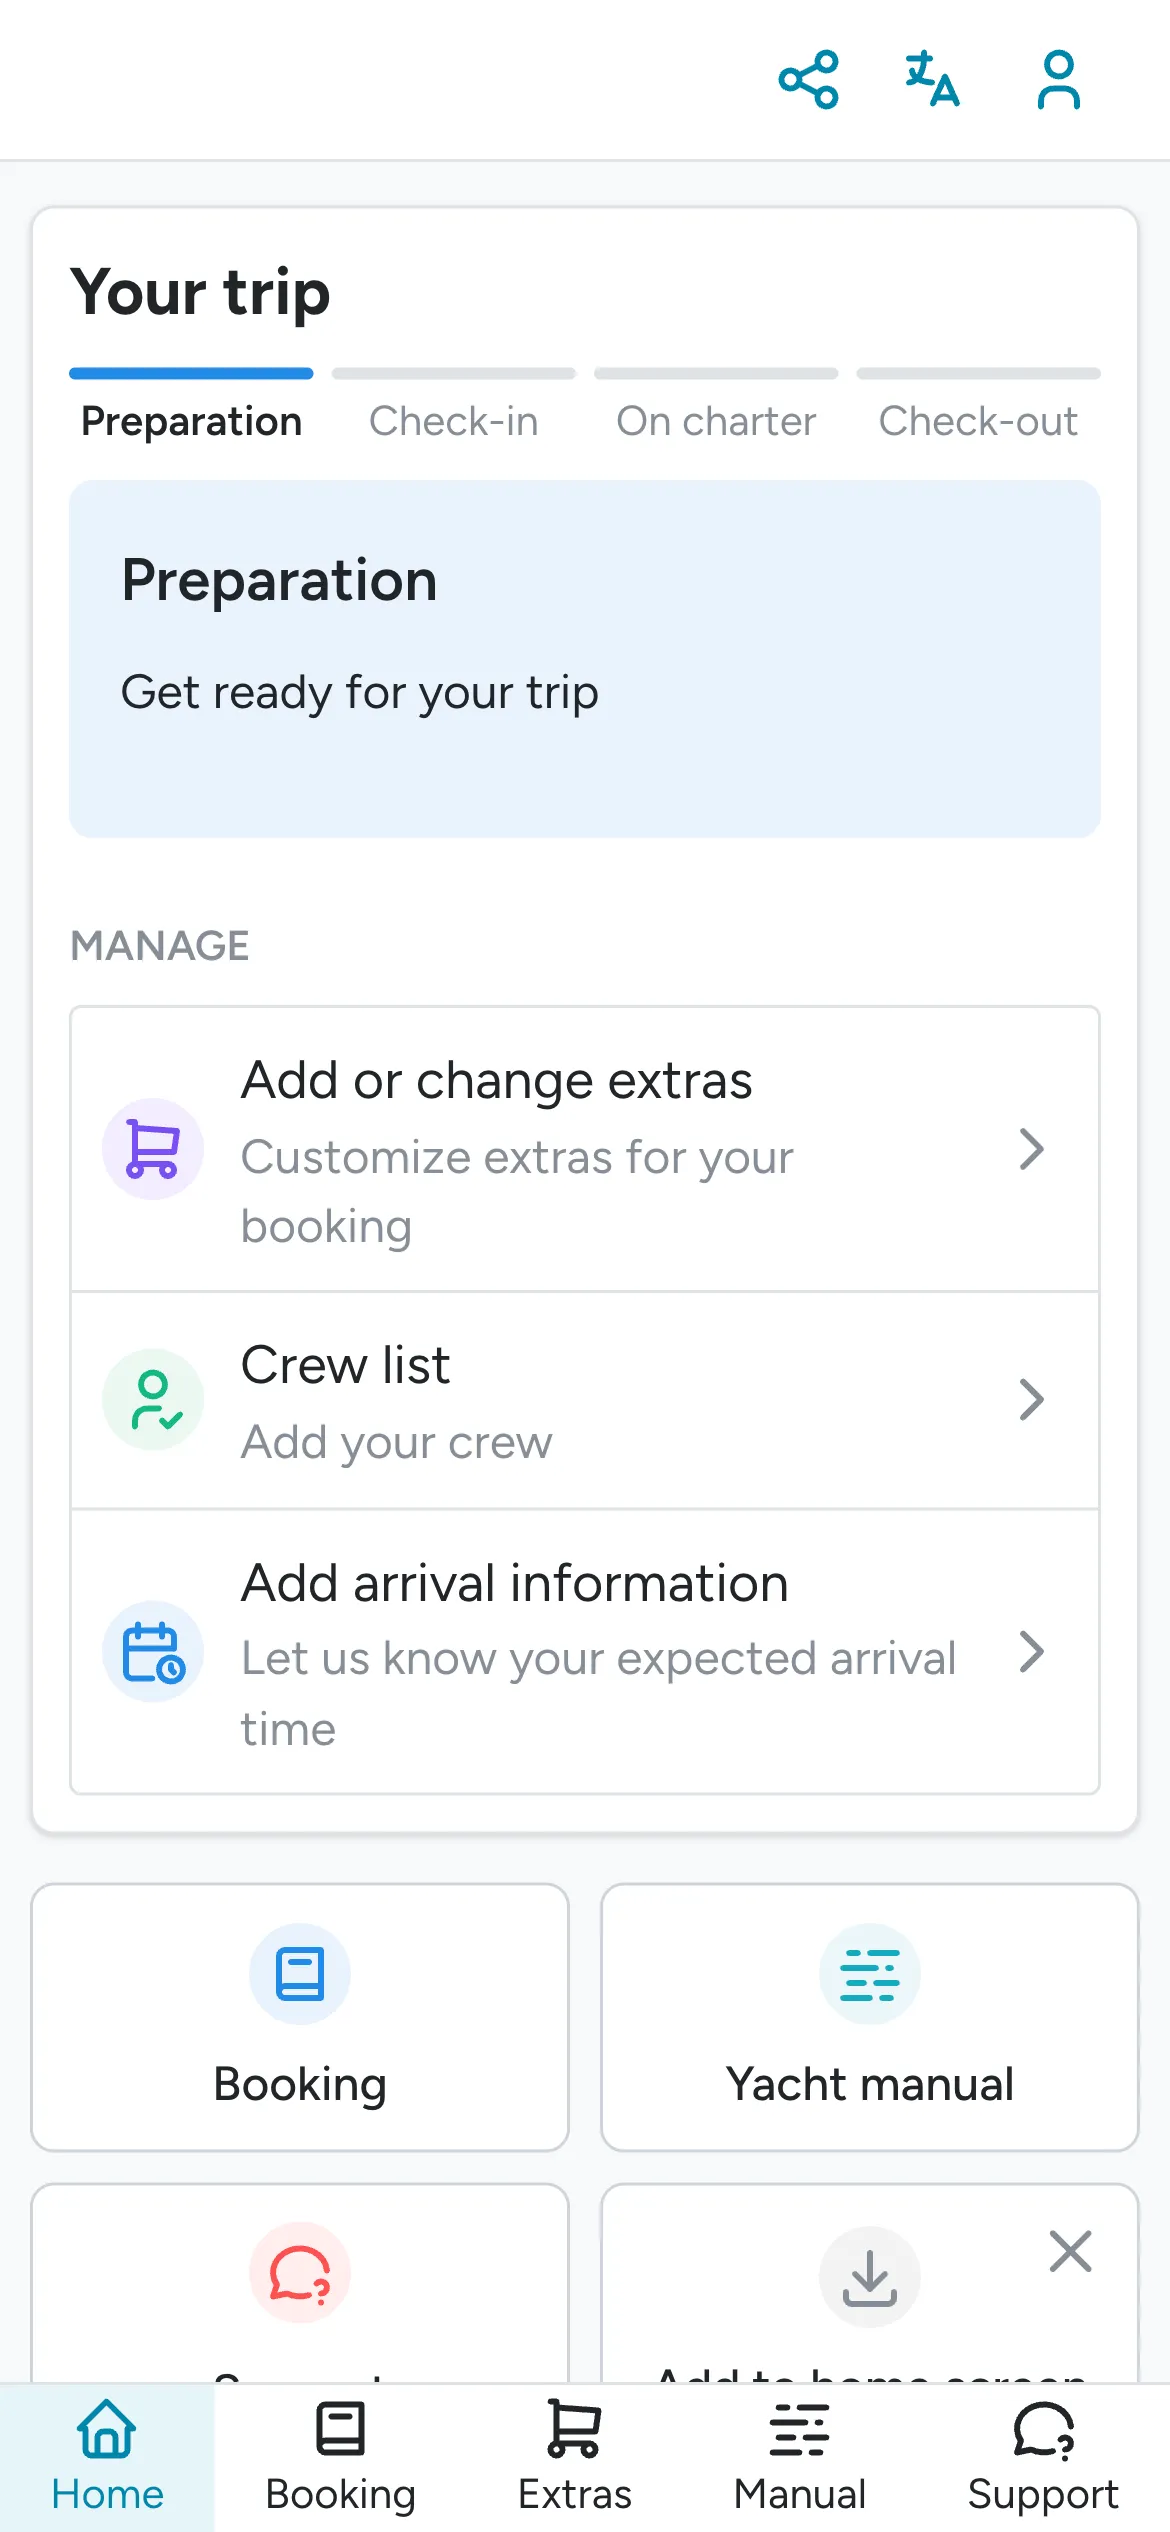
Section titled “2. Guest fills in arrival info, crew list, and extras”After sharing the login link, the guest can fill in their arrival information, the crew list, and book any extras from the guest app.
When the guest submits the crew list, it’s automatically marked as done on the booking timeline, and
they won’t be able to make any changes without someone from the base marking the crew list as
not done again.
3. Guest installs the app
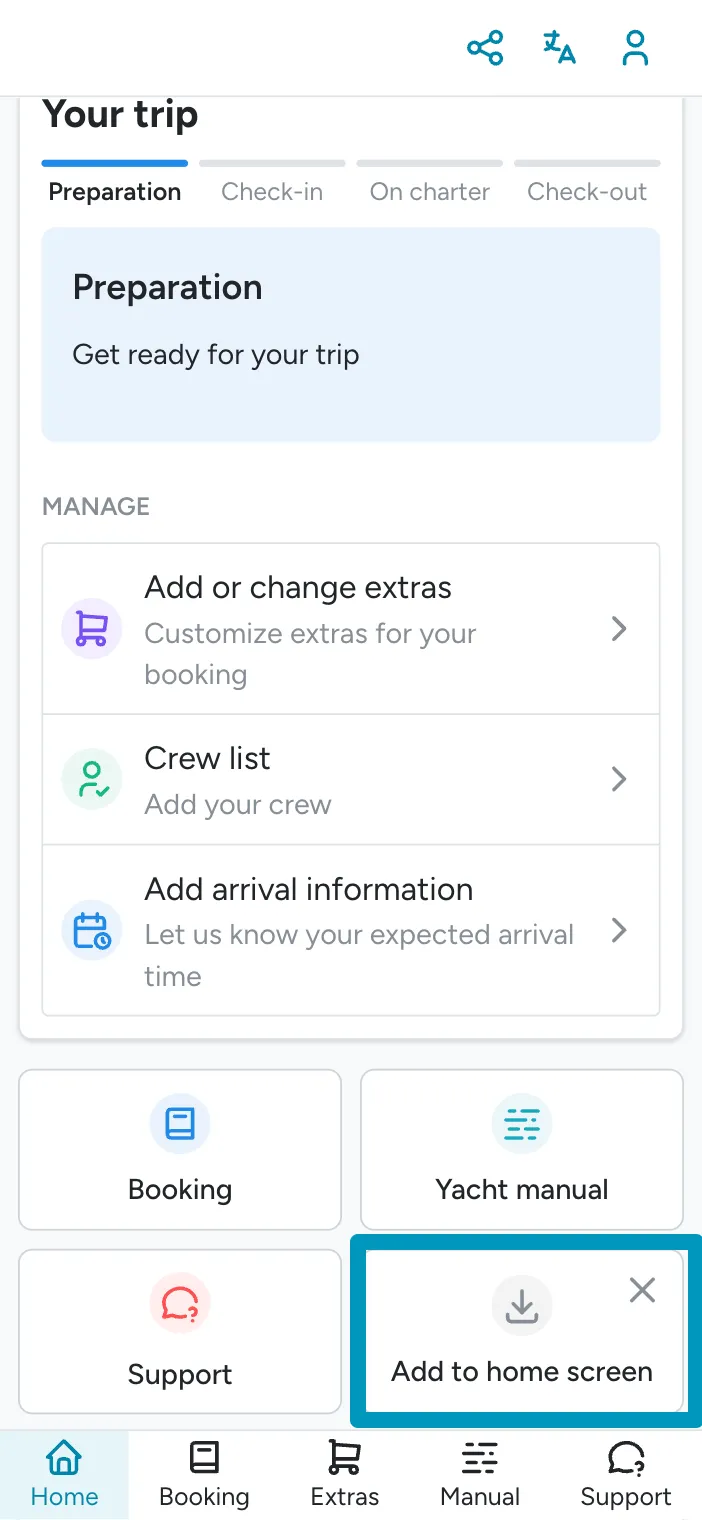
Section titled “3. Guest installs the app”For the best experience, the guest should install the app to their phone’s home screen. That keeps the link from getting lost in their browser, and ensures the yacht equipment instructions are available throughout the charter.
The welcome screen of the guest app has an Add to home screen button with device-specific instructions — staff follow the same flow, documented in Getting started.
We recommend checking whether the guest has installed the app before arrival. If not, walk through it with them at the reception.
4. Base team tracks progress on the timeline
Section titled “4. Base team tracks progress on the timeline”To reduce back-and-forth between team members, the base team should keep track of progress on the booking timeline. There are several timeline tools available for internal communication — see Booking management for the full reference.
-
Step statuses: Each timeline step has an icon that can be marked
doneornot done. For example, once cleaning inside has been done, the person who did it should mark it as done by clicking the icon next toCleaning inside.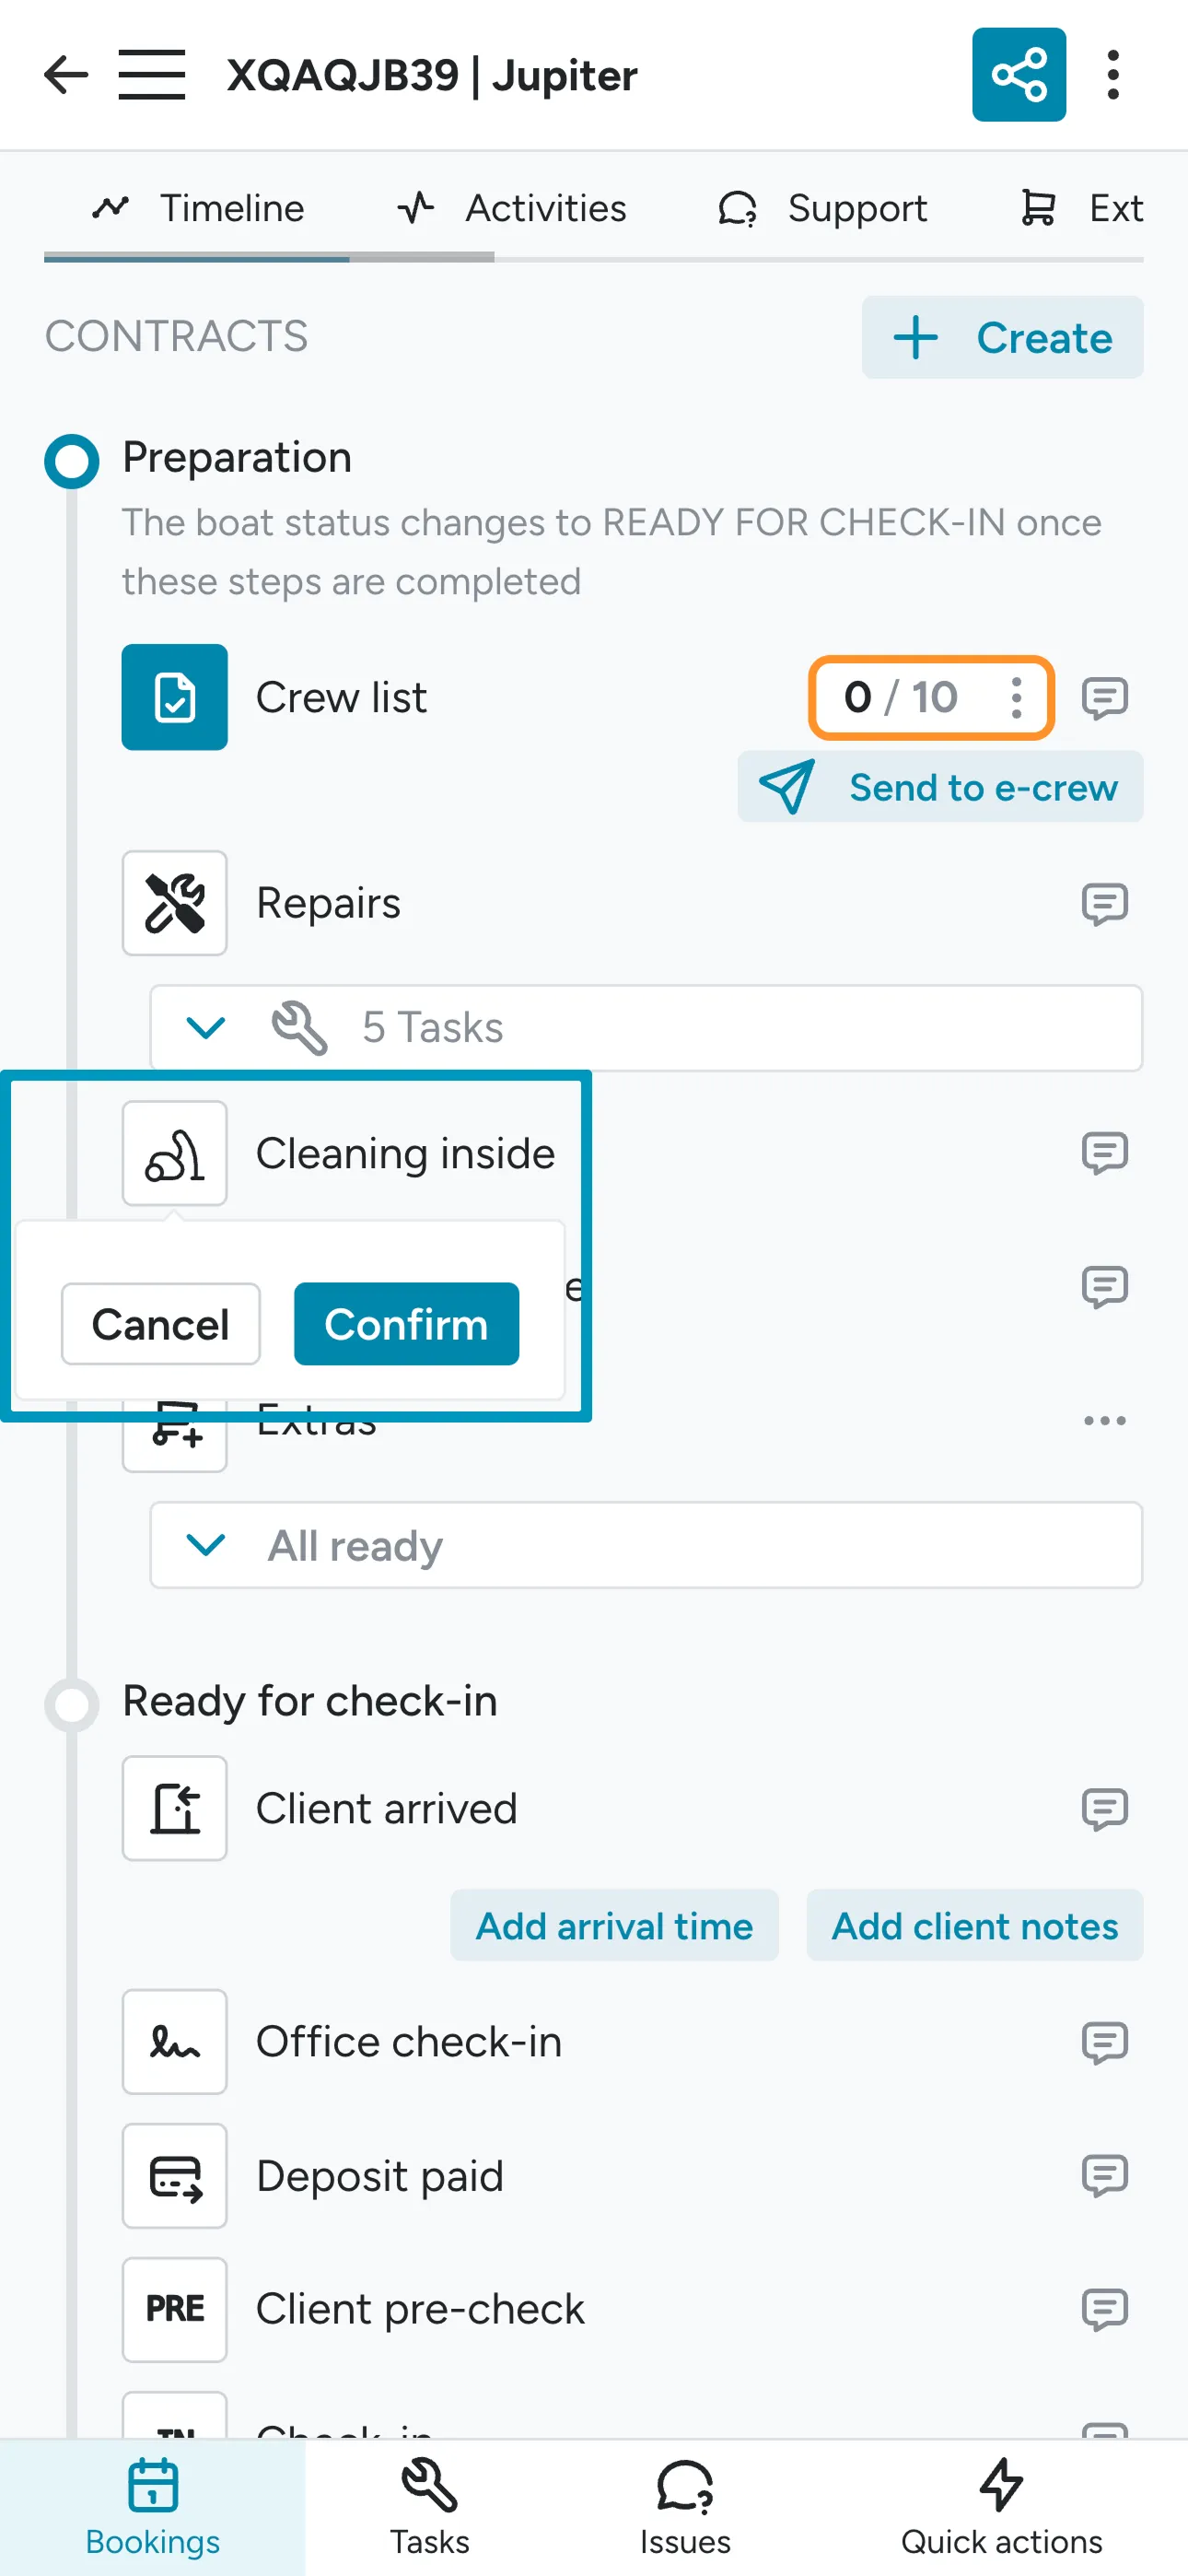
-
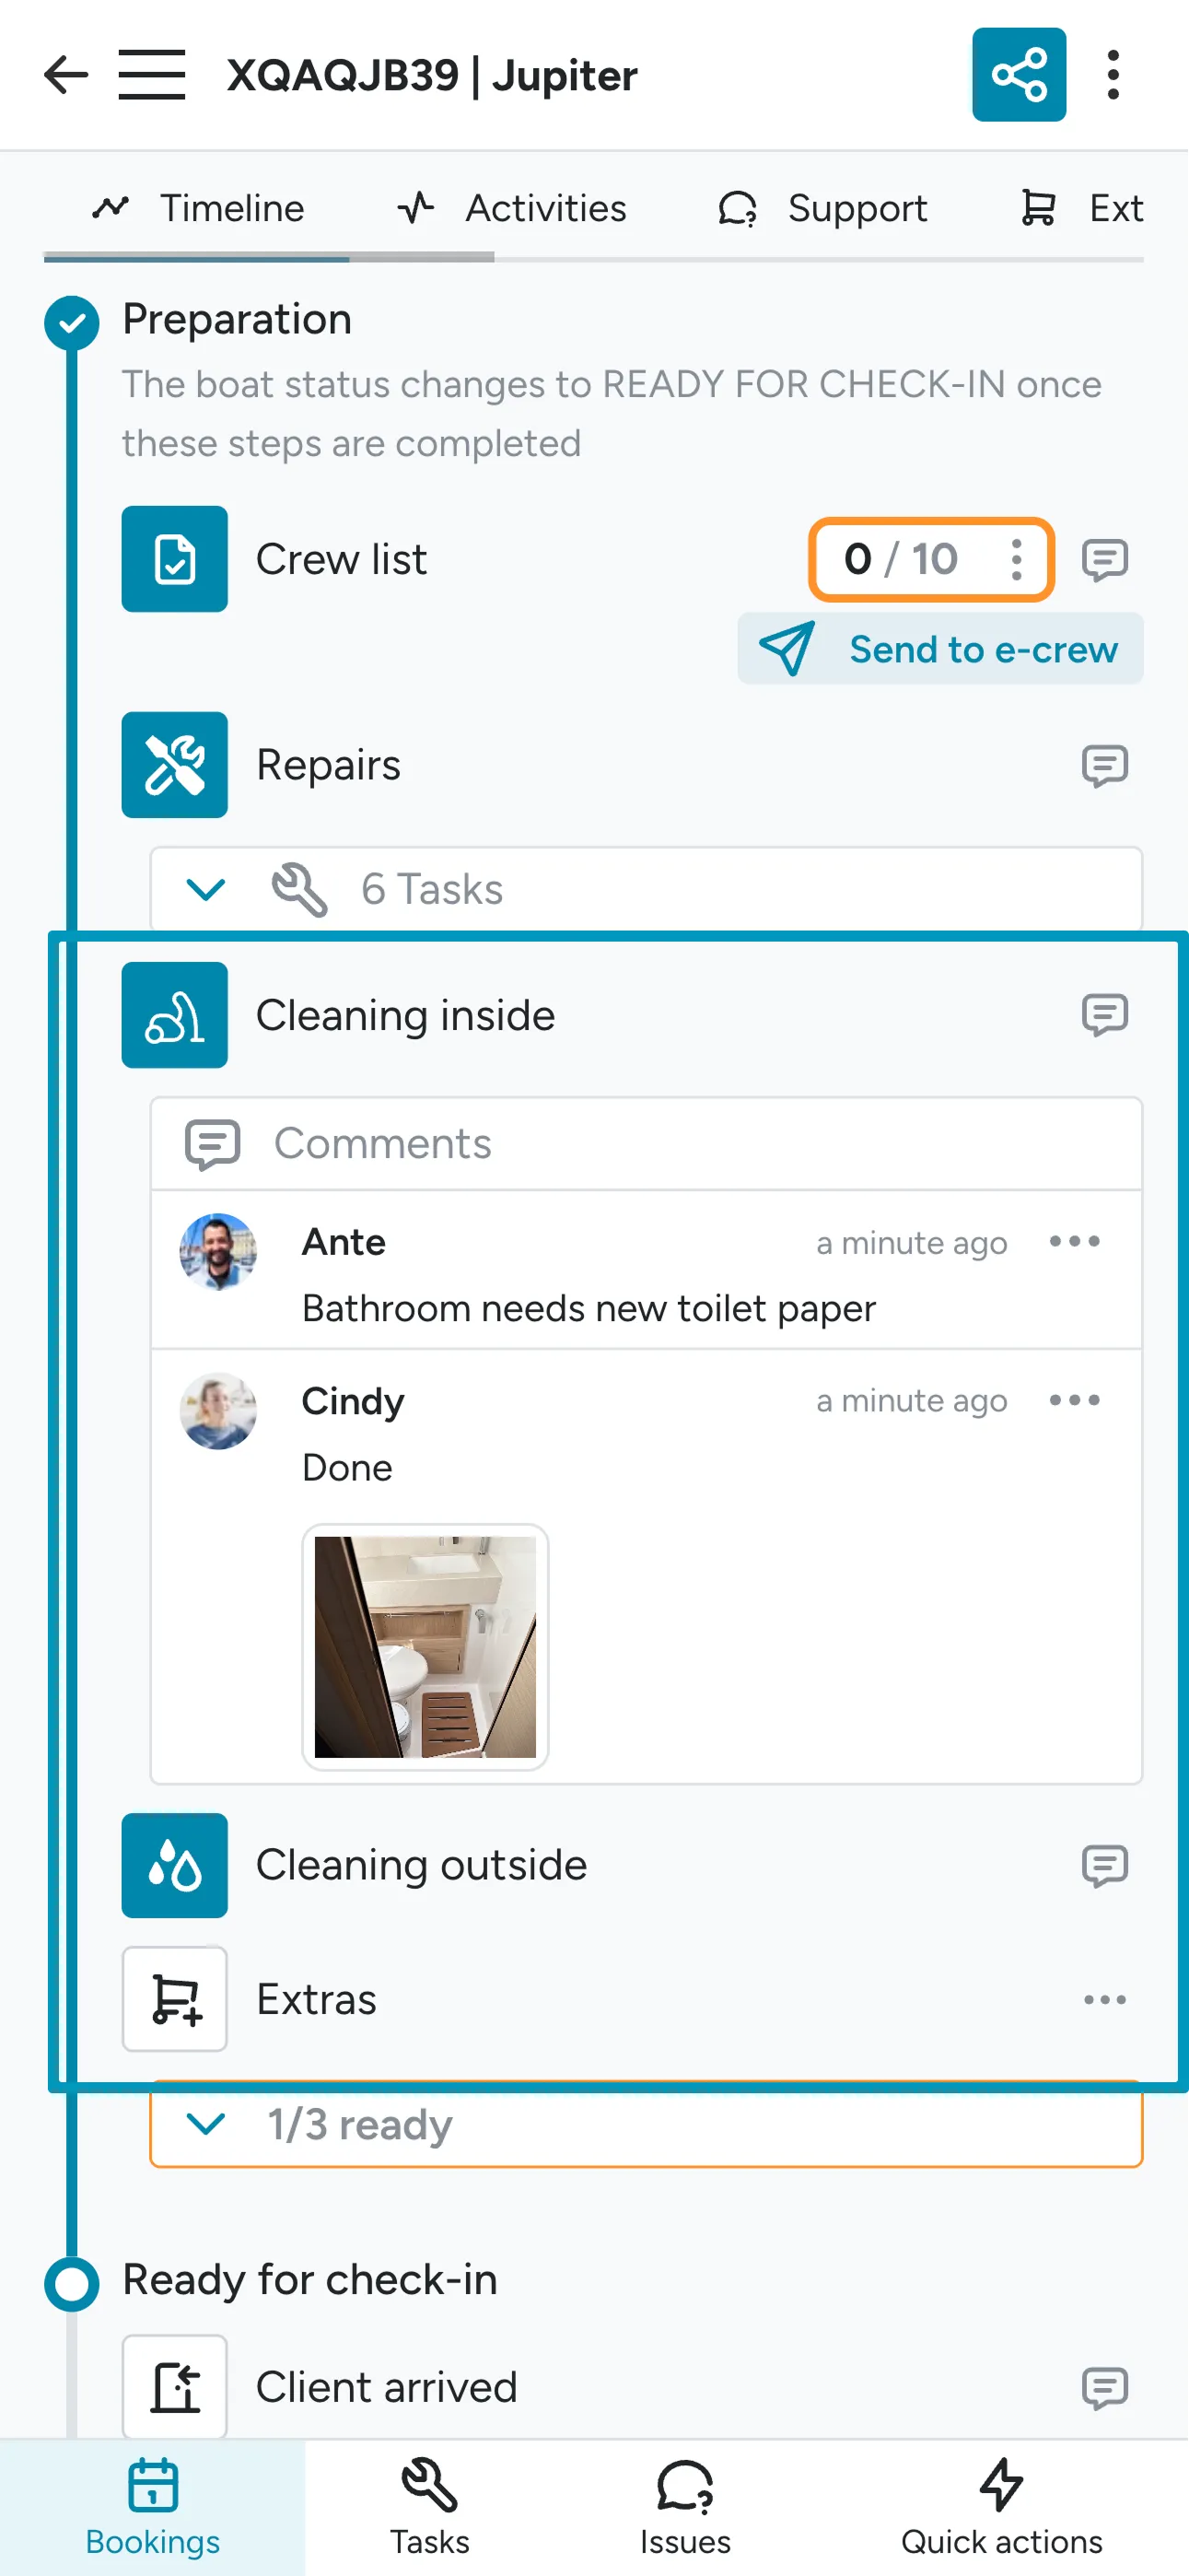
Step comments: Each timeline step can have comments with text and images. Team members subscribed to notifications for that step receive a notification for each comment.
-
Tasks: Within the
Repairsstep, tasks due on or before the first day of the charter show up automatically. Use this overview to complete any outstanding tasks before the charter leaves.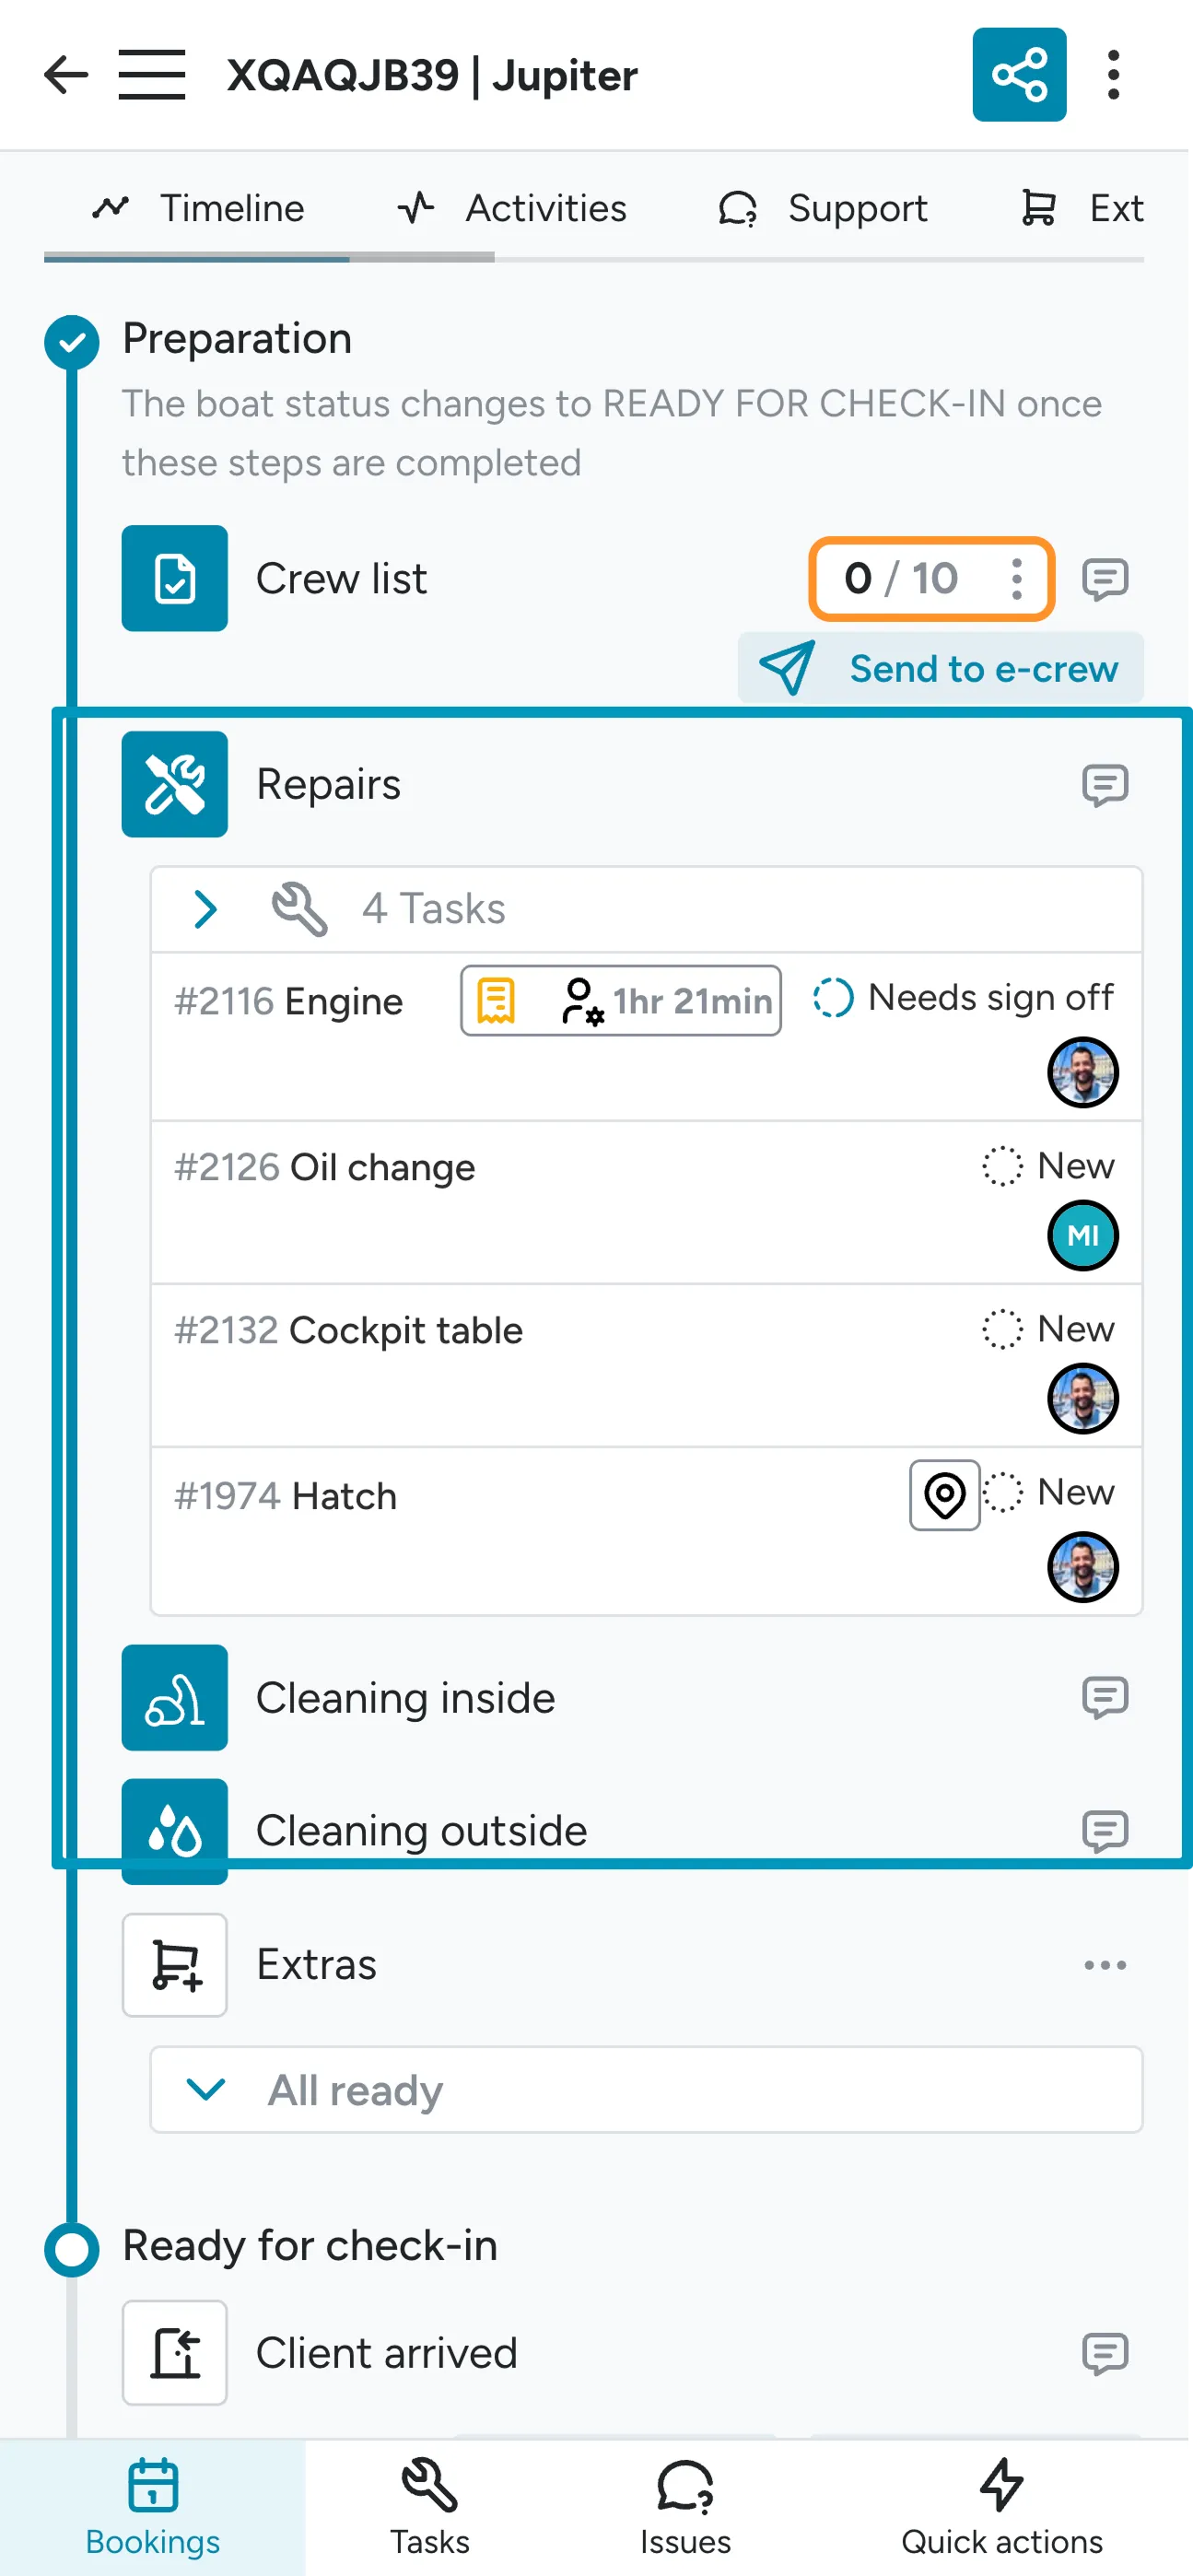
-
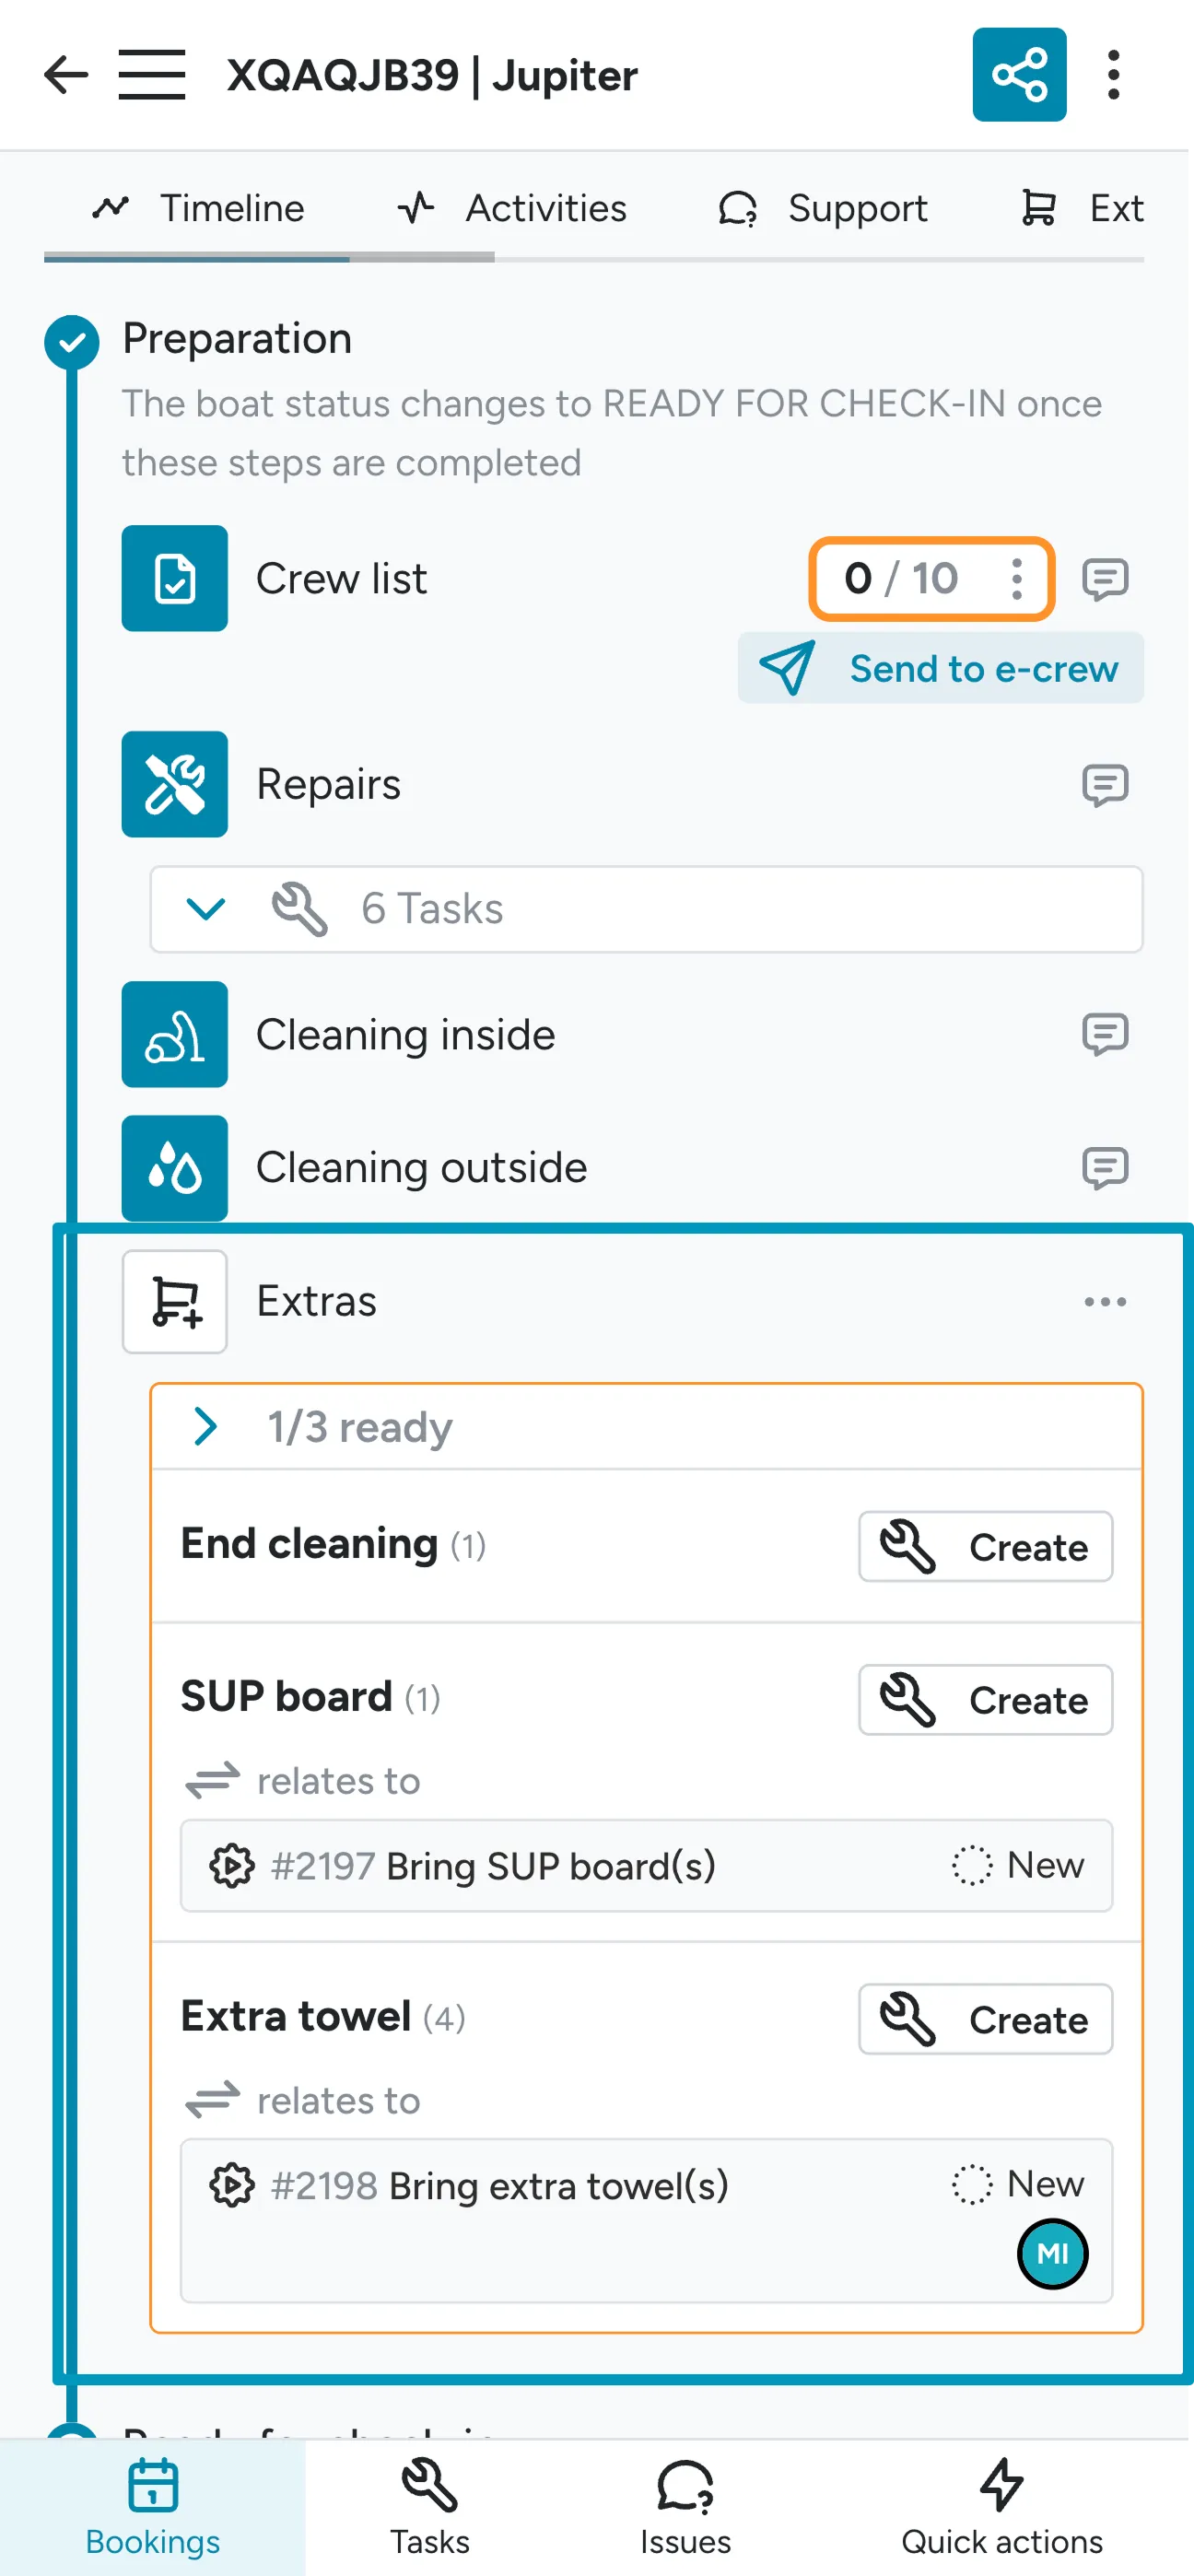
Extras tasks: If extras are enabled for your account (see Extras setup), you can automatically or manually create a task for each extra to be handled. See Extras preparation for the operations workflow.
5. Pre check-in
Section titled “5. Pre check-in”Once the first four timeline steps are completed (Crew list, Repairs, Cleaning inside,
Cleaning outside), pre check-in opens. A blue Start button appears automatically on the
guest’s home screen.
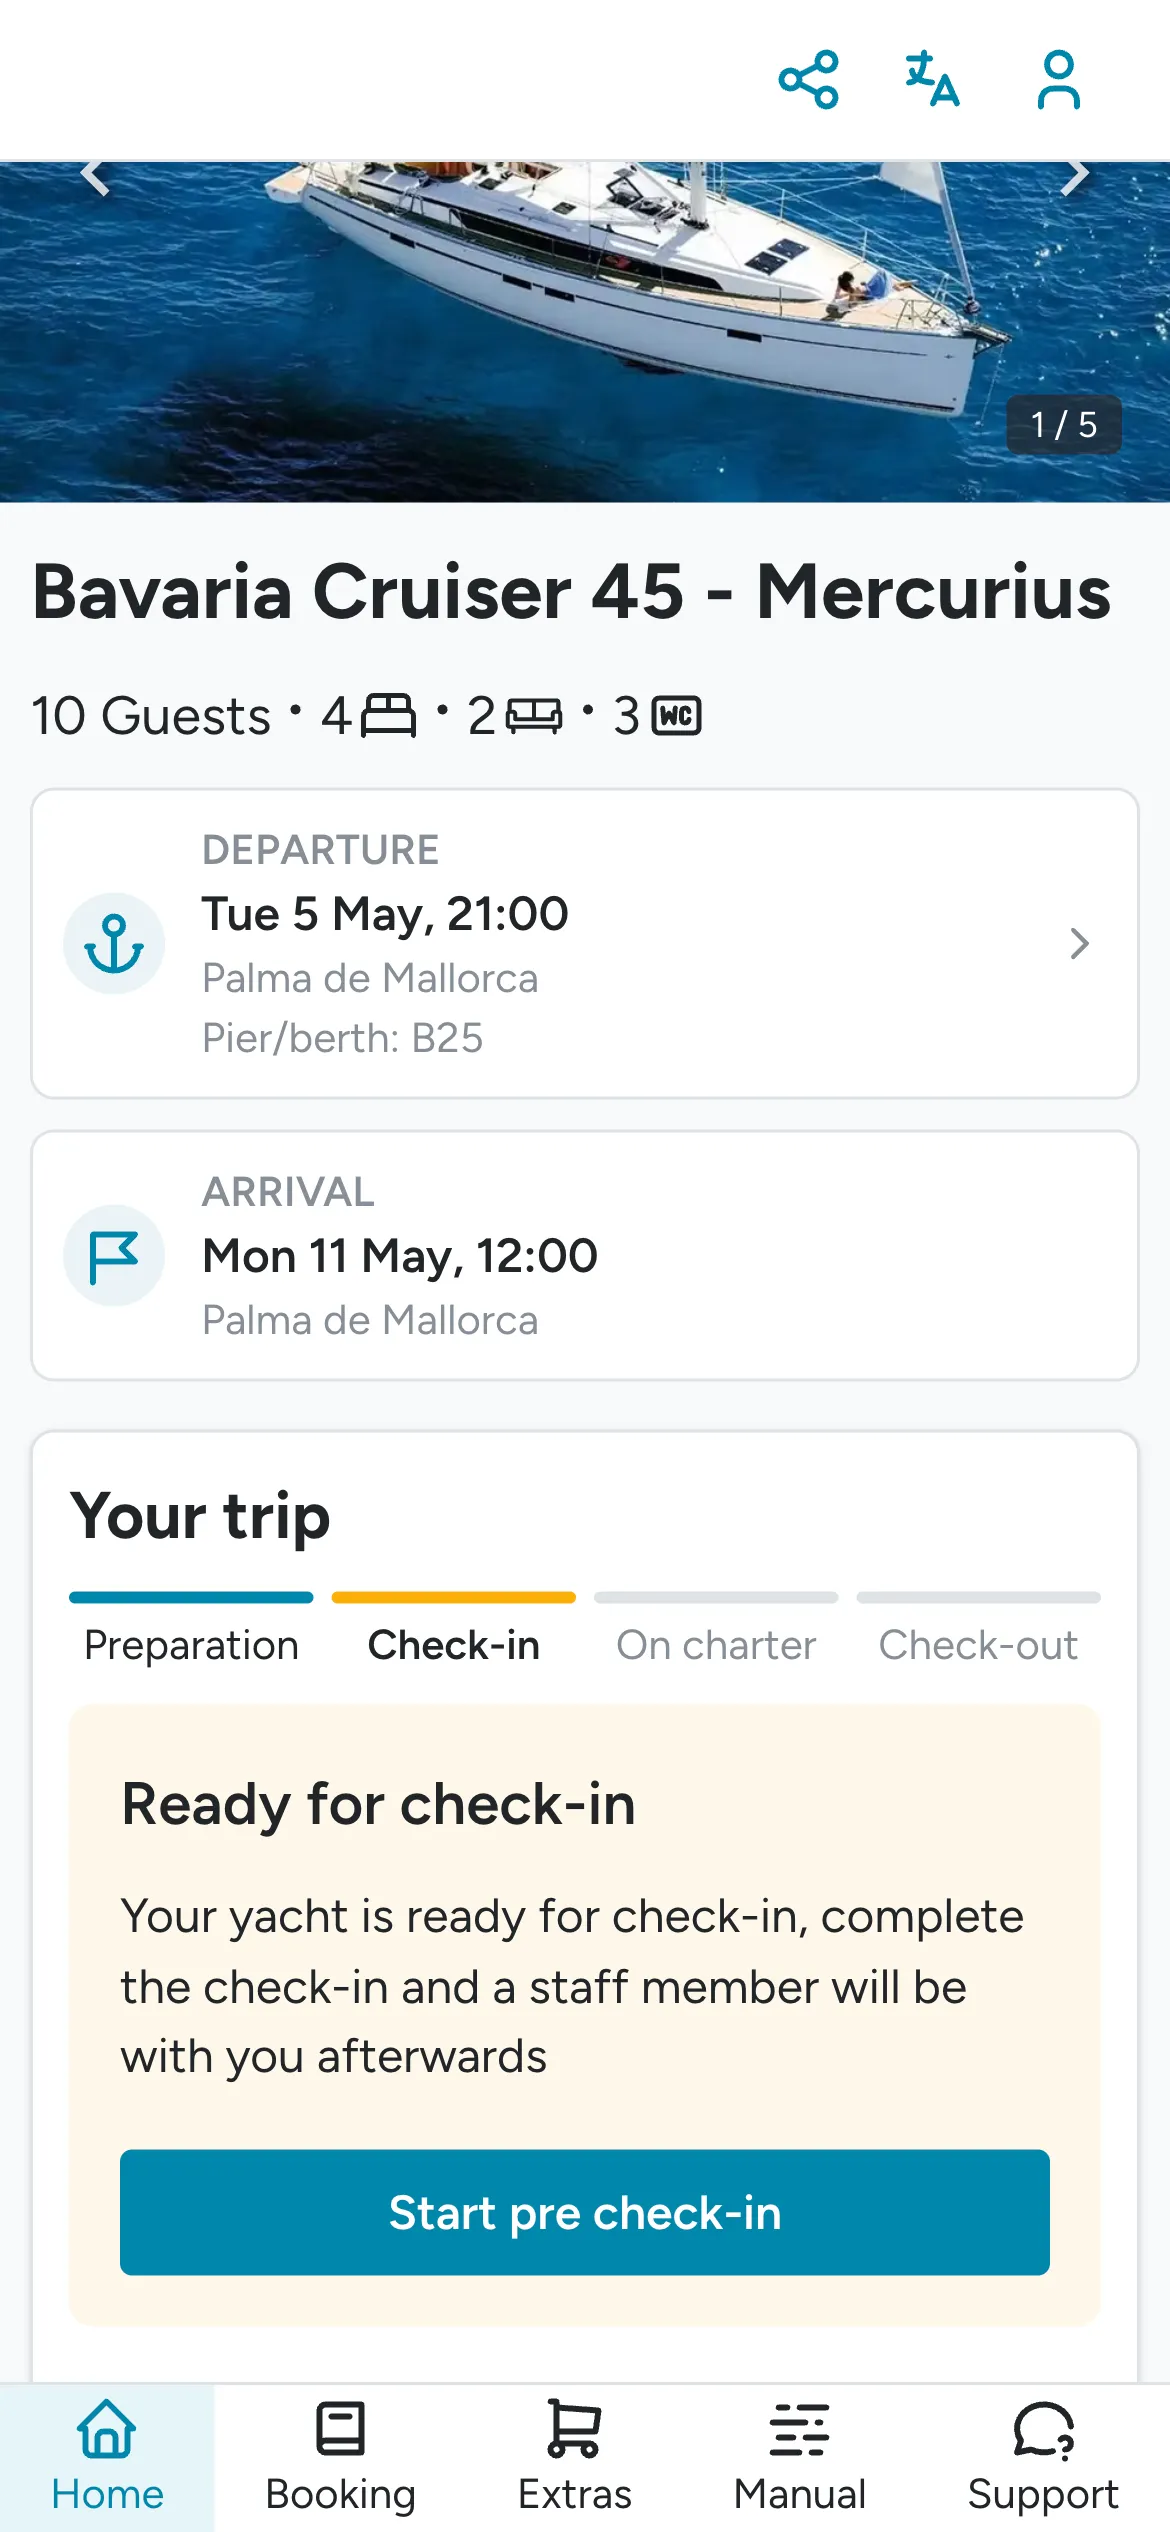
The goal of pre check-in is for the guest to walk through everything at their own pace, guided by the app’s instructions, images, and videos. A staff member doesn’t need to accompany them. The guest can add remarks, photos, or questions to the list — see Guest experience for the guest-side view. Once they submit, the base team gets a push notification and a staff member can come to the boat to discuss open questions or resolve issues.
Pre check-in is optional. If you don’t want the guest to do it, mark it as complete manually by
clicking the PRE icon, then continue to check-in.
Pre check-in troubleshooting
Section titled “Pre check-in troubleshooting”The pre check-in start button isn’t appearing
Section titled “The pre check-in start button isn’t appearing”Make sure the pre check-in step on the timeline is not already marked as done by accident. If
it is, undo it.
6. Check-in
Section titled “6. Check-in”When the guest submits pre check-in, the staff team gets a push notification. Staff can then immediately review the guest’s remarks by opening the Check-in view.
We recommend that staff prepare before going to the yacht: open the check-in, click Start to preview the guest’s filled list, and gather any missing equipment they noted. Walking onto the boat already prepared makes for a much smoother experience.
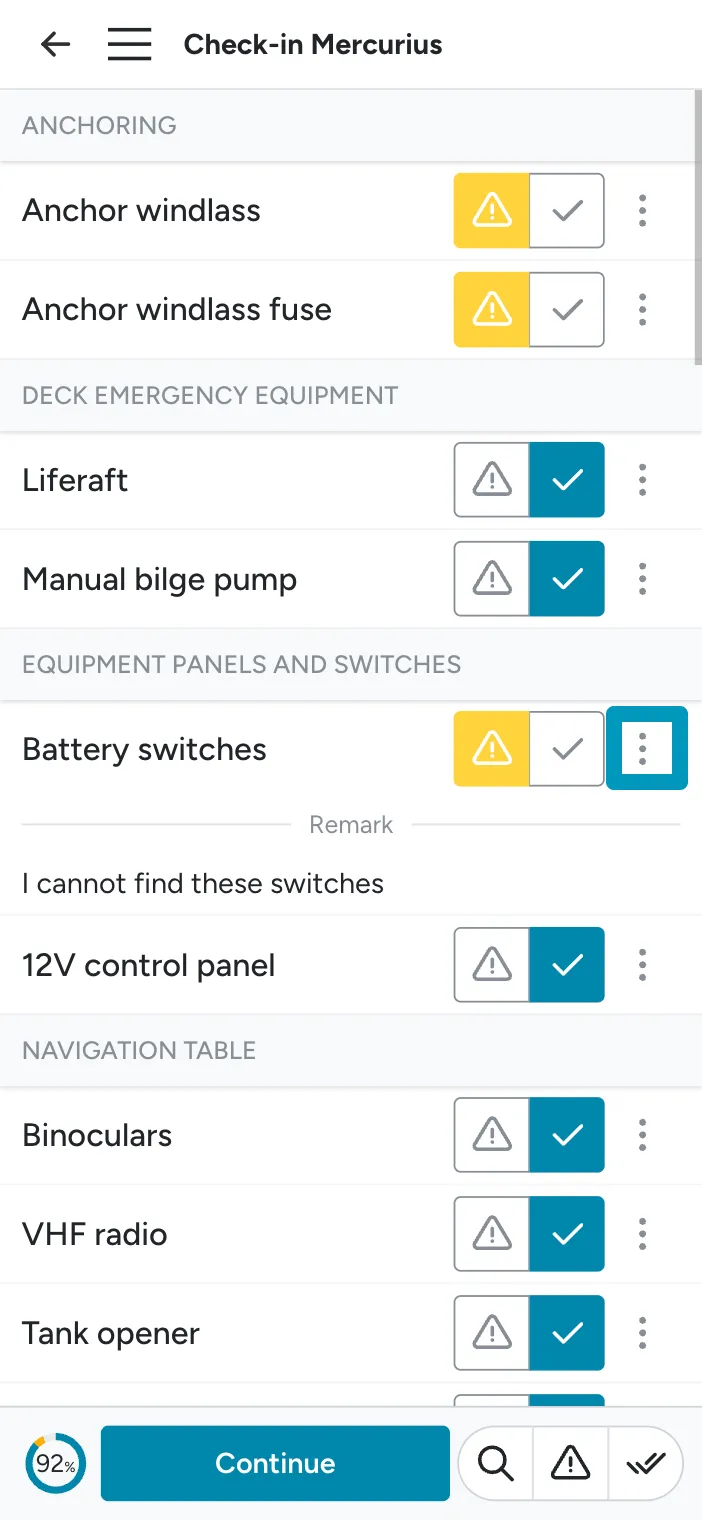
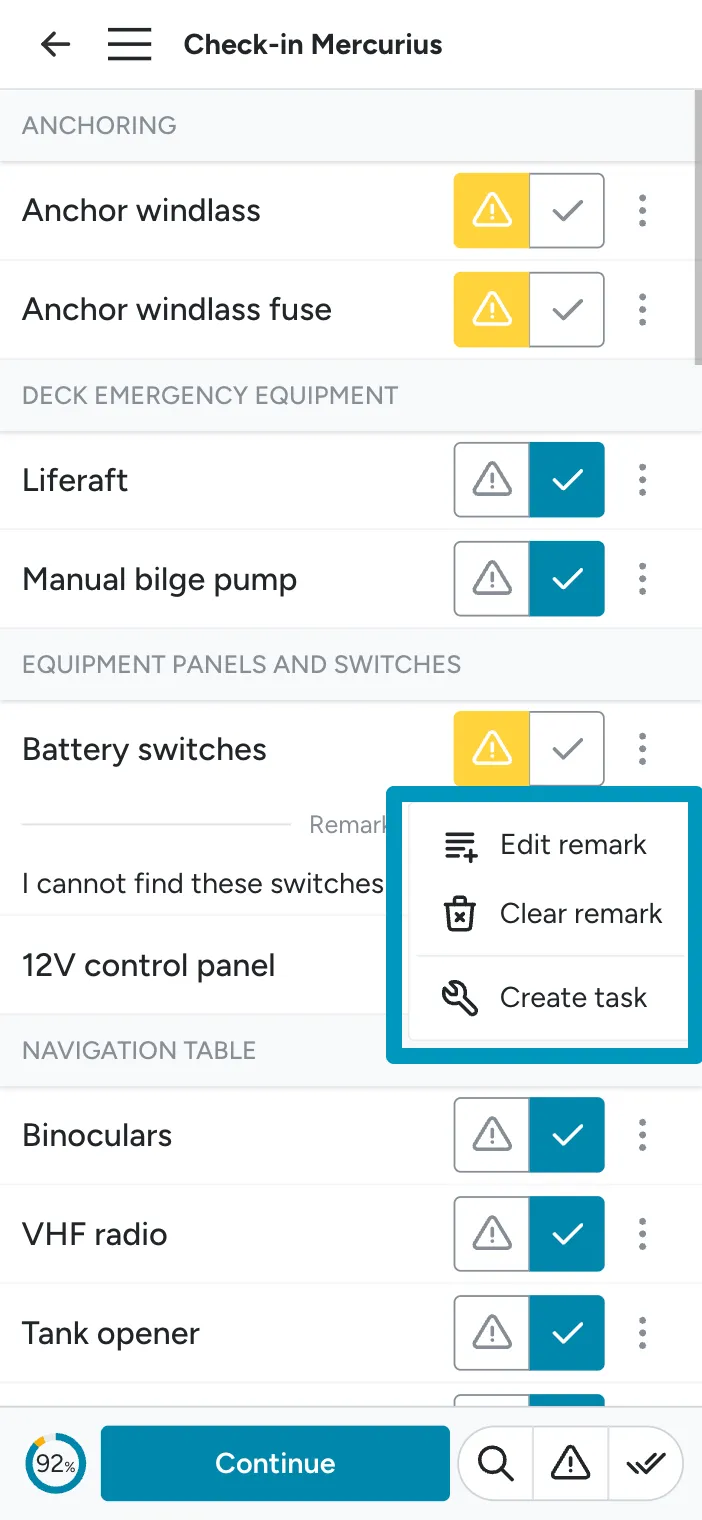
On the yacht, the staff member walks through the comments together with the guest, collects any required signatures (see Signatures for setup), and submits the final checklist.
7. Charter support
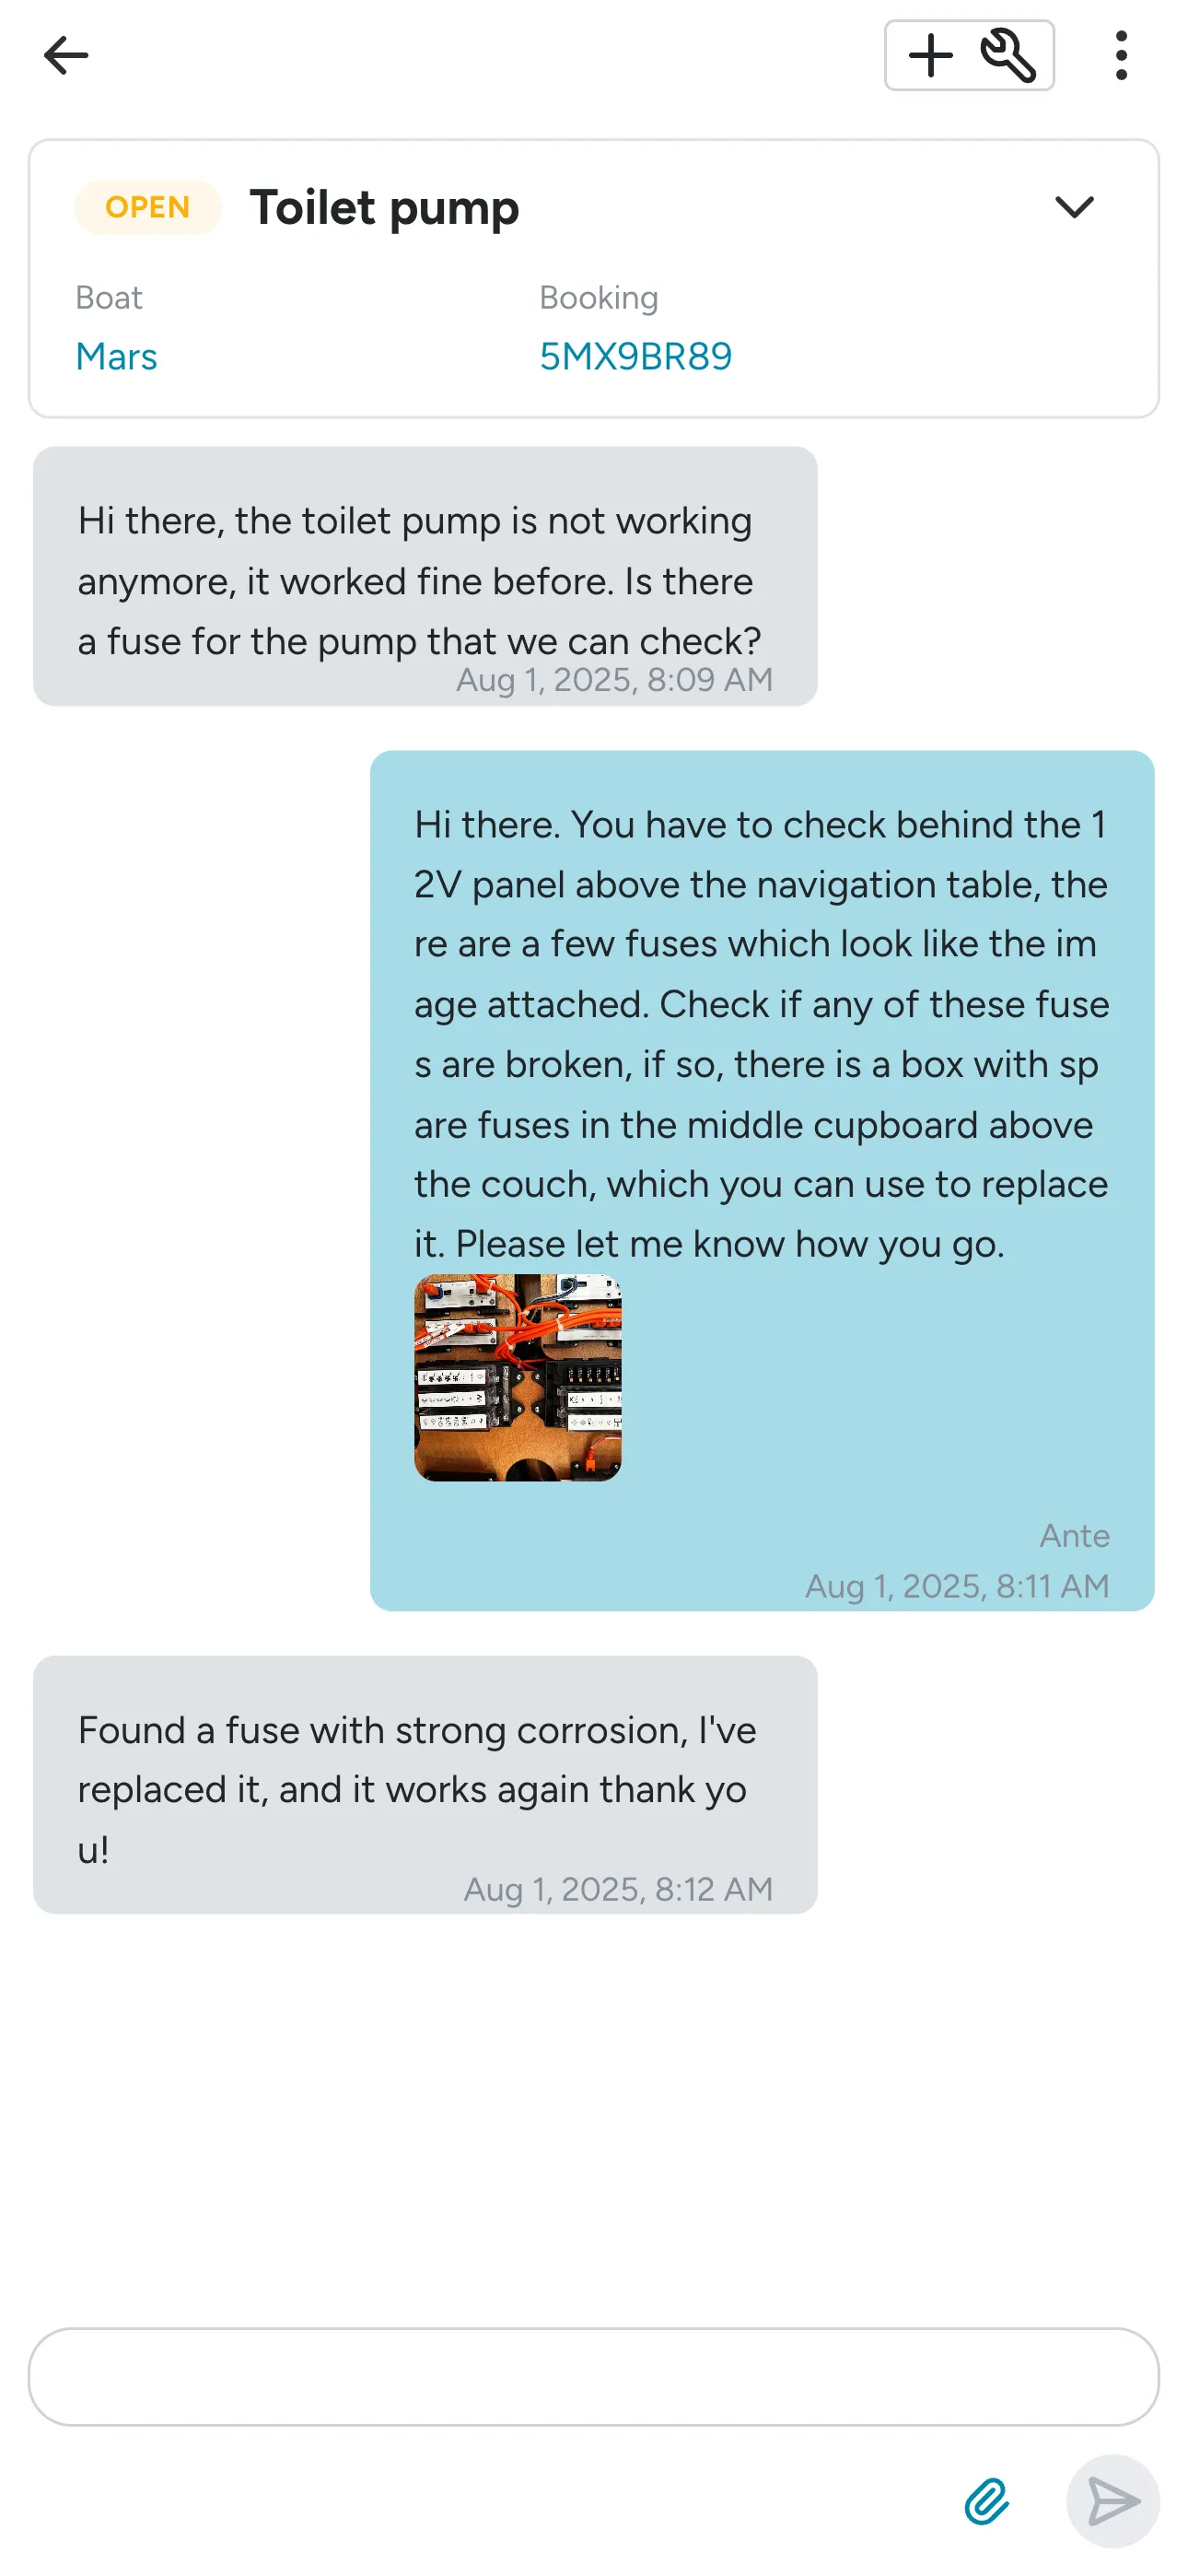
Section titled “7. Charter support”While the guest is on charter, they can request support from the app. Each request creates a Charter support entry in Bookings > Charter support.
Staff should keep an eye on the Charter support list and answer guest questions as they come in.
8. Check-out
Section titled “8. Check-out”When the guest is ready to return the yacht, they should press the Request checkout button in the guest app. This signals to the base team that the boat is on its way back, and prompts the guest to leave a review of their charter. Some operators initiate check-out from the staff side instead — either approach works, but the guest-initiated flow is more transparent and captures the review prompt.
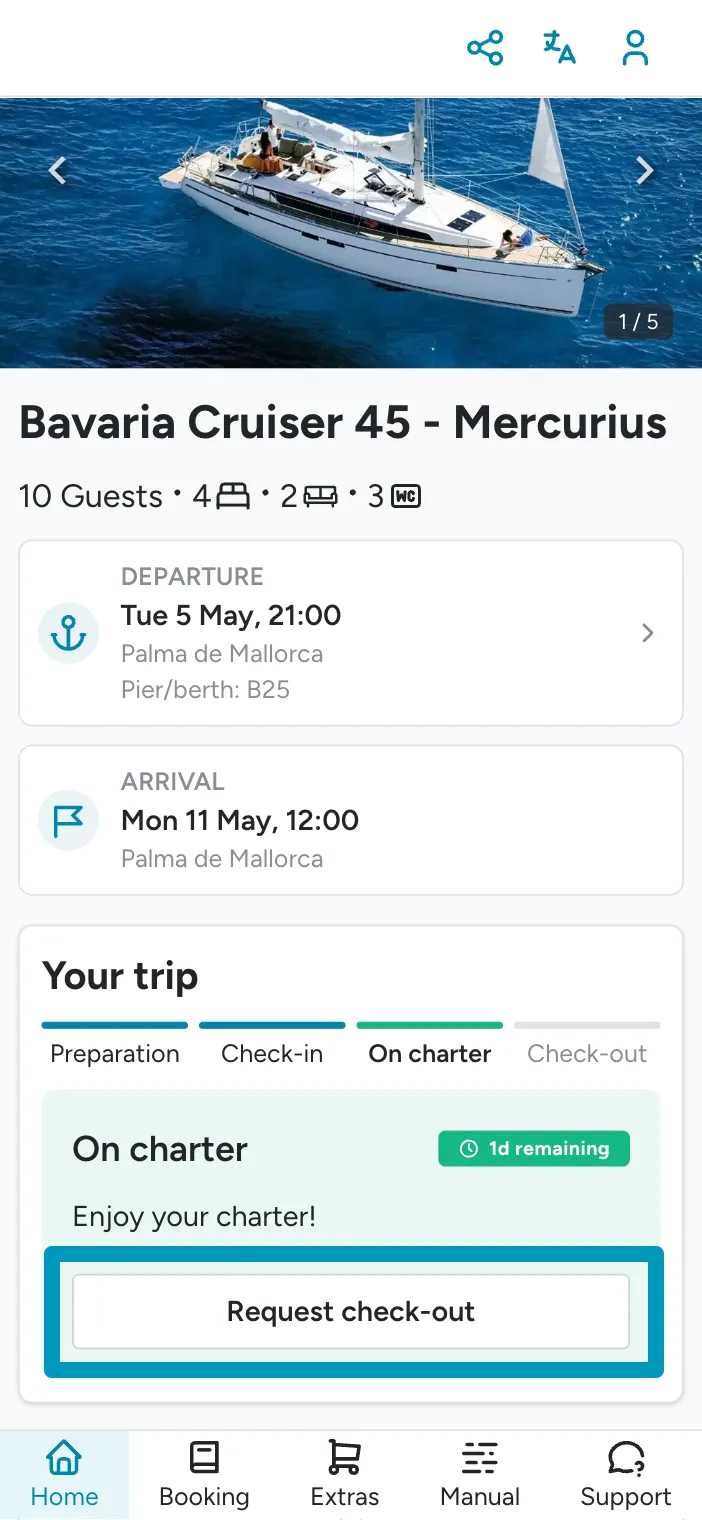
Always do check-out with the guest present. It’s the fairest moment to identify any damage or missing items, and any signatures collected at that point reflect agreement from both sides. Check-out runs on the staff device. The check-out checklist is generally similar to check-in but flexible per operator — you can tailor each phase in your configuration.
Handling damage or missing equipment
Section titled “Handling damage or missing equipment”When something is wrong on the boat, turn it into a task directly from the checklist:
- In the check-out list, click the three-dot menu next to the item.
- Click Create task.
- The task is created automatically with a due date of the following day.
This keeps the issue tracked without breaking the flow of check-out — same pattern as creating follow-up tasks from flagged items on regular task checklists.
Closing the booking
Section titled “Closing the booking”Submit check-out before releasing the deposit — the deposit decision often depends on what the check-out turned up.
If you want to inform the client of any damages found after the check-out has been submitted, such as something the diver found, the best way to do so is to use the client notes in the deposit step.
The booking automatically moves to the final Checked out stage once all timeline steps are complete. After all steps are completed, the guest receives an automatic email with the check-out PDF.