Items and stock
Your warehouses hold items, and each item has stock: a number of units on the shelf. This page covers adding items, adding stock when deliveries come in, and taking stock out.
Barcode scanners
Section titled “Barcode scanners”Most operators work with a barcode scanner: scanning is the fastest way to add stock when a delivery comes in, find an item and take stock out. Any USB or Bluetooth barcode scanner that works with your computer, tablet or phone will do. No setup is needed in Floatist.
The Scan barcode window can use either your barcode scanner or your device’s camera. It starts on the camera, so the first time on each device, switch it to the barcode scanner with the scanner icon at the top of the window. Floatist remembers your choice on that device. Without a scanner, use the camera instead.
Adding items
Section titled “Adding items”Once you have at least one warehouse, you can start adding inventory items to it.
- Go to Inventory > Items and click Add stock.
- If you want to add from a barcode, select Scan barcode and scan it with your barcode scanner (see Barcode scanners). If the barcode belongs to an item you already have, Floatist opens Add stock for that item instead of creating a duplicate. If it doesn’t, a new item opens with the barcode filled in.
- Otherwise, you can add the item manually by selecting New item.
- Fill the details of the item, like the name, warehouse, and price, and then click Save
Items and FIDs
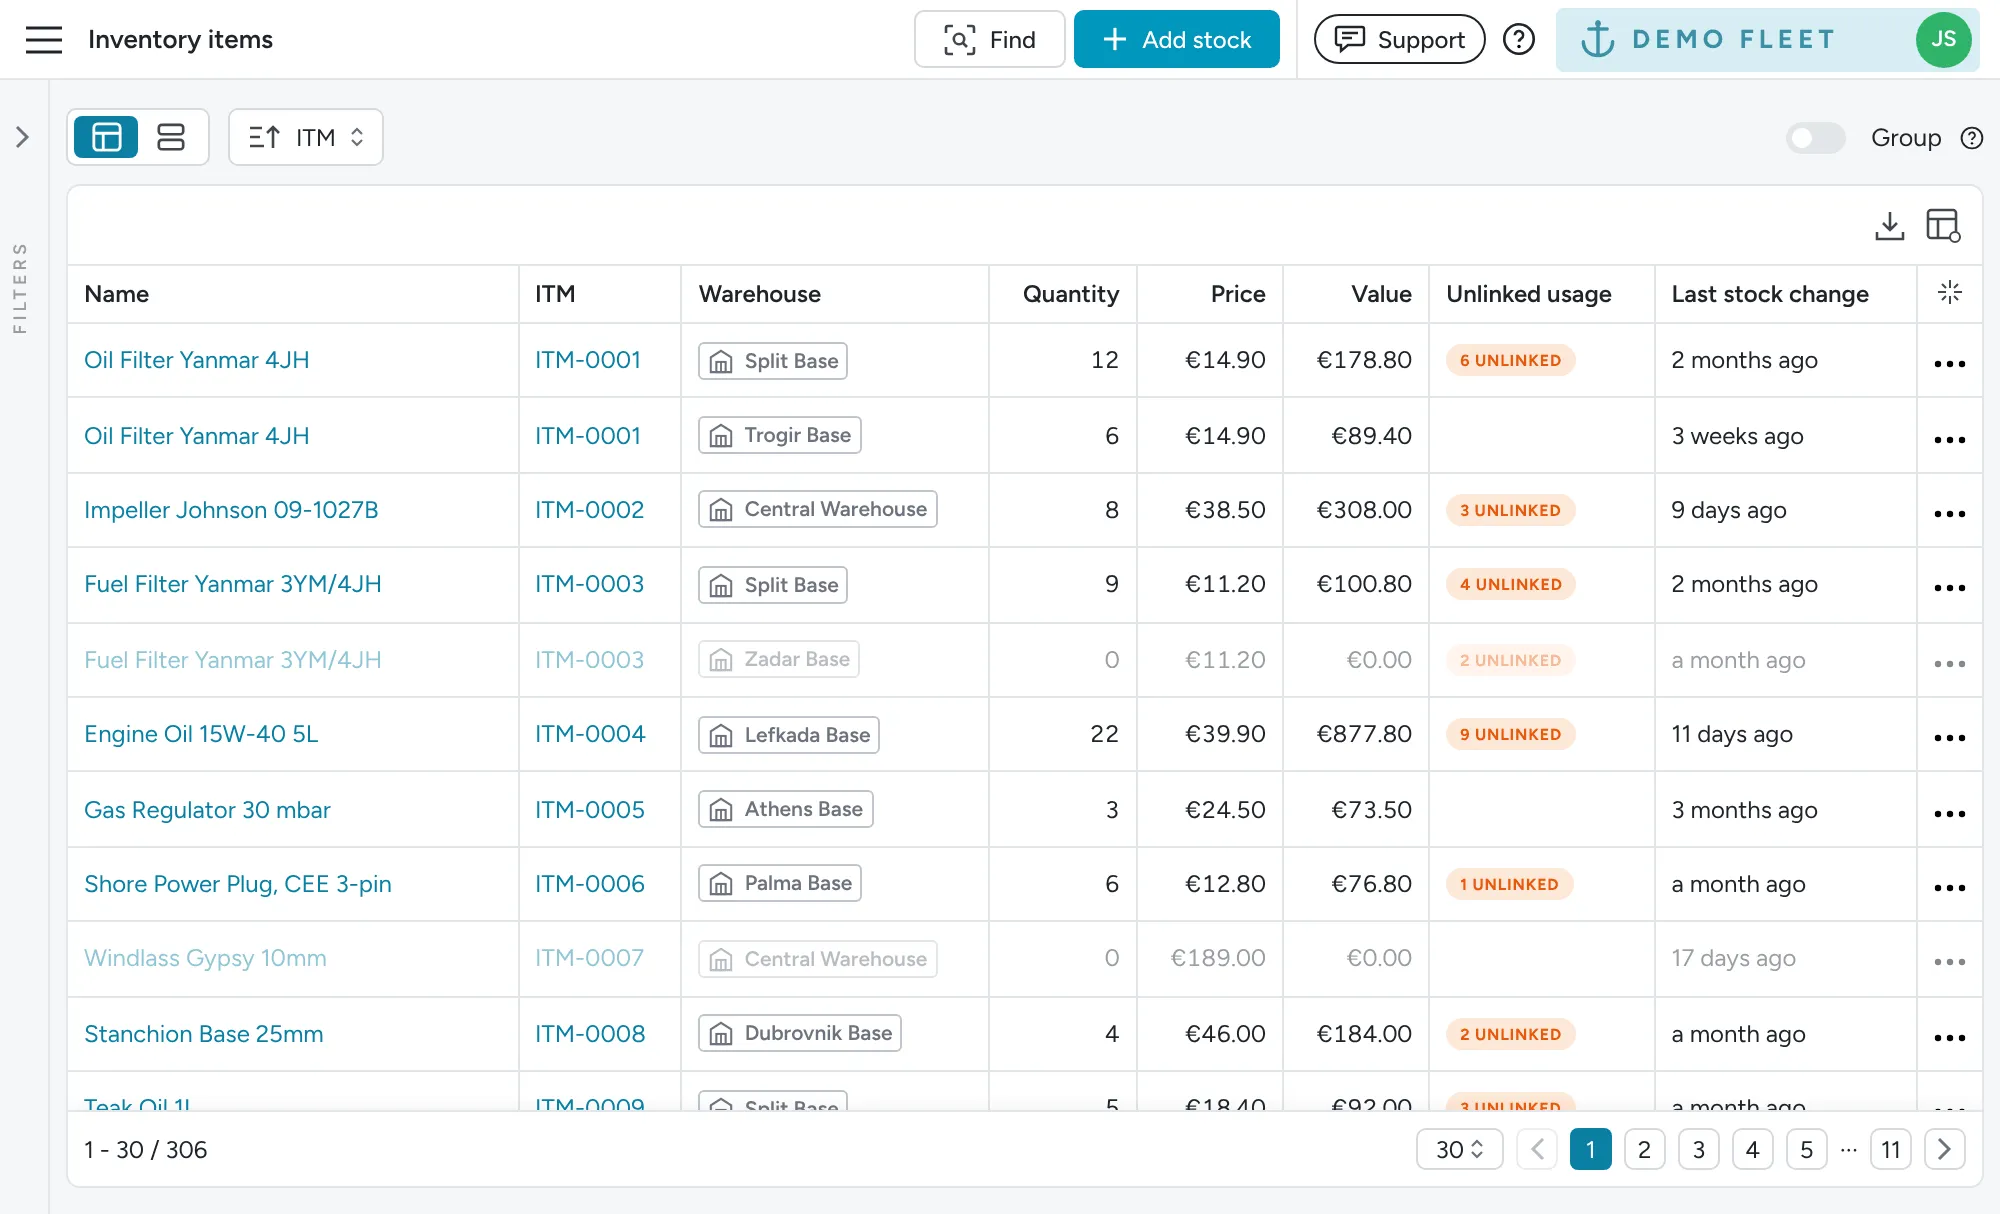
Section titled “Items and FIDs”Every item has an FID, the identifier that groups items of the same kind. Batches of the same item bought at different prices are separate items under one FID (see Adding stock and new prices), and items under one FID can also differ slightly, for example in name, photo or colour.
Give every genuinely different item its own FID. Use one FID for the same thing you buy again and again, like your usual dishwasher soap, even if the pack size or price changes. Don’t group different items under one FID, for example oil filters from different manufacturers, or your usage and shopping list numbers stop making sense.
Adding barcodes
Section titled “Adding barcodes”You can add barcodes when you create an item, or later by editing it. In the item form, click Add barcode and choose Scan barcode to scan it, or Enter barcode manually if the label won’t scan. An item without a barcode also shows an Add barcode button on its page, which opens the same form.
When you enter a barcode manually, the Format starts on the one you picked last time on that device, so you don’t have to choose it again for every item.
Finding an item by scanning
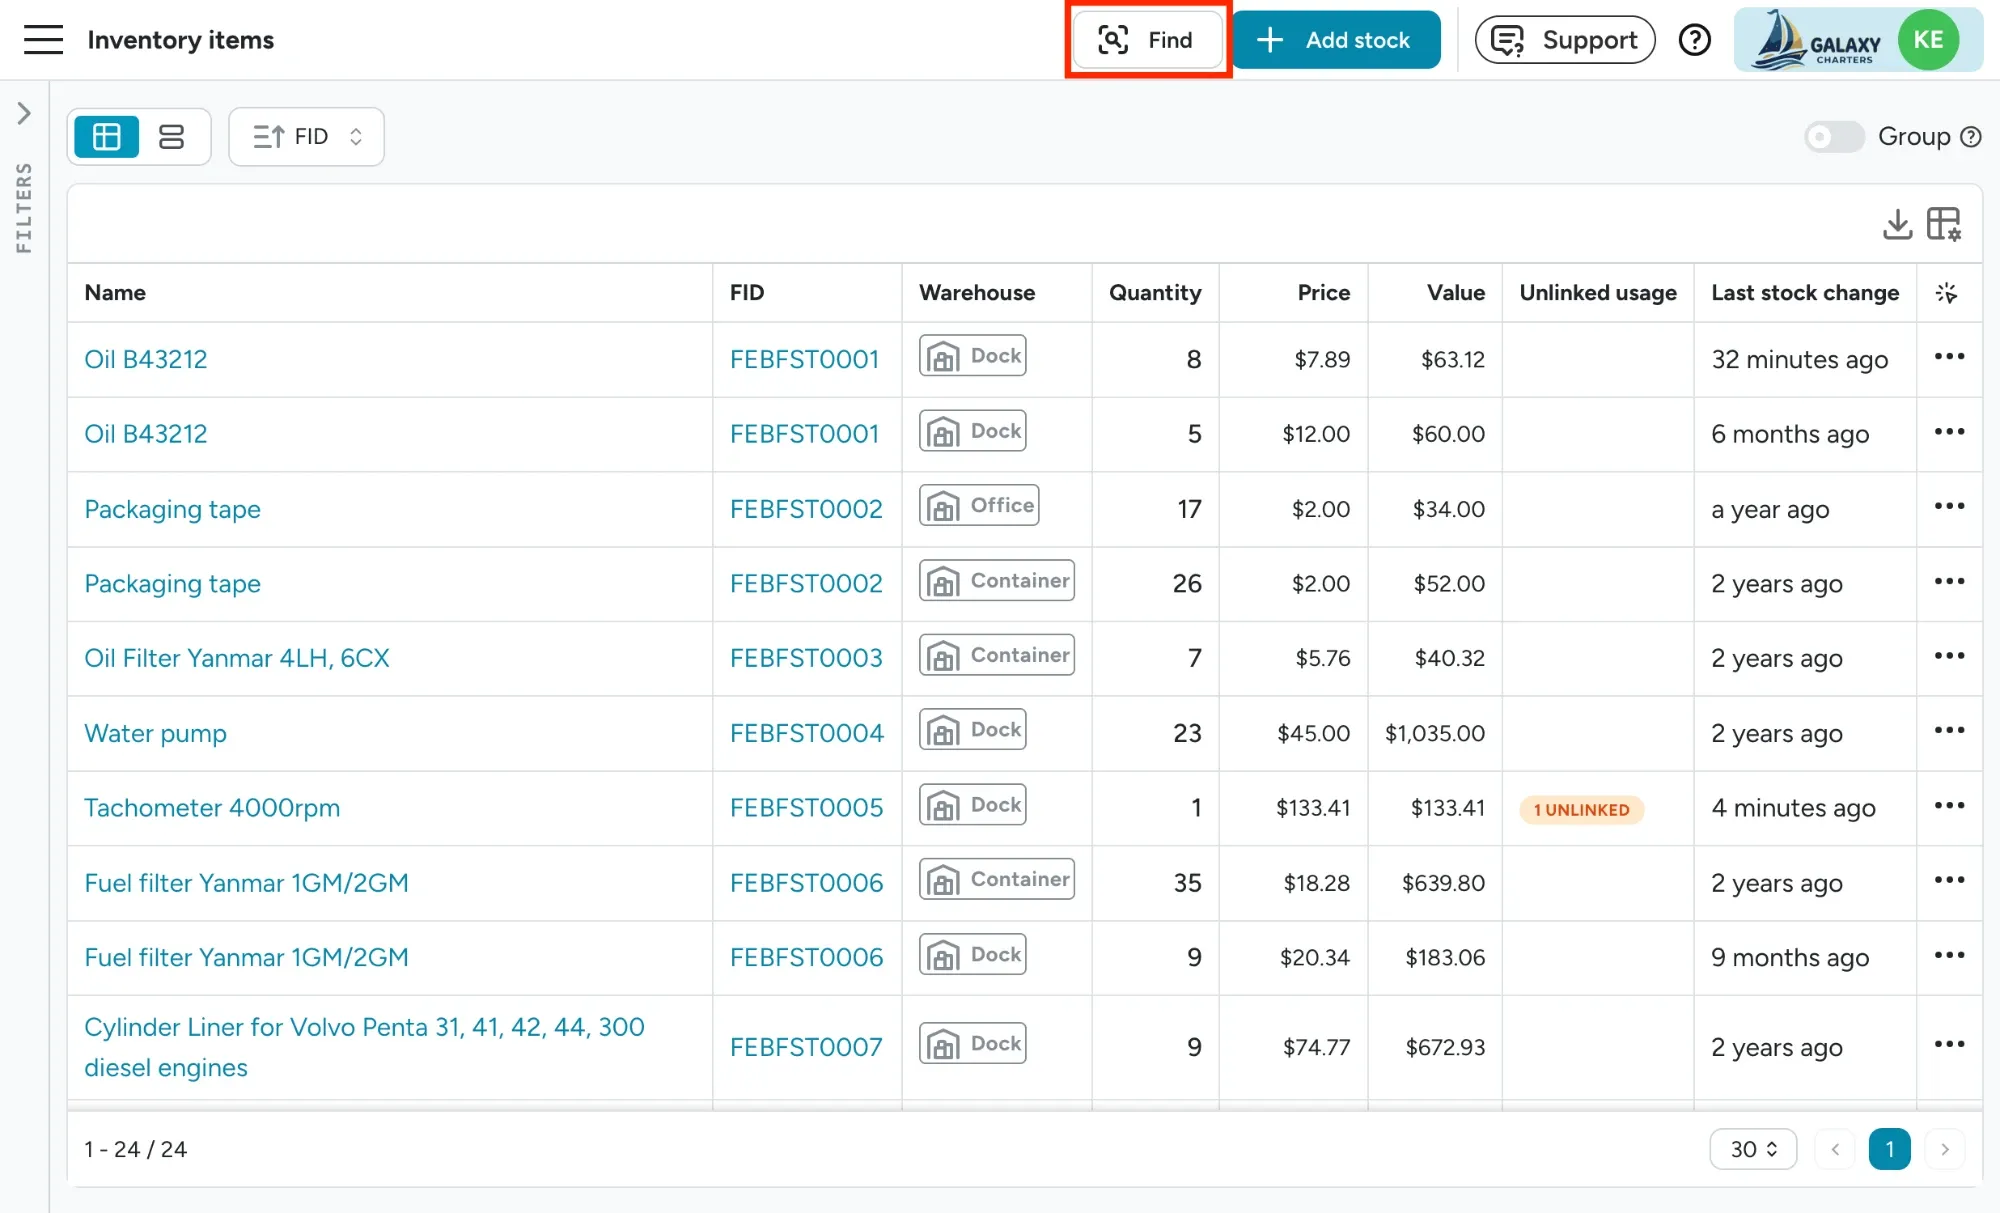
Section titled “Finding an item by scanning”To jump straight to an item, click Find at the top right of the Inventory > Items page and scan its barcode with your scanner. Floatist opens the item. If several items share the barcode, you pick which one. If no item has it, you can create one with the barcode already filled in.
Filtering items
Section titled “Filtering items”On the Inventory > Items page you can filter on Has a price and Has a barcode to find items that still need one. The Unlinked usage column shows consumed units of each item that are not on a task yet. To see all batches of an item together, turn on Group.
Stock reasons
Section titled “Stock reasons”Every change to an item’s stock either adds units or takes them out, and each change carries a Reason so you can see later why the number moved.
| Reason | Use it when |
|---|---|
| Restocked | A delivery comes in and you put new units on the shelf |
| Consumed | Someone takes units out to use them on a boat |
| Returned | Units come back to the shelf, for example stock taken out but not used |
| Sold | Units leave the warehouse because you sold them |
| Damaged | Units are no longer usable |
| Lost | Units are missing and you don’t know where they went |
| Stock take | You correct the number after counting a whole warehouse |
To change an item’s stock by hand, open the item’s menu, click Update quantity, enter the change and pick the Reason. Every change is listed on the Inventory > Transactions page.
Adding stock and new prices
Section titled “Adding stock and new prices”When a delivery comes in, open the item and click Add stock. Enter the number of units and the Price paid per unit, which starts on the item’s current price.
If you paid a different price this time, Floatist adds the units as a separate batch under the same FID and the button changes to Add as new batch. Every unit keeps the price you paid for it, so your stock value stays right and tasks that use those units show their real cost.
If you’d rather start a separate item (for example a different item that happens to share the barcode), click Clone instead. This opens a copy of the item where you can change the name, FID, price, quantity and barcodes before saving. For a normal delivery, use Add stock rather than cloning, so you don’t end up with duplicate items.
If you scan a barcode that belongs to more than one item, Floatist lists them and you pick which one to add stock to.
Correcting a price
Section titled “Correcting a price”Editing an item’s Price is only for fixing a wrong price. The new price applies to the item’s whole history: past use and every unit already on a task are valued at it. Before saving, Floatist tells you how many tasks will have their stock cost updated, so you can cancel and use Add stock instead if you actually bought at a new price.
Consuming stock
Section titled “Consuming stock”Until consumed stock is on a task, it shows in Usage as awaiting a task. When you already know the task, add stock to it straight from the warehouse instead, and it’s linked in one step (see Using items on a task).
You can consume items in two different ways:
- Scanning the item’s barcode
- Searching for the item and consuming it from the item page
1. Consuming from scanning barcode
Section titled “1. Consuming from scanning barcode”- Go to Inventory > Items and click Find at the top right.
- Scan the item’s barcode with your barcode scanner. If you don’t have a scanner, switch the scan window to the camera and point it at the barcode (see Barcode scanners).
- Floatist opens the item. If several items share the barcode, pick the right one first.
- Click Consume.
The Consume button at the top right of the Inventory > Usage page opens the same scan window.
2. Consuming from item page
Section titled “2. Consuming from item page”- To consume an item without scanning the barcode, go to Inventory > Items
- Open the filter, and search for the item you want to consume
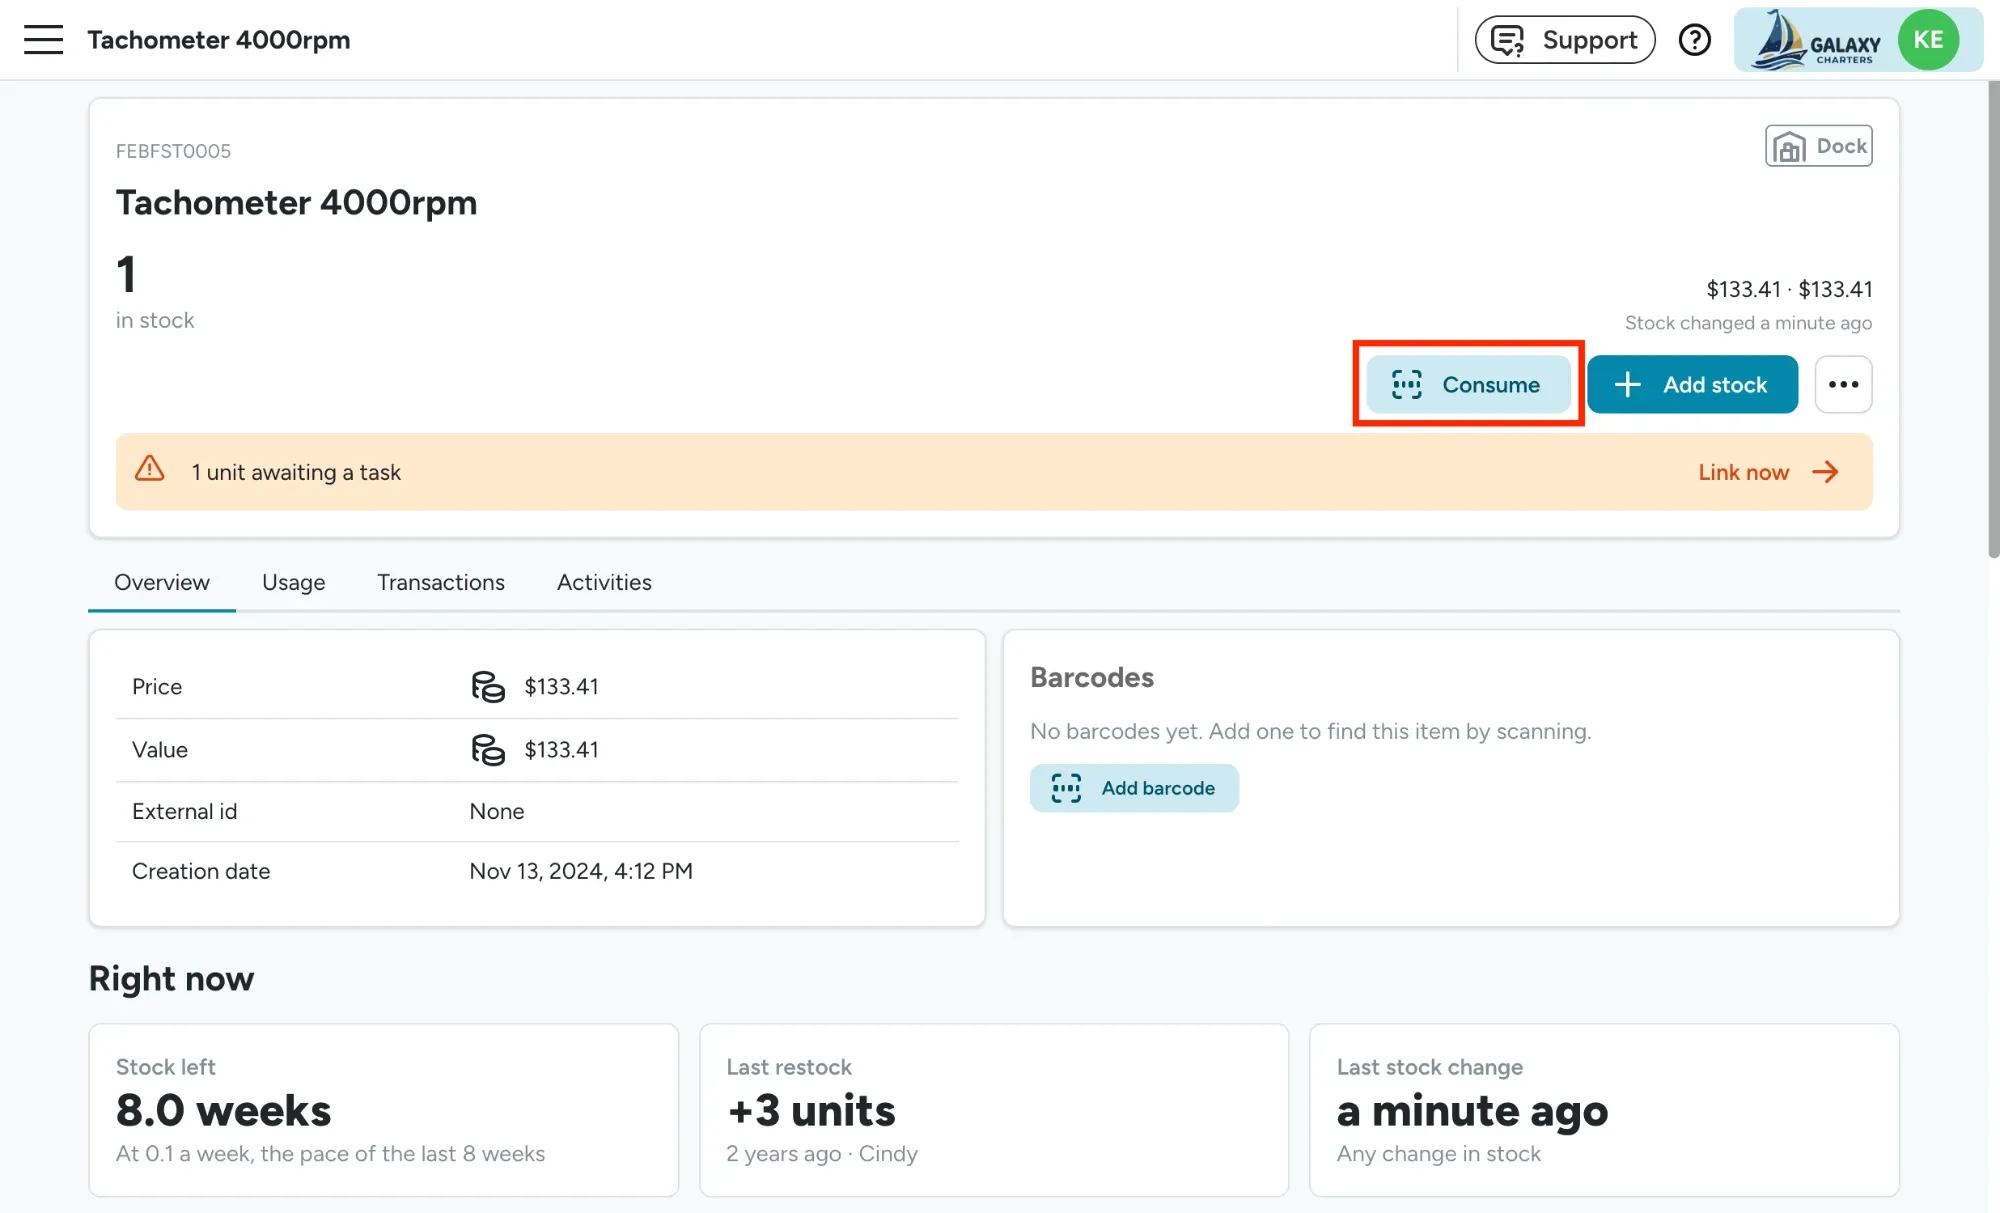
- Click on the item, and select Consume
Item page
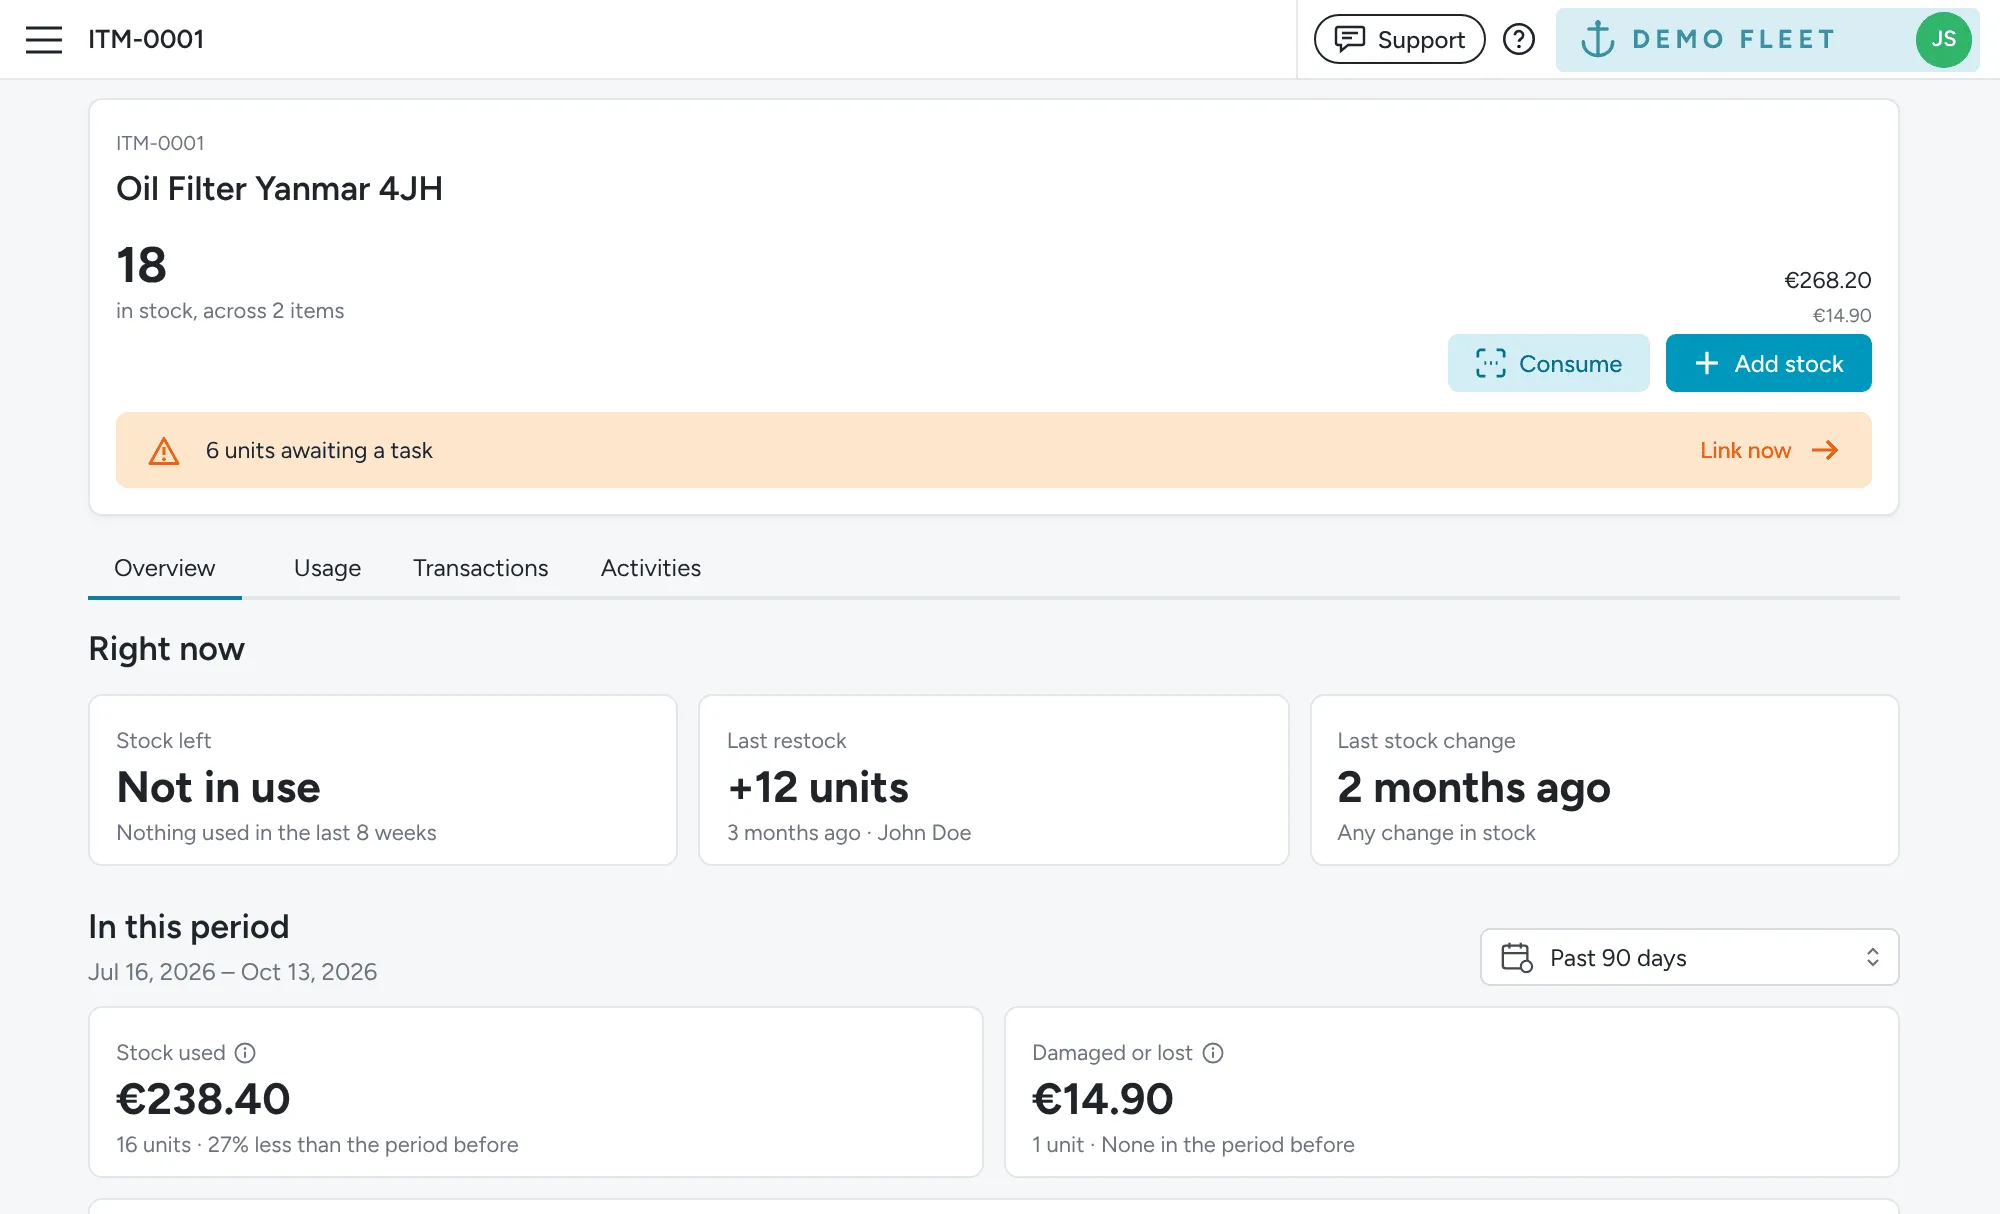
Section titled “Item page”Click an item (or a group of items with the same FID) to open its page. The header shows the stock on hand, with Consume and Add stock buttons, and an orange banner with Link now if any of its units are awaiting a task. The Overview tab starts with the item’s details, such as price, value and external ID, and its barcodes (with Add barcode if it has none). Below that, it splits like the dashboard:
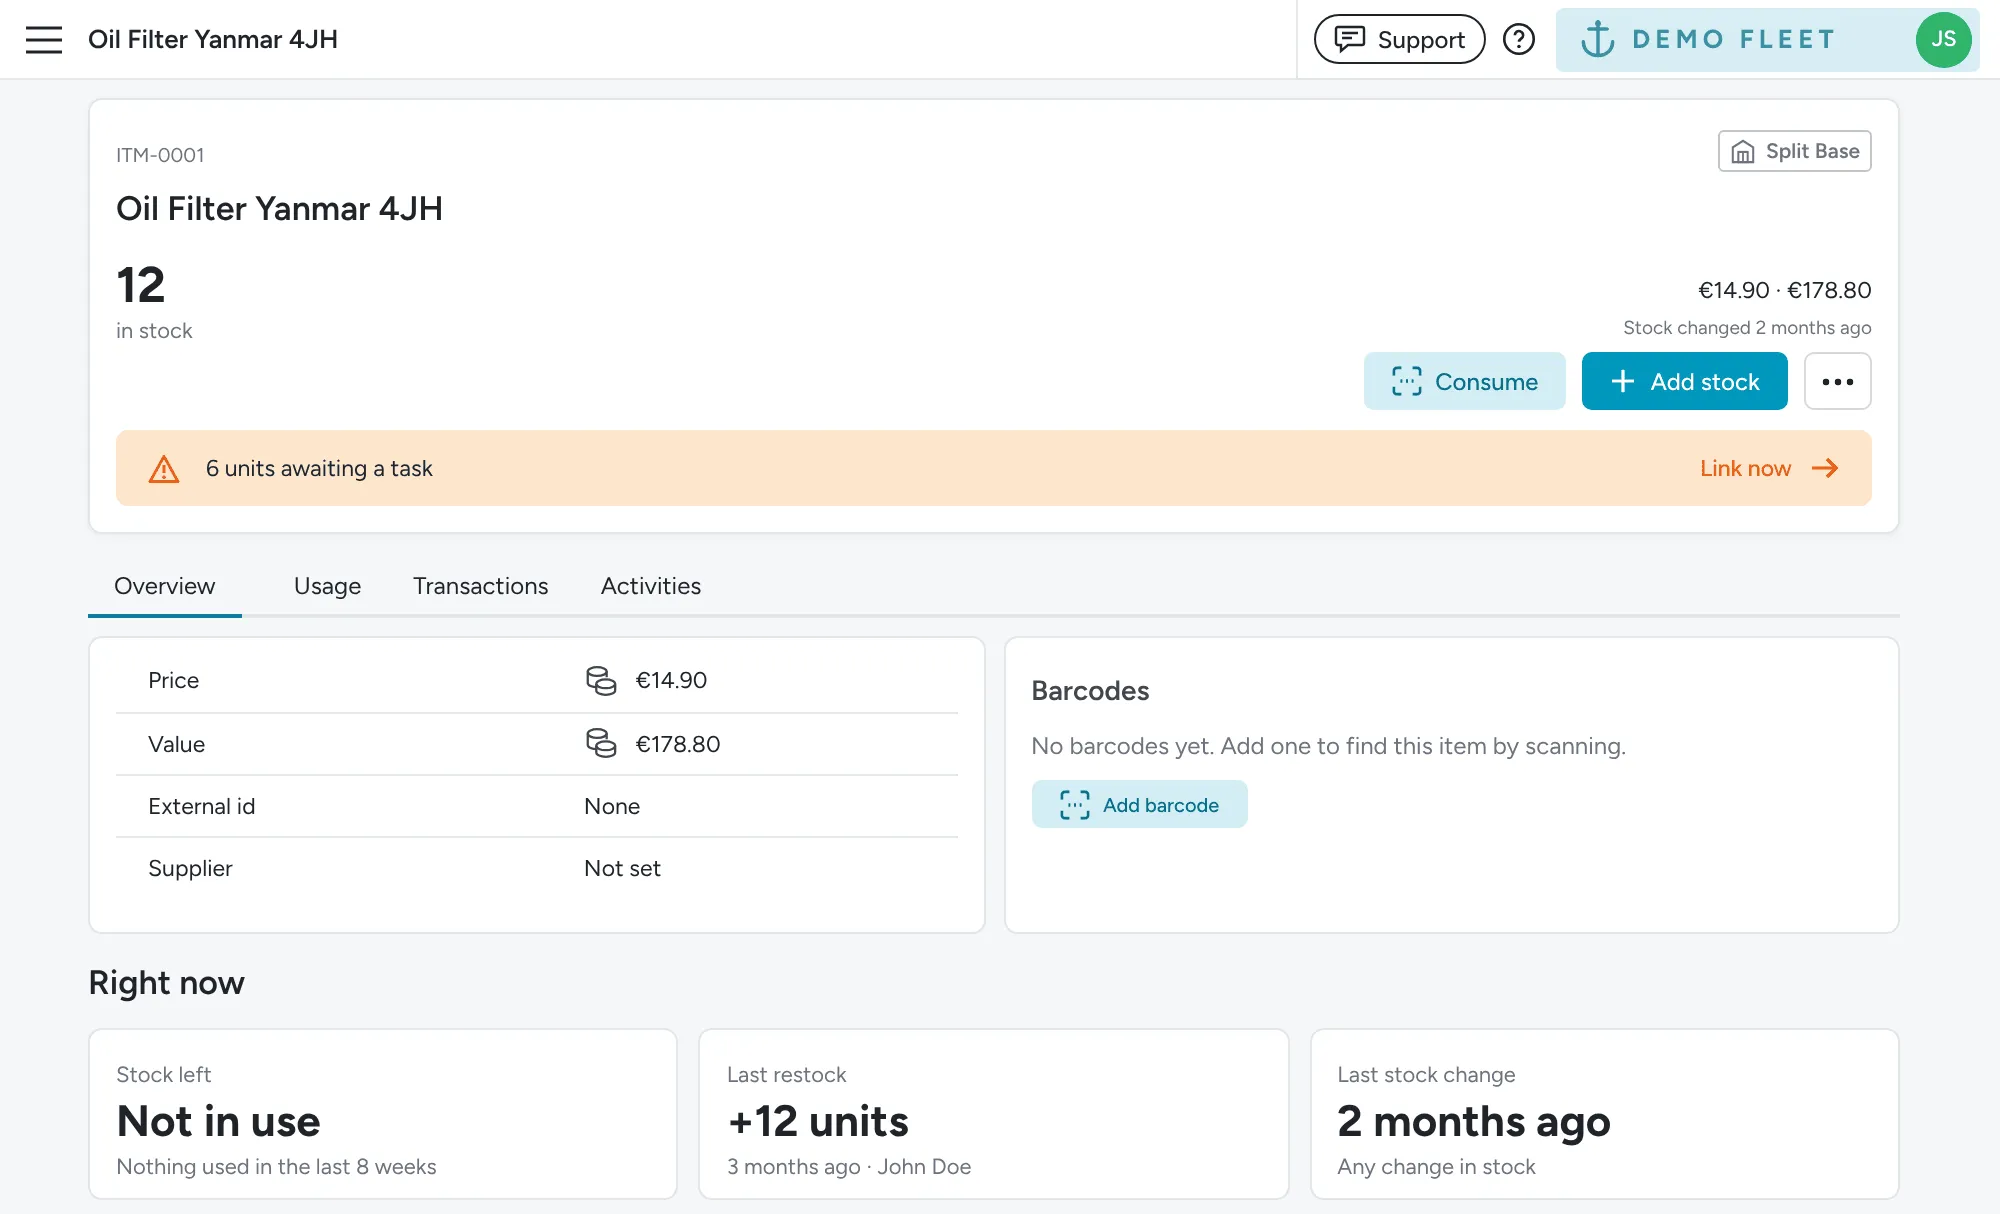
- Right now: Stock left in weeks at the pace of the last 8 weeks, Last restock and Last stock change. If the item was bought at two or more prices, a Price paid chart shows the unit price of each batch, by when it came in.
- In this period: Units and value used compared with the period before, a Stock over time chart of units on the shelf (a dashed line marks where stock starts running low), units used per day, week or month, and Used per boat. The period defaults to the last 90 days.
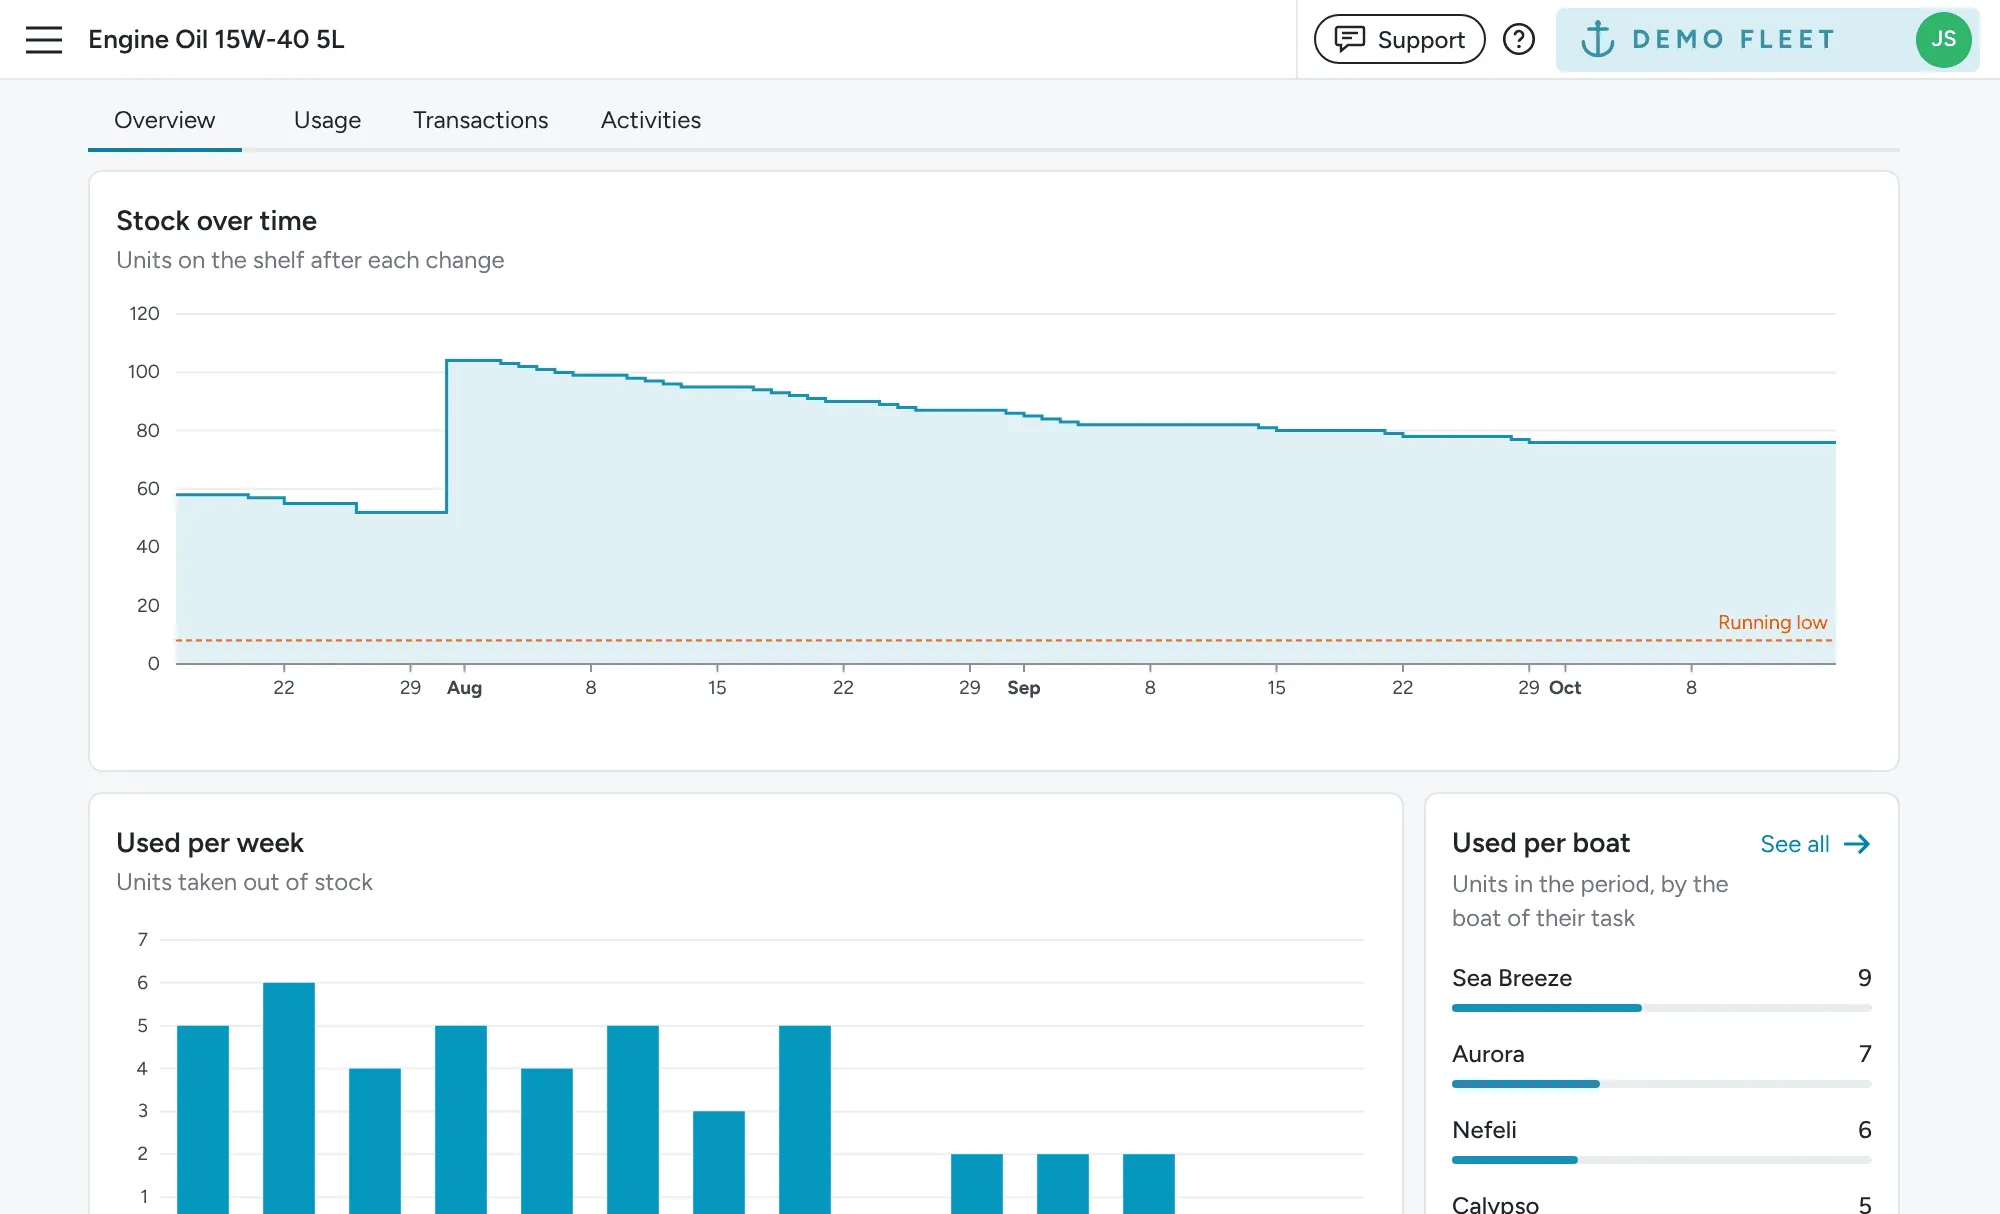
The Usage, Transactions and Activities tabs show the item’s history. Usage opens on the pending lines first, since those are the ones to act on.
Click the FID to open the page for the whole group. It shows the same charts and tabs, added up across every item under that FID.