
Adding a new yacht
When you add a new yacht to your fleet, the steps depend on whether you use a booking integration:
- Using MMK or NauSYS? The yacht should be pulled in through the integration rather than created manually. See With an integration.
- Not using an integration? Add the yacht from scratch using the steps in Without an integration.
With an integration
Section titled “With an integration”If you sync your bookings via MMK or NauSYS, the yacht comes into Floatist through the integration rather than being created from scratch.
- Open the integration page: Settings > Integrations > MMK for MMK, or Settings > Integrations > NauSYS for NauSYS.
- Scroll to the Boats section. Yachts pulled from the integration that aren’t yet in Floatist show a Create button next to them.
- Click Create for each yacht you want to add to Floatist. Yachts you don’t click Create for are simply never added — there’s nothing to archive afterward.
- Once the yacht is created, assign a configuration so checklists and the manual show up on its bookings. Optionally, select a boat plan if you want checklist items to show locations on a deck plan.
For details on each integration, see MMK integration or NauSYS integration.
Without an integration
Section titled “Without an integration”If you’re not using an integration, set up the yacht from scratch.
1. Create the boat
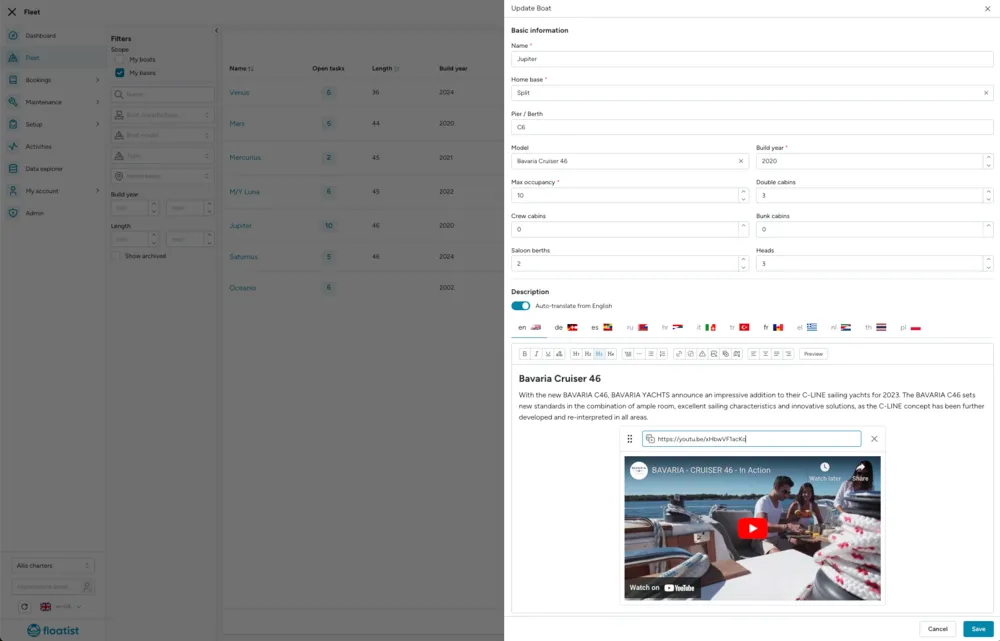
Section titled “1. Create the boat”- Go to Settings > Fleet and click Create boat.
- Fill in the details in the panel — cabin count, max capacity, and other specs. You’ll also set Beam and Draft alongside Length. The Length unit (Meters or Feet, default Meters) is a fleet-wide setting — go to Settings > Global settings to change it for all your yachts.
- Add a description. The manufacturer’s website is usually a good source.
- Add a YouTube video if one is available (for example, from the manufacturer’s channel).
- Click Save.
2. Add photos
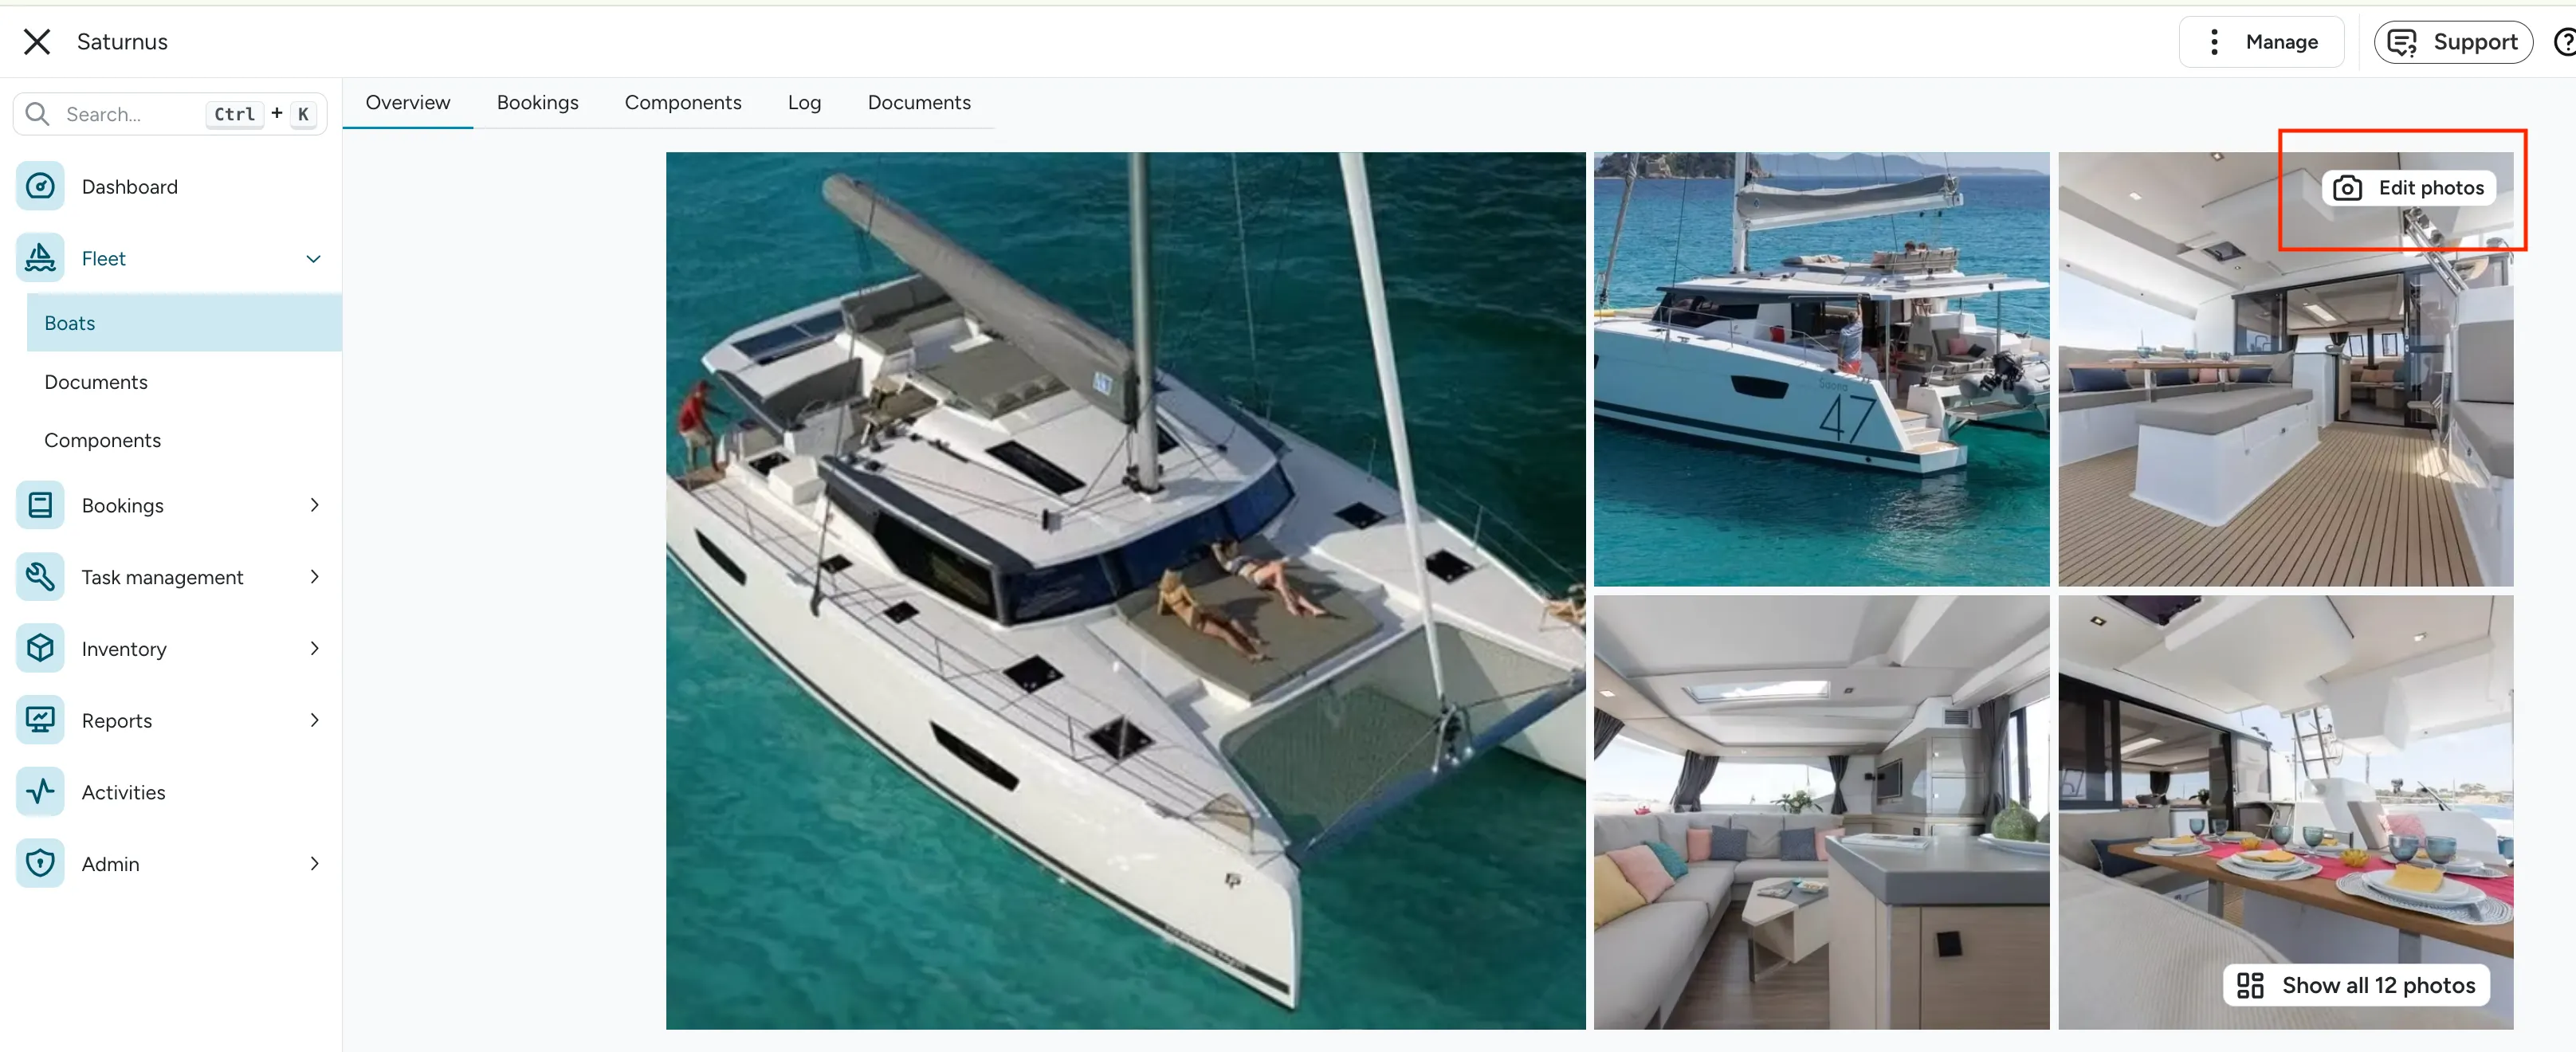
Section titled “2. Add photos”After saving, open the newly created boat and click Edit photos on the gallery at the top of the page. Upload photos if there is no booking system integration, or add additional ones if preferred.
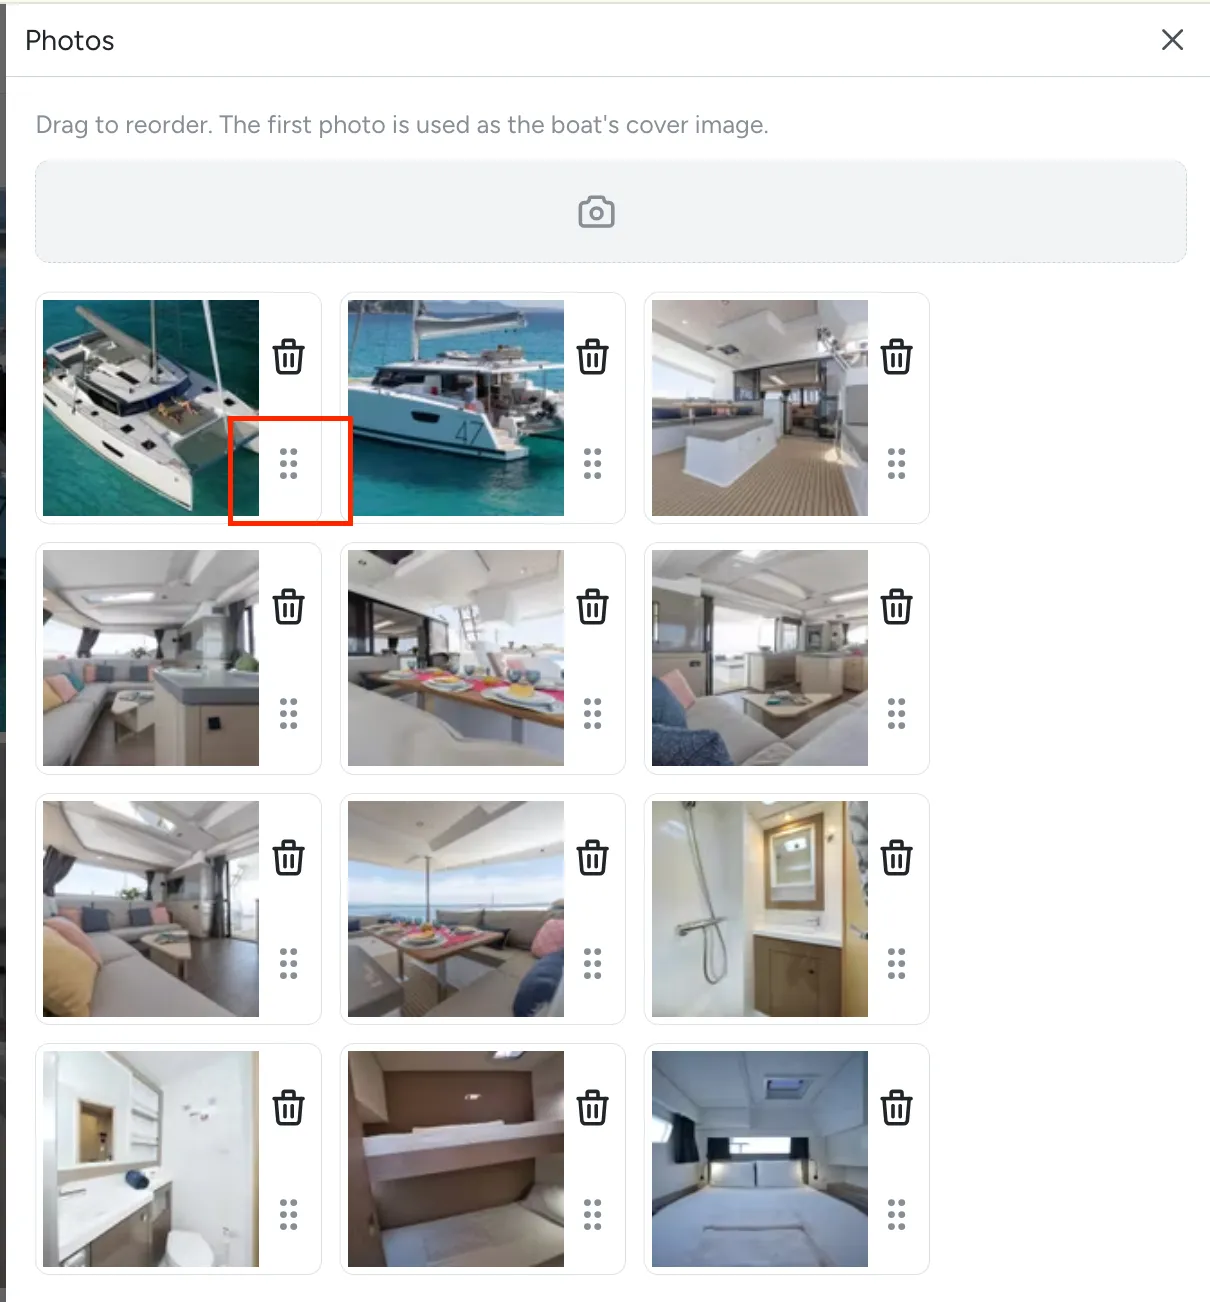
Drag photos to reorder them — the first one becomes the boat’s cover image.
3. Add components
Section titled “3. Add components”Go to Fleet > Components and add the engine and any other relevant components for the yacht.
4. Assign a configuration
Section titled “4. Assign a configuration”Go to Settings > Bookings > Configurations and assign a configuration to the new yacht.
See Managing configurations for how to set up or import the right configuration for a boat model.
5. Select a boat plan (optional)
Section titled “5. Select a boat plan (optional)”If you want checklist items to show their location on a deck plan, assign a boat plan to the yacht and map the items onto it. This step comes last because mapping items requires the configuration from step 4 to already be in place.
See Boat plans for the full step-by-step, including how to assign a plan and how to map individual checklist items onto it.